Iceland’s Fimmvörðuháls hike is a two day adventure in the southern part of the island, either beginning in Skógar and ending in Þórsmörk, or vice versa.
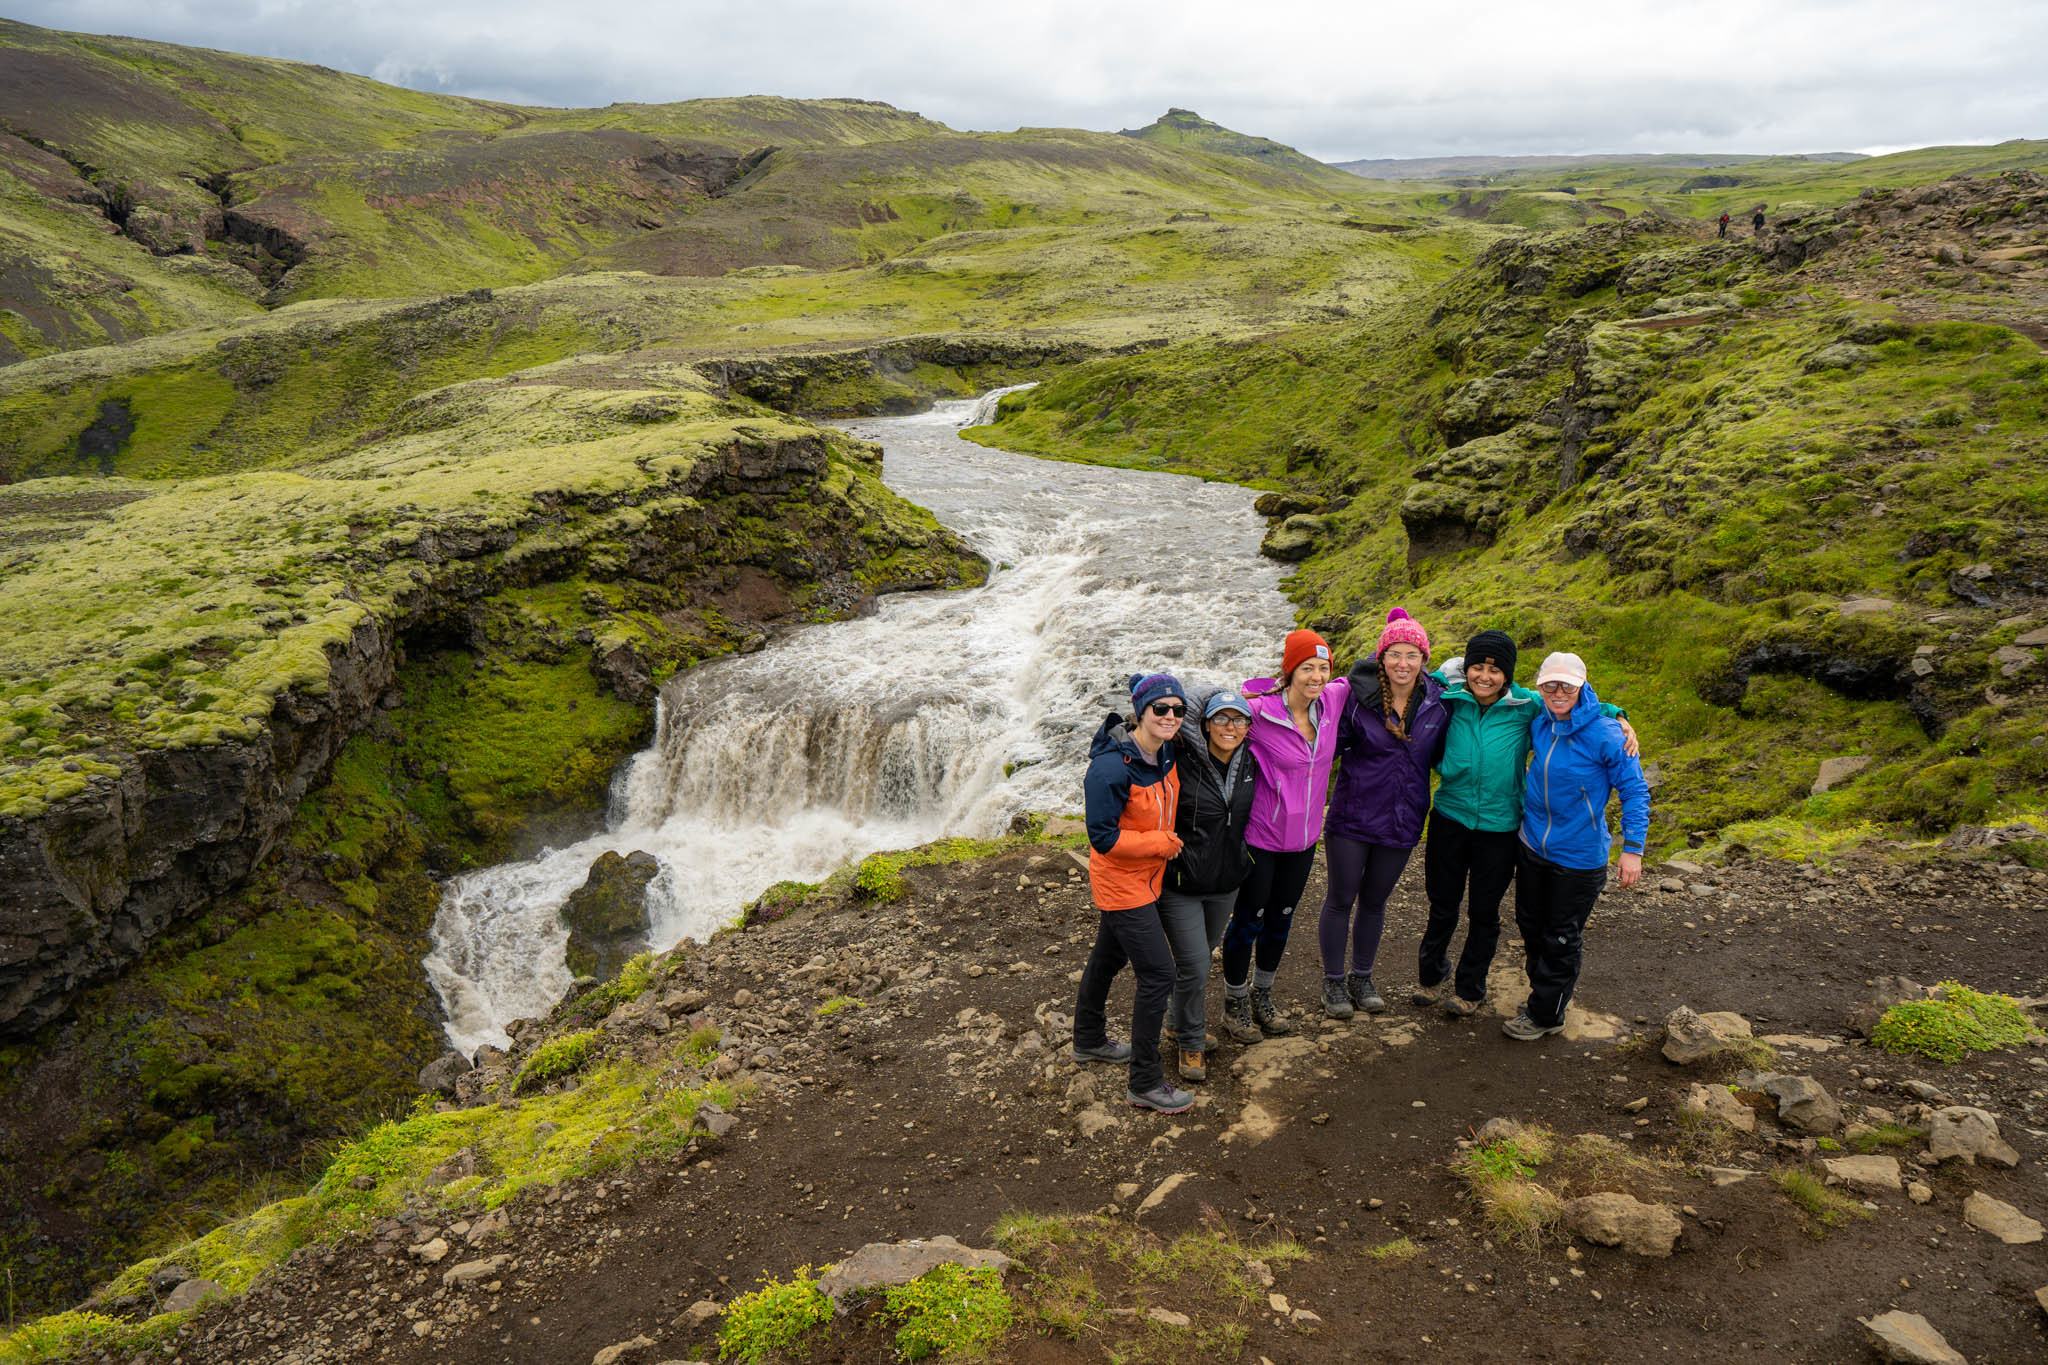
For the more adventurous, like my BMTM Adventures group and me, it’s the perfect addendum to the four-day Laugavegur trail beginning in the highlands.
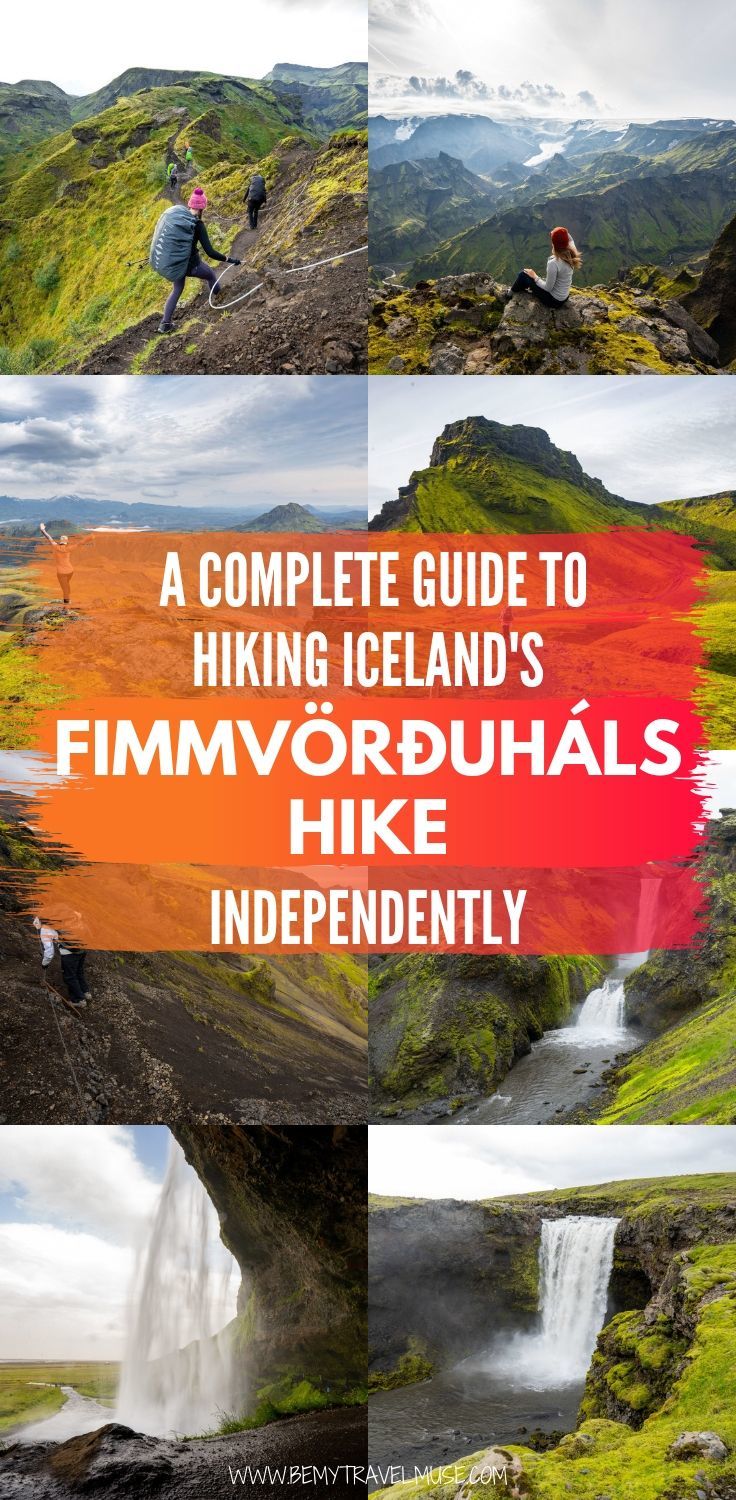
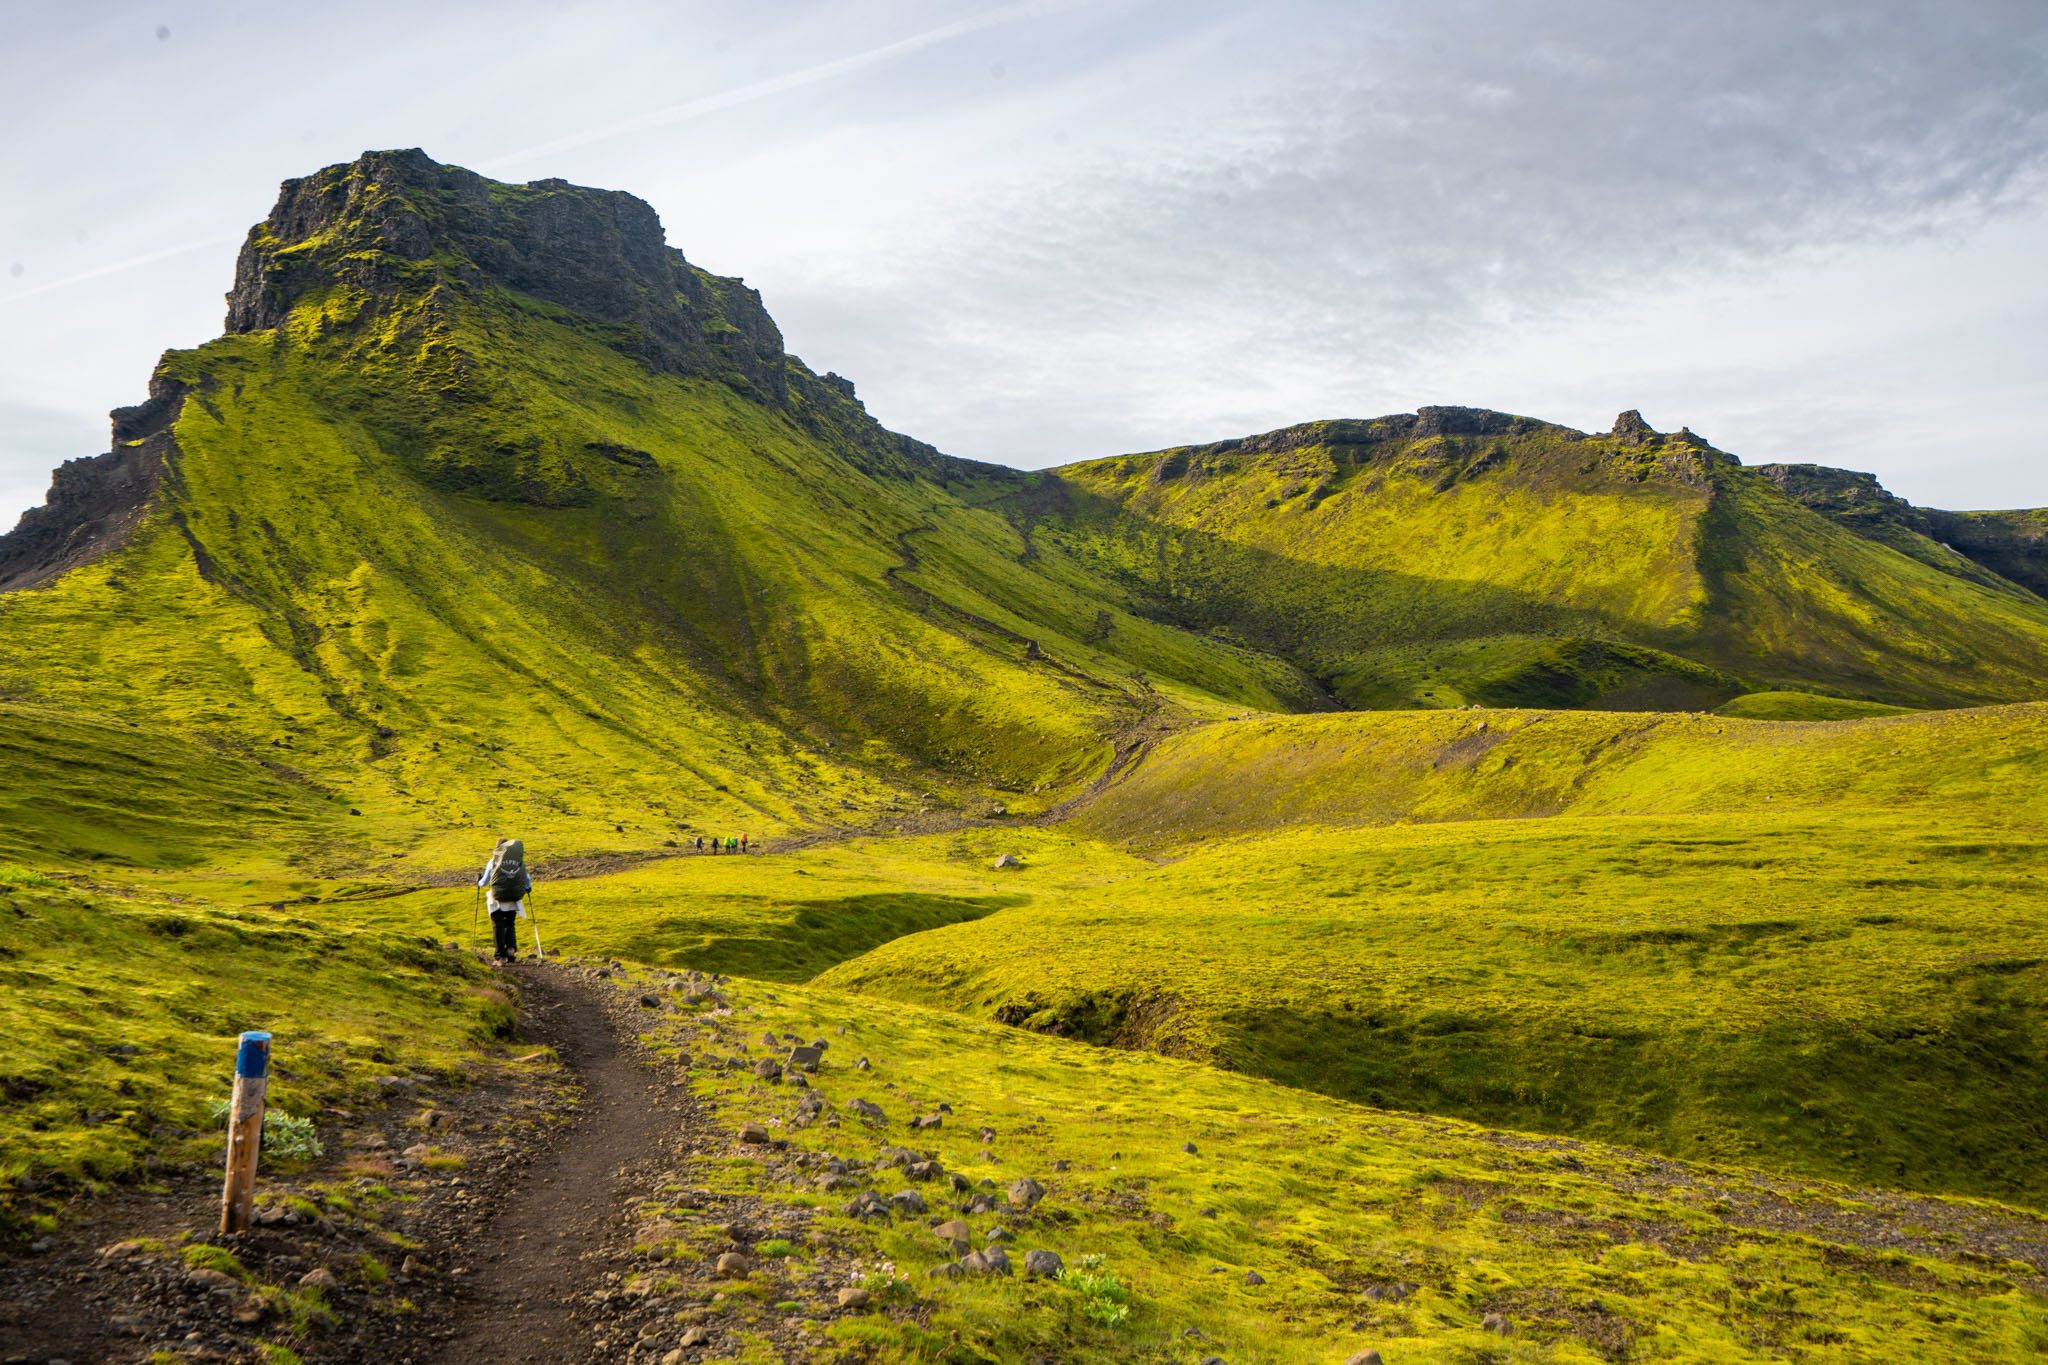
Whether you’re doing this as an add-on, or only have time for the Fimmvörðuháls trail, you’re in for a beautiful adventure with shades of green that I previously thought couldn’t exist outside of cartoons, plentiful waterfalls that look like they’re from the Shire, and sweeping glacier views, provided that you have clear weather. This post will help you do the hike independently, since most of what I found online were tour operators selling tours without any meaty info. So without further ado, here’s everything you need to know about the Fimmvörðuháls hike:
Where to Begin on the Fimmvörðuháls Trail:
This point-to-point hike can be done in either direction. Obviously, if you’re adding this on from the Laugavegur hike, you’ll be beginning in Þórsmörk (pronounced ‘Thorsmork’) and finishing in Skógar.
The benefit of beginning in Þórsmörk is that you will do most of the steep part of the trail uphill. I much prefer this to a steep downhill, though I may be in the minority there.
This also means that you get a chance to see where the famous waterfall originates, at the glaciers, and follow it all the way down to Skógafoss, which felt like the perfect culmination of six days on the trail for us. I also appreciate that the downhill is so gradual. It is about 1000 meters, after all. The drive back from Skógar to Reykjavik, stopping at some of the beautiful sites along the way, was a perfect finale as well.
Conversely, if you choose to do it in the other direction, your uphill will be more gradual as you make your way to the pass, watching as the landscape goes from green to a chocolate covered volcanic terrain. It’s pretty dramatic and beautiful!
You can also hike all 26 km in one day, which some people do. Since you have so much daylight, it’s not out of the realm of possibilities. Be sure to check the bus schedules (there are about 5 companies) to make sure that you can make it, and be prepared to have to turn back if the weather gets bad. It can happen.
Some of the trail is steep and narrow, making parts of it quite perilous if the weather isn’t good (more on that later). Make sure you’re checking in with the wardens to get a read on the weather. Online resources are rarely accurate.
I liked breaking it up into two days, being able to take our time a bit more, stopping for photos, which happened constantly.
What to Bring on the Fimmvörðuháls Trail
First, decide how many days you want to give this trail. Will you stay in the hut in Þórsmörk the night before you begin, or the night that you finish if you go the other way? Just in case the weather is bad, it might be nice to have options and extra food. Here’s what I brought:
Food: I brought along just-add-water camp meals. After many backpacking trails, and being a human guinea pig, I figured out the best tasting ones. I have a ranking here to help you. It’s best to buy these at home and bring them into Iceland with you. Even though the hut at the pass did have just-add-water meals for sale (for like $30), I wouldn’t count on them having provisions. It’s also wise to pick up snack, breakfast and lunch items at the grocery stores in Reykjavik before you head out. You’ll find the best selections there.
Hiking: You need to have waterproof clothing. I’m not a fan of rain pants, so I wear Lululemon leggings that dry super fast. However I do advocate a rain jacket and if you’ll use a rain cover, make sure it’s one that straps around the middle and around the waist so that it stays on in the potentially heavy wind. I love this one. Waterproof gloves are also a must.
Even if you’re not a fan of hiking poles, it’s important to have them on this trail. Parts of it are very steep and slippery, and you may encounter heavy winds like we did.
Connectivity: Although the huts don’t have WiFi, I was shocked to find that I had cell service for most of the hike! I was able to surf on 3G, for better or worse, for most of the hike with a Siminn SIM card that I bought at the convenience store at the arrivals hall of the airport. Just keep in mind there is nowhere to charge electronics on the trail, so bring an external battery pack if you plan to use signal or charge camera batteries.
Sleeping: First, decide if you’re camping or staying in the hut.
It’s important to note that the hut where you will overnight, should you choose to do this in two days, does not have running water. Collect as much water as you can from the snowmelt if you start in Þórsmörk or if you start in Skógar. There’s a river on the right hand part of the trail when the water is easier to access. If you’re looking for it you won’t miss it. It’s about 30 minutes from the hut.
You also must book this ahead of time, which you can do here.
You will also need your own sleeping bag. The huts are pretty warm, so you don’t need something that will keep you warm below freezing.
Finally, bring an eye mask and earplugs. You could be sharing the room with snorers and since the sun never truly sets, it can get bright. Both are very helpful to shuteye and were worth their weight in gold to me.
If you’re backpacking it, be sure to check out my backpacking packing list which has all of the gear that I use. It’s also helpful if you’re staying in the huts, just eliminate the tent and sleeping mat.
What to Expect Each Day of the Fimmvörðuháls Trail
Since I did this hike beginning in Þórsmörk , that’s the direction I’ll describe the hike in, but you can easily read this and then reverse it:
Day One – Þórsmörk to the Baldvinsskáli Hut:
Though we hiked into Þórsmörk from the Laugavegur trail, it’s possible to take a bus in as well. The hut in Þórsmörk is nice to stay in, has a kitchen, and allowed us a night of rest before making our way up.
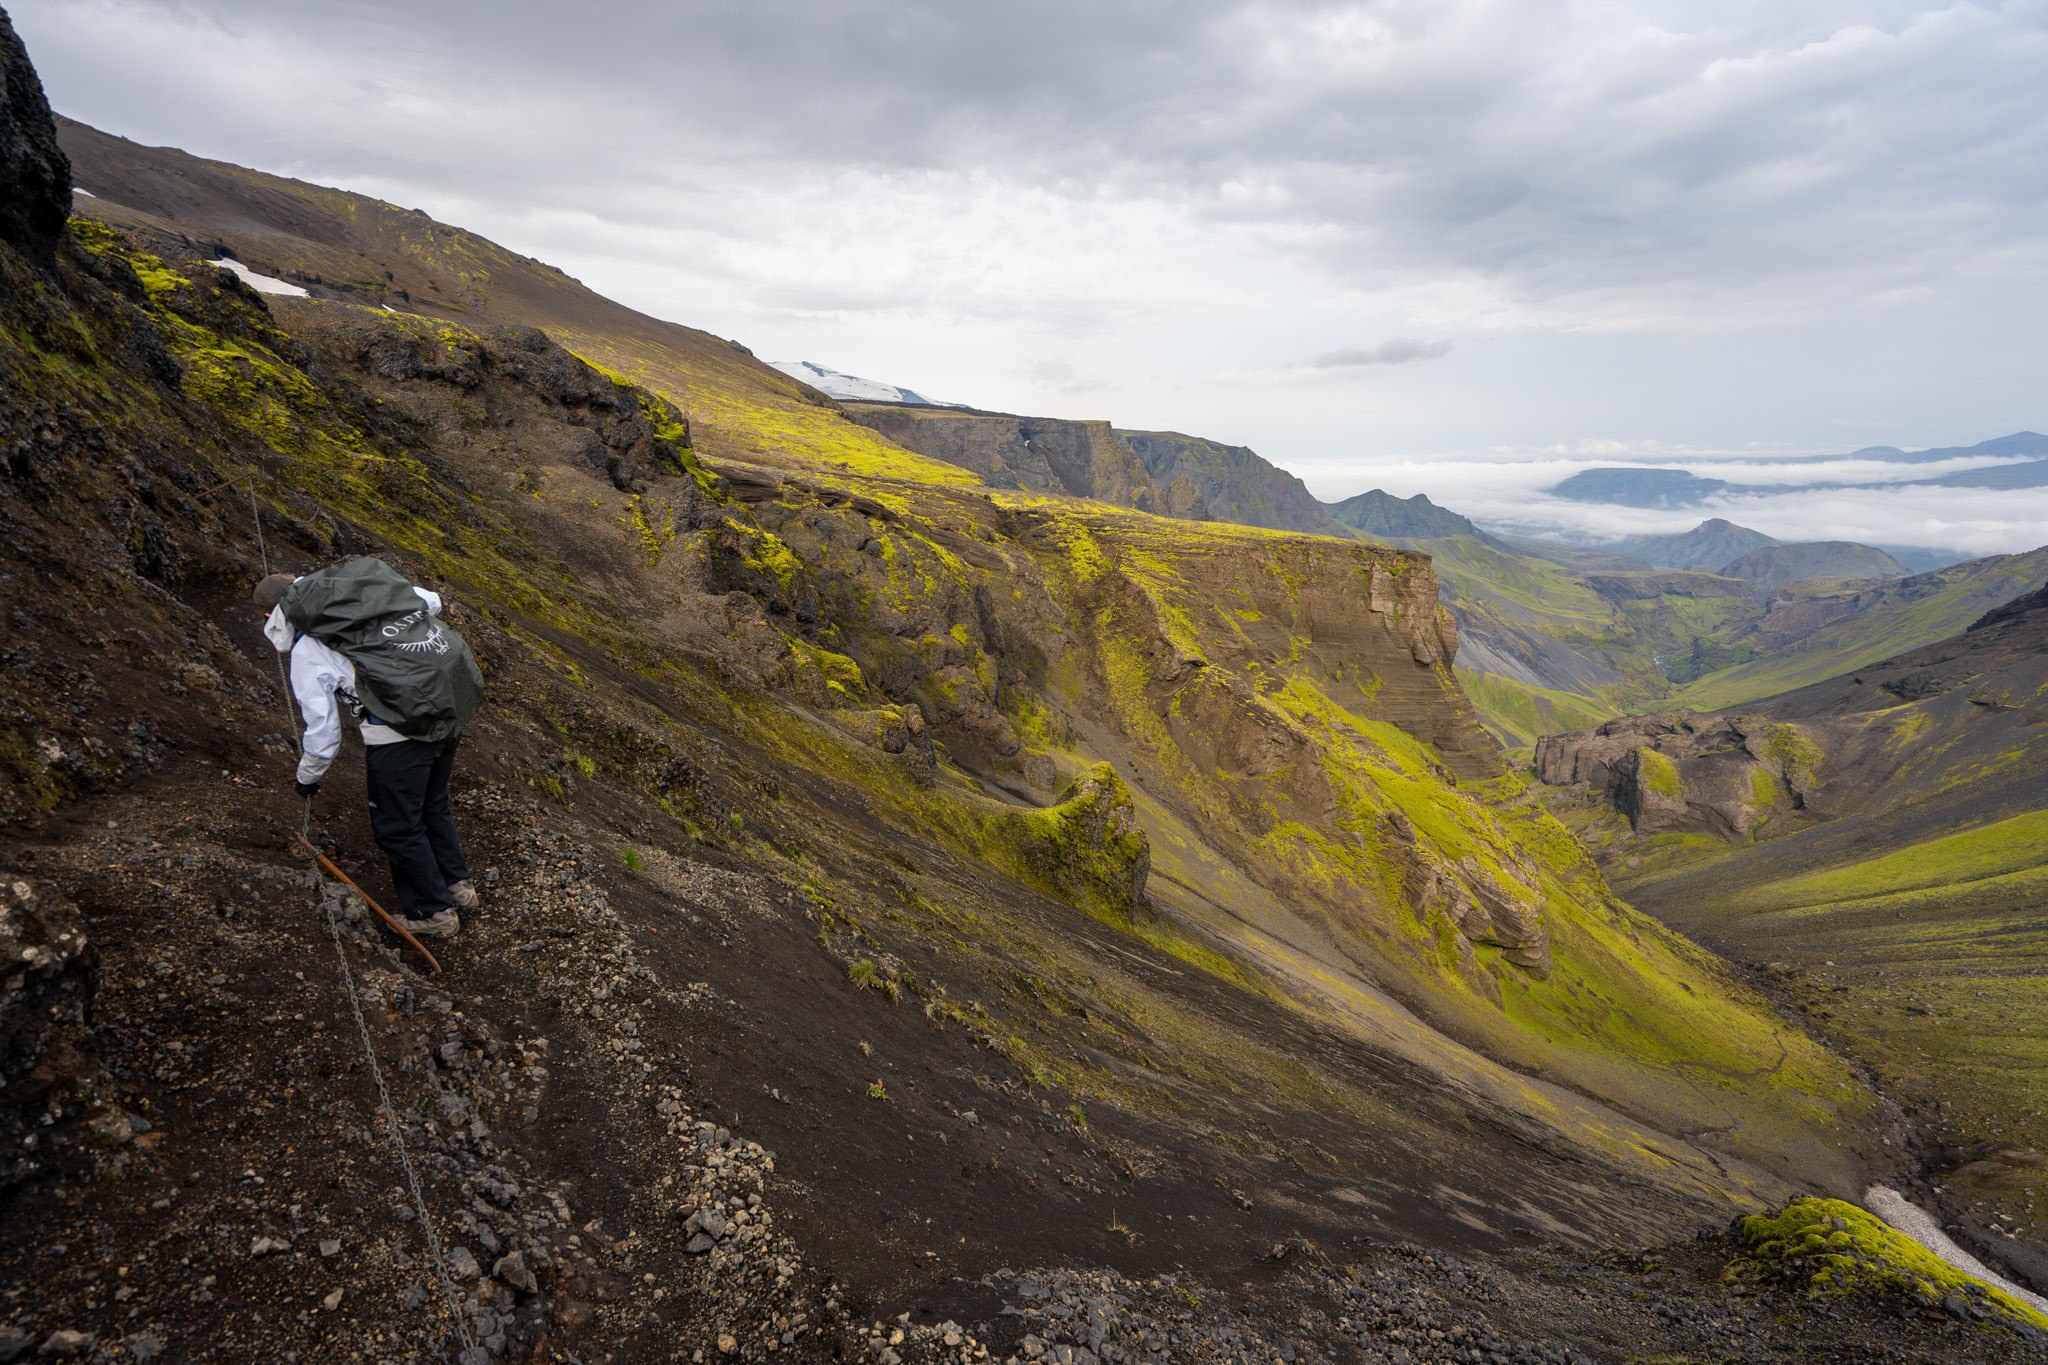
Since the wardens told us that heavy winds would be coming in the afternoon, we began our hike at 5 AM as the sun was cresting the horizon. After about a 600 m gain, we came to our first narrow part of the trail.
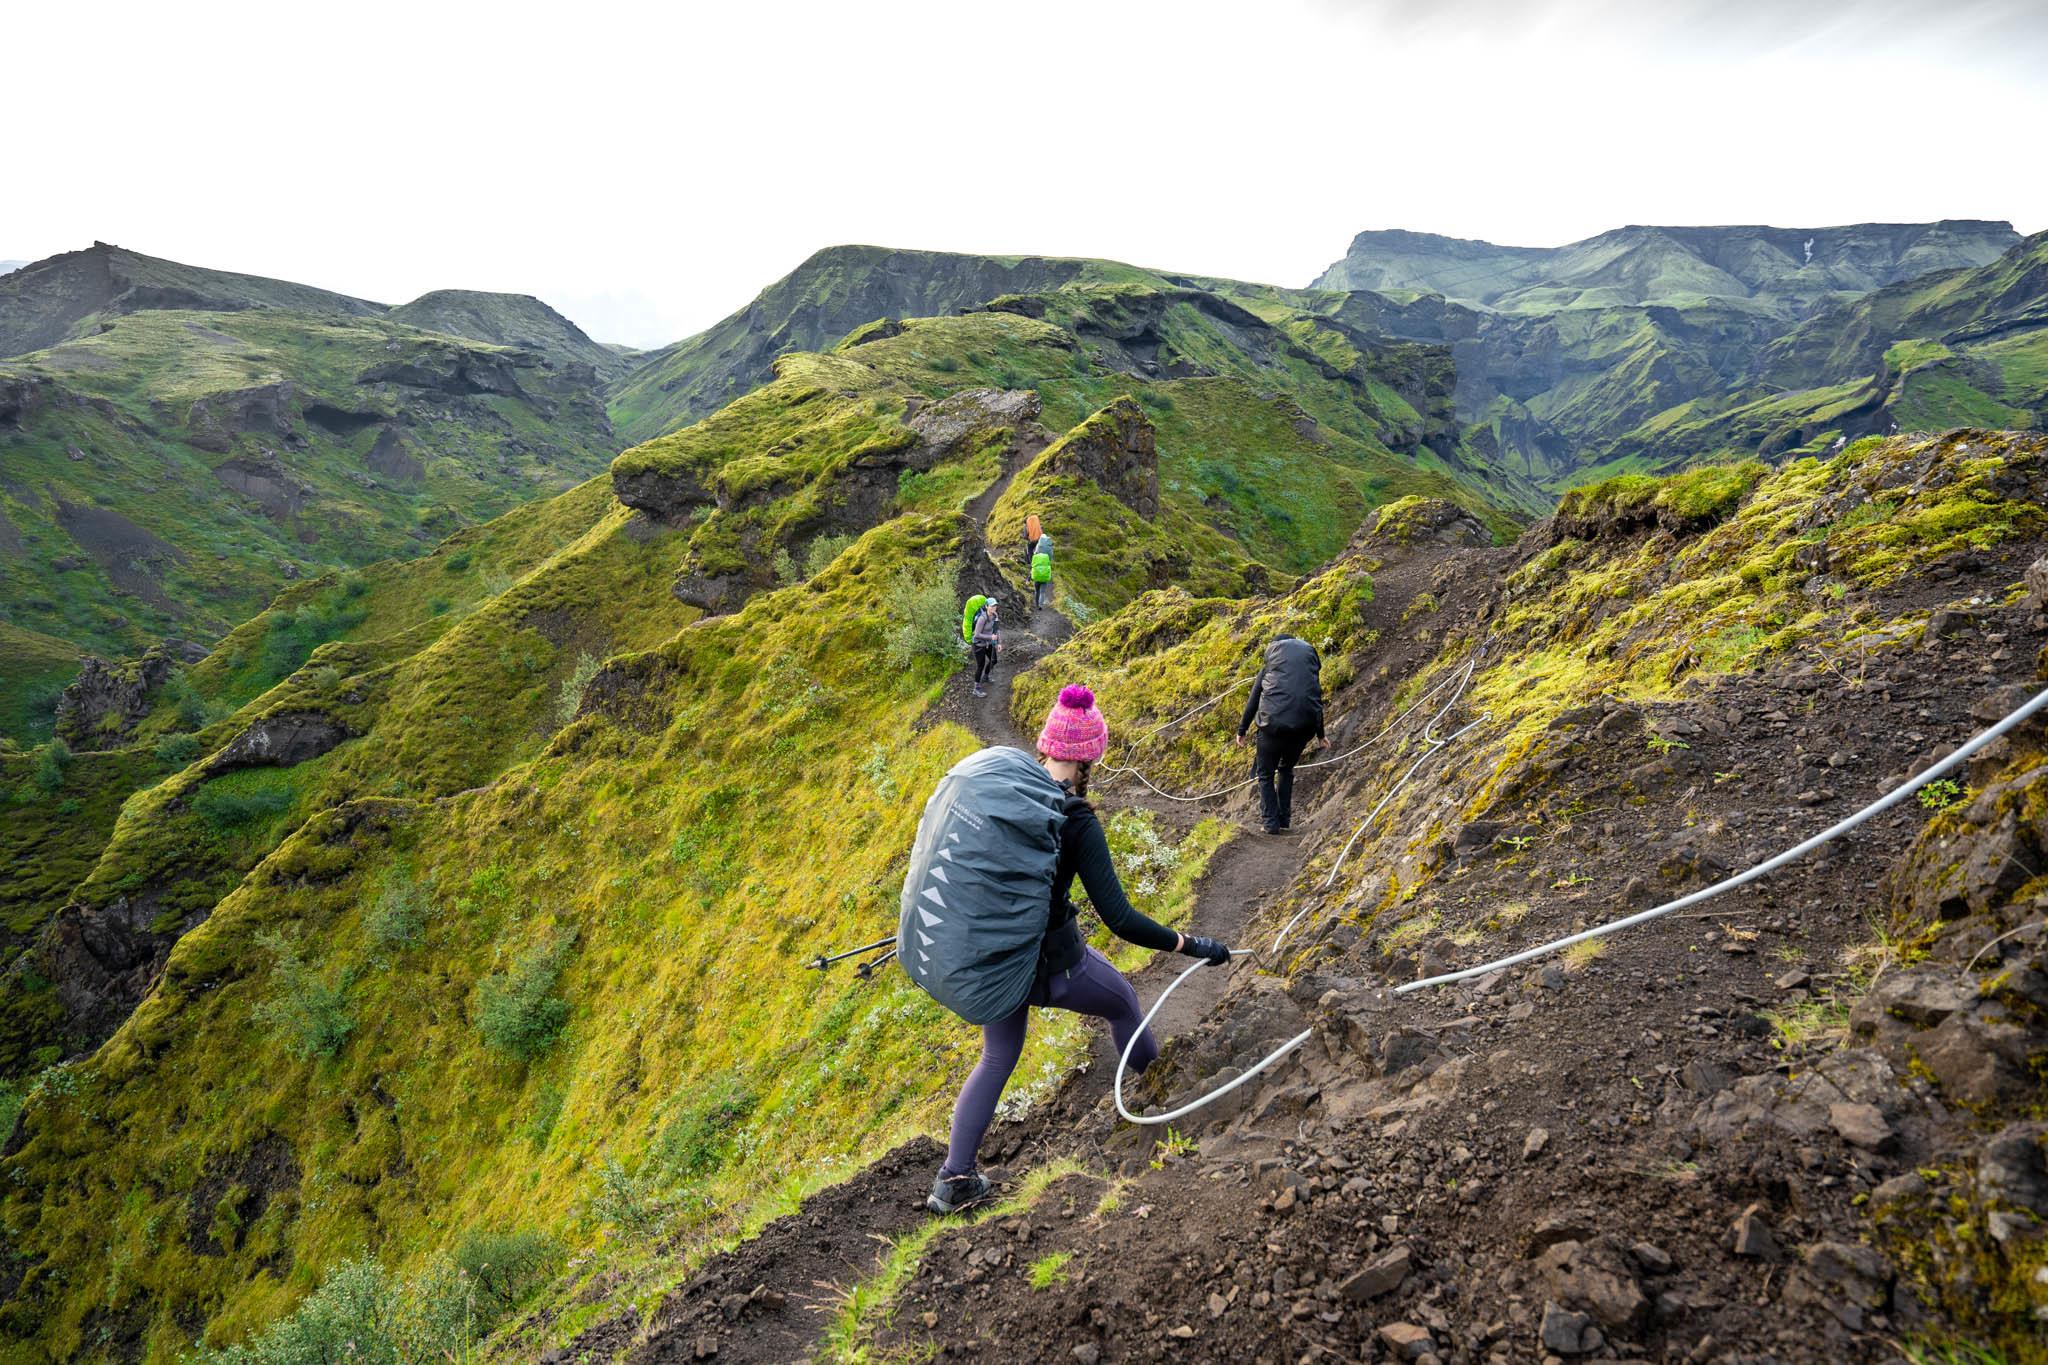
There are ropes to help stabilize you for part of it, and as long as it’s not incredibly foggy or very windy, this is doable, but will be pretty uncomfortable if you have a fear of heights.
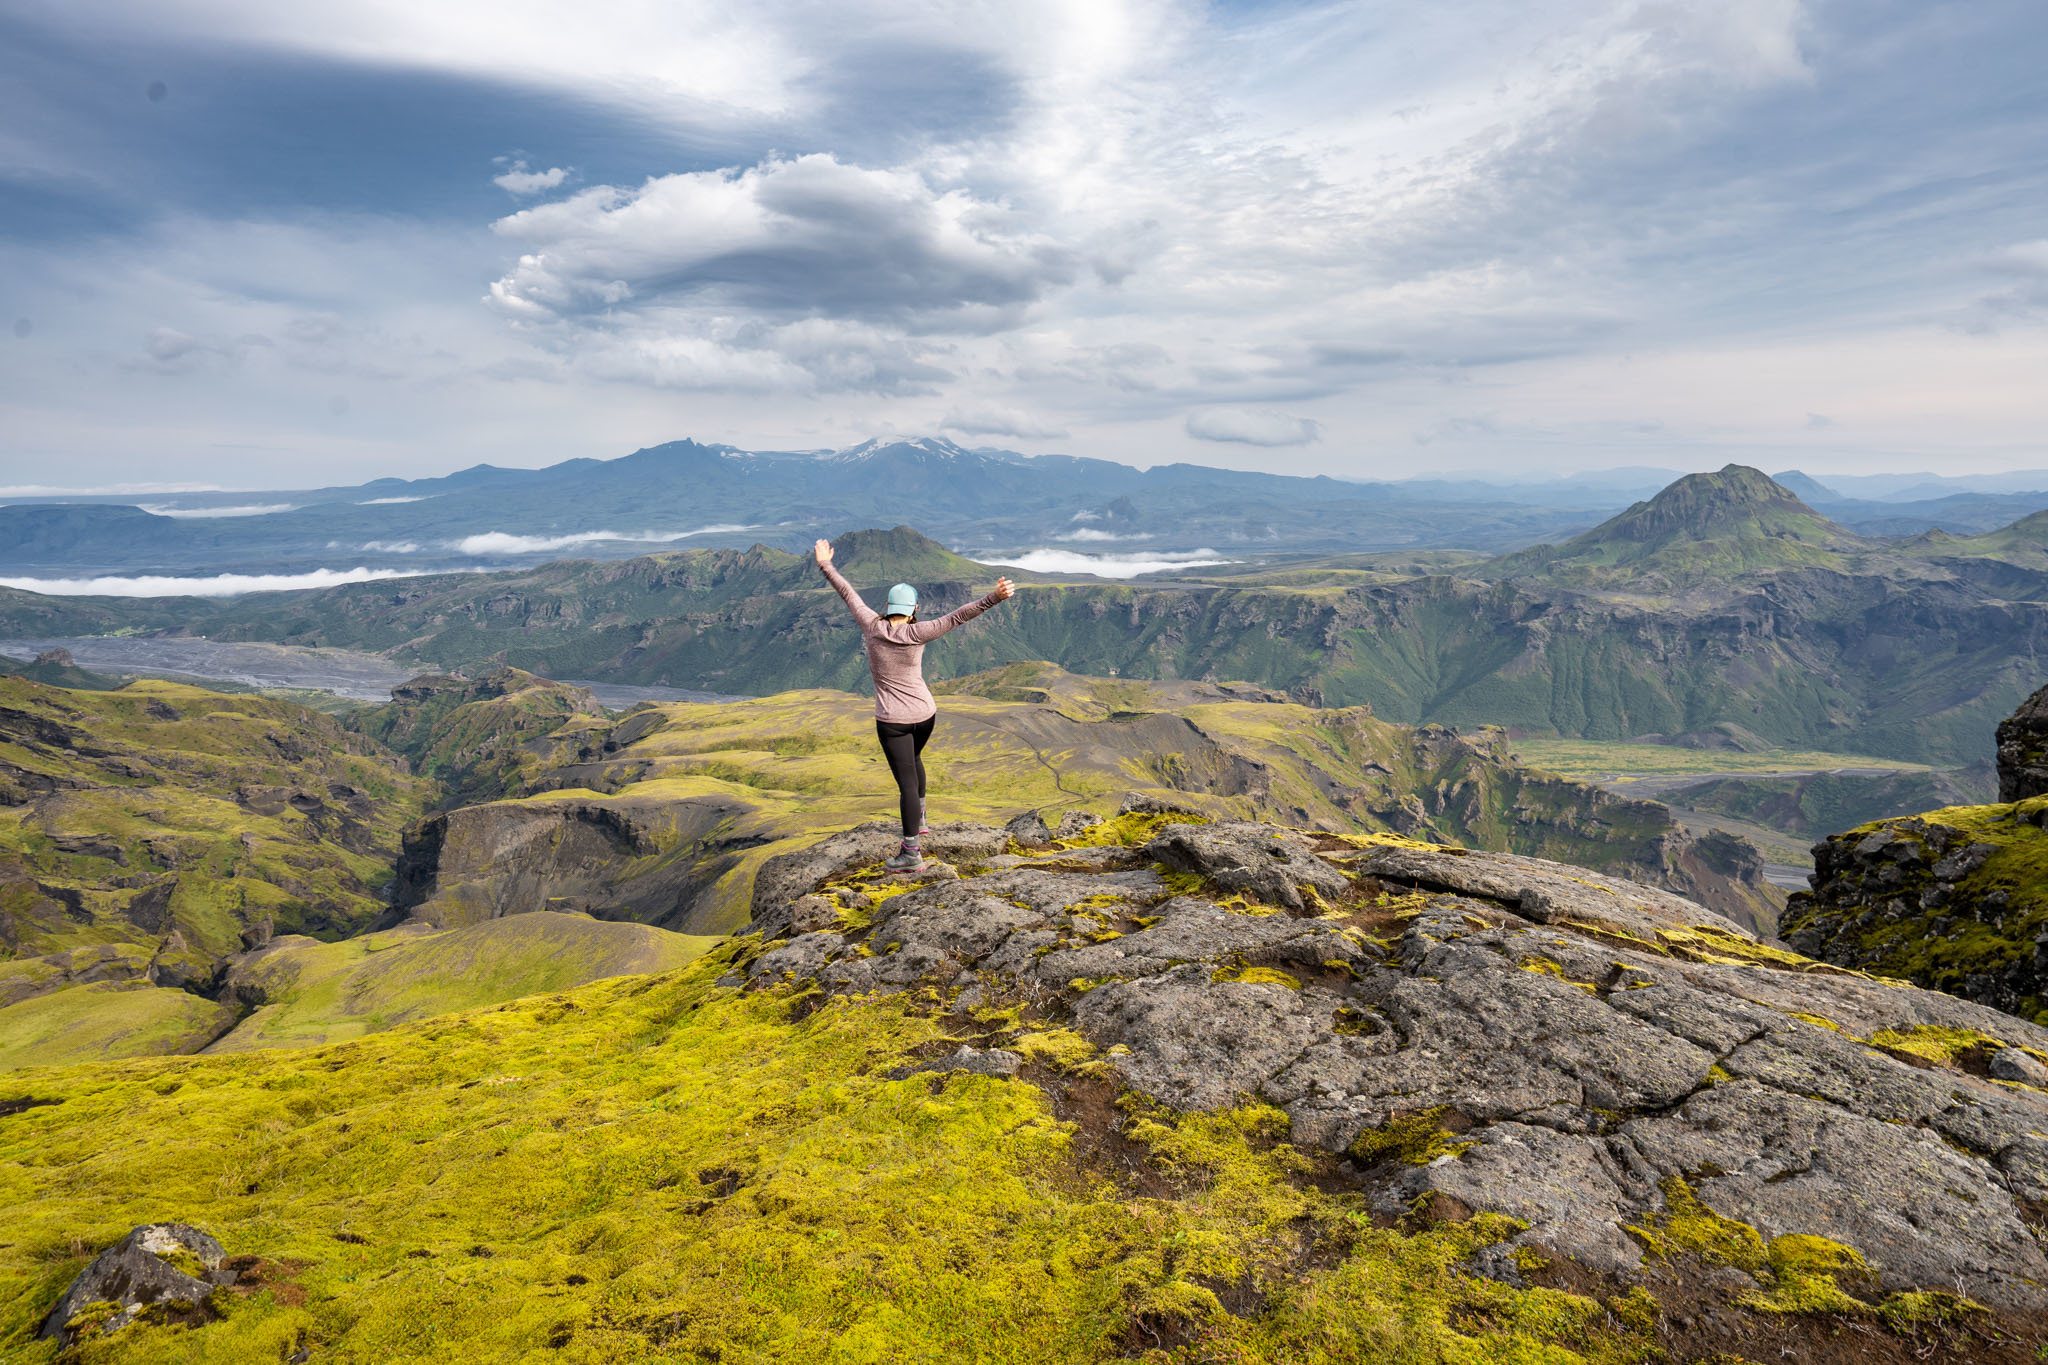
We were lucky. It was perfectly clear and beautiful as we made our way past a green canyon and up, up, up roughly 200 meters more to a plateau with stunning views of the glaciers.
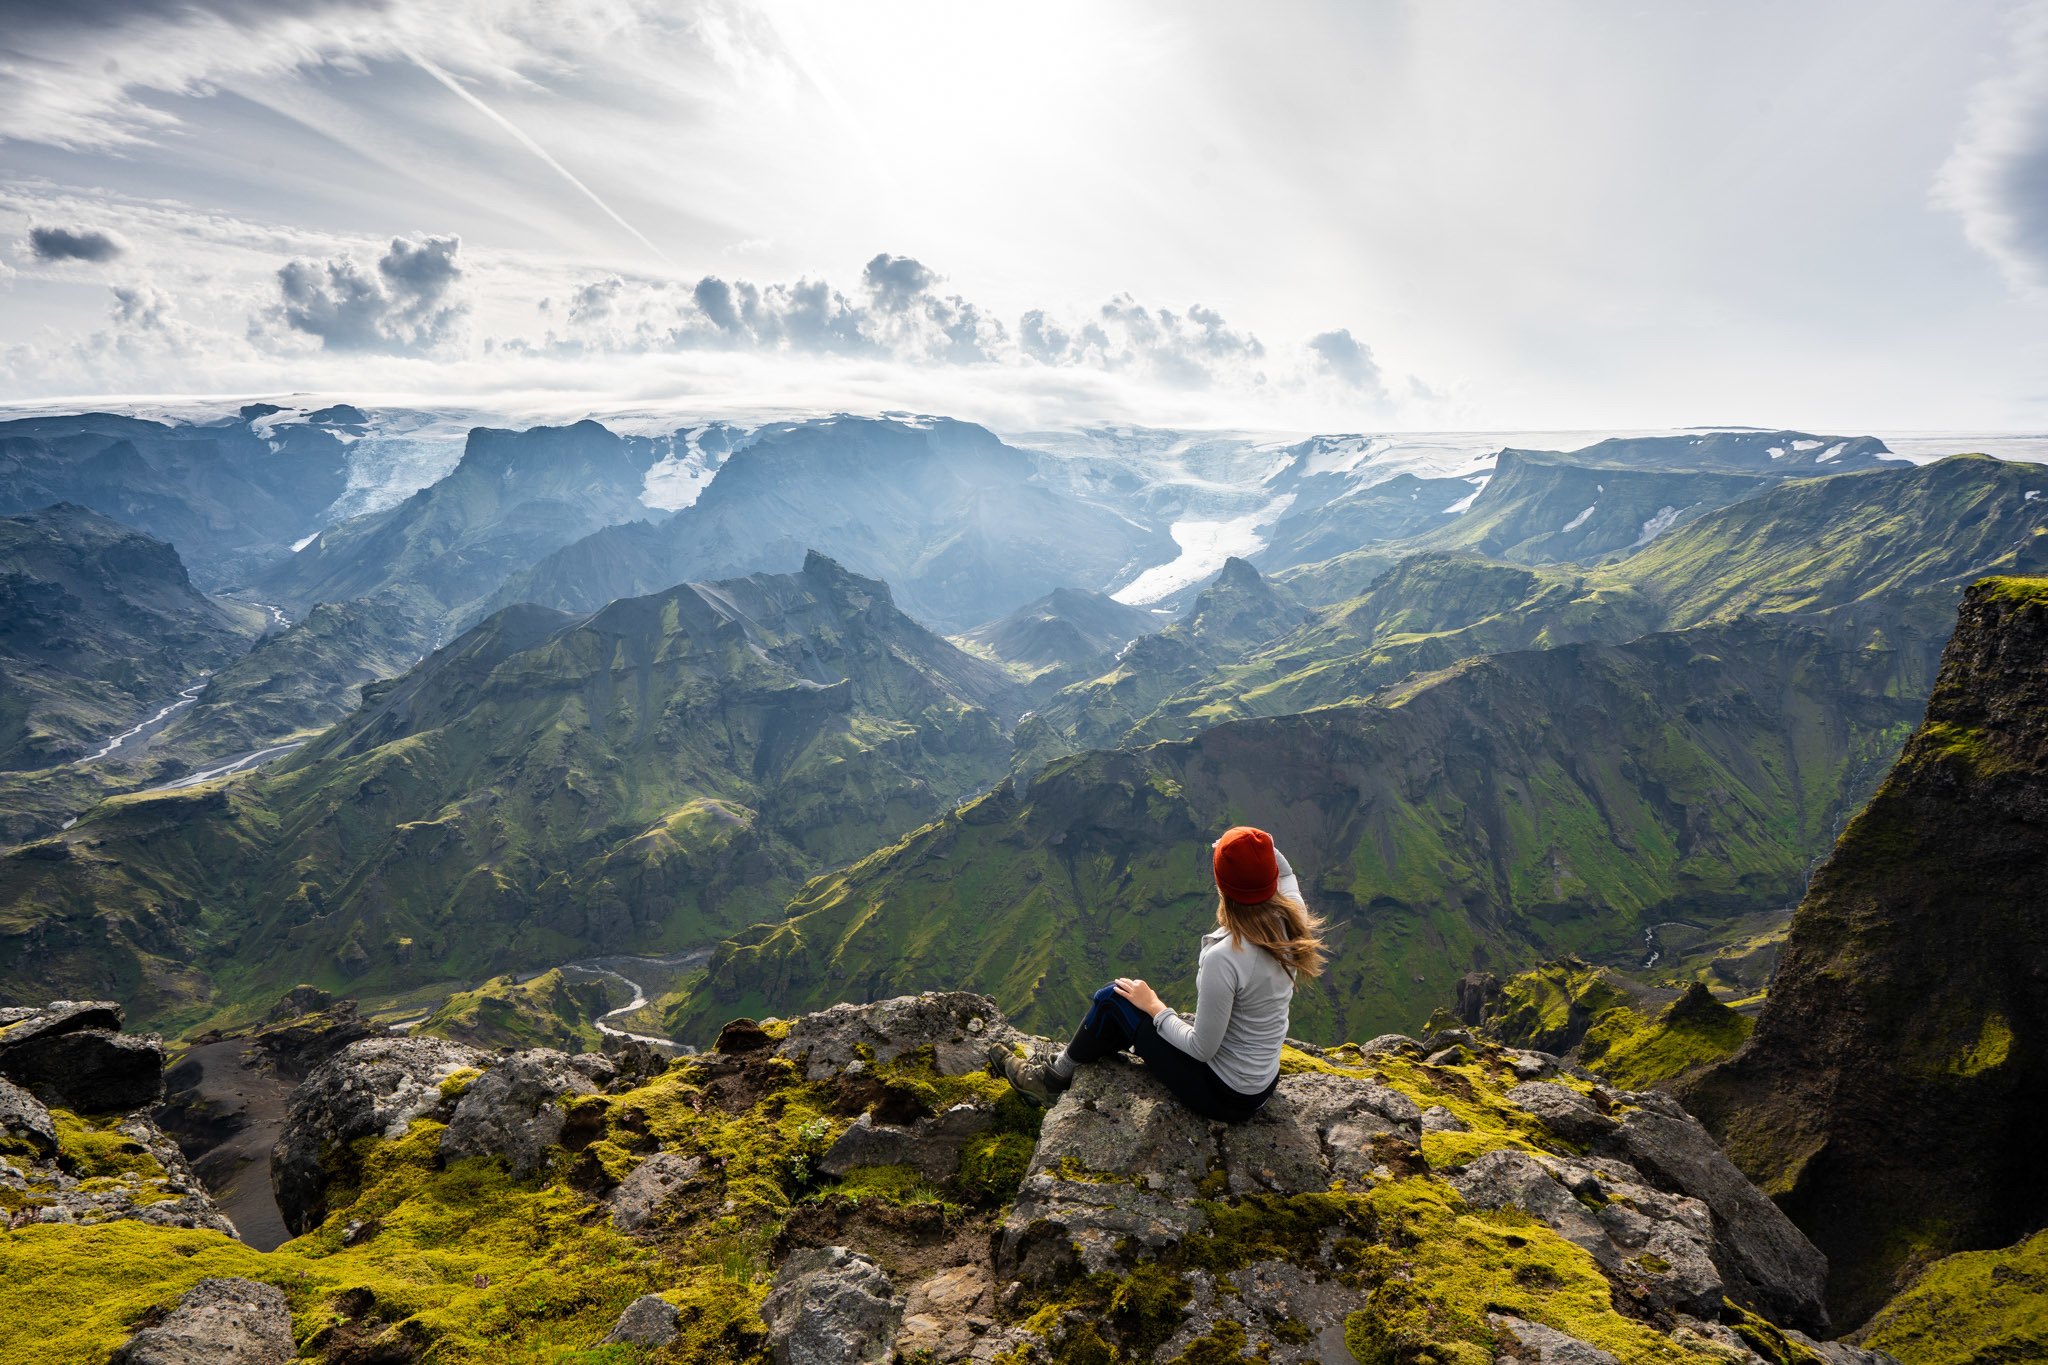
It’s one of the most impressive views I’ve ever seen on a hike, and that’s saying a lot!
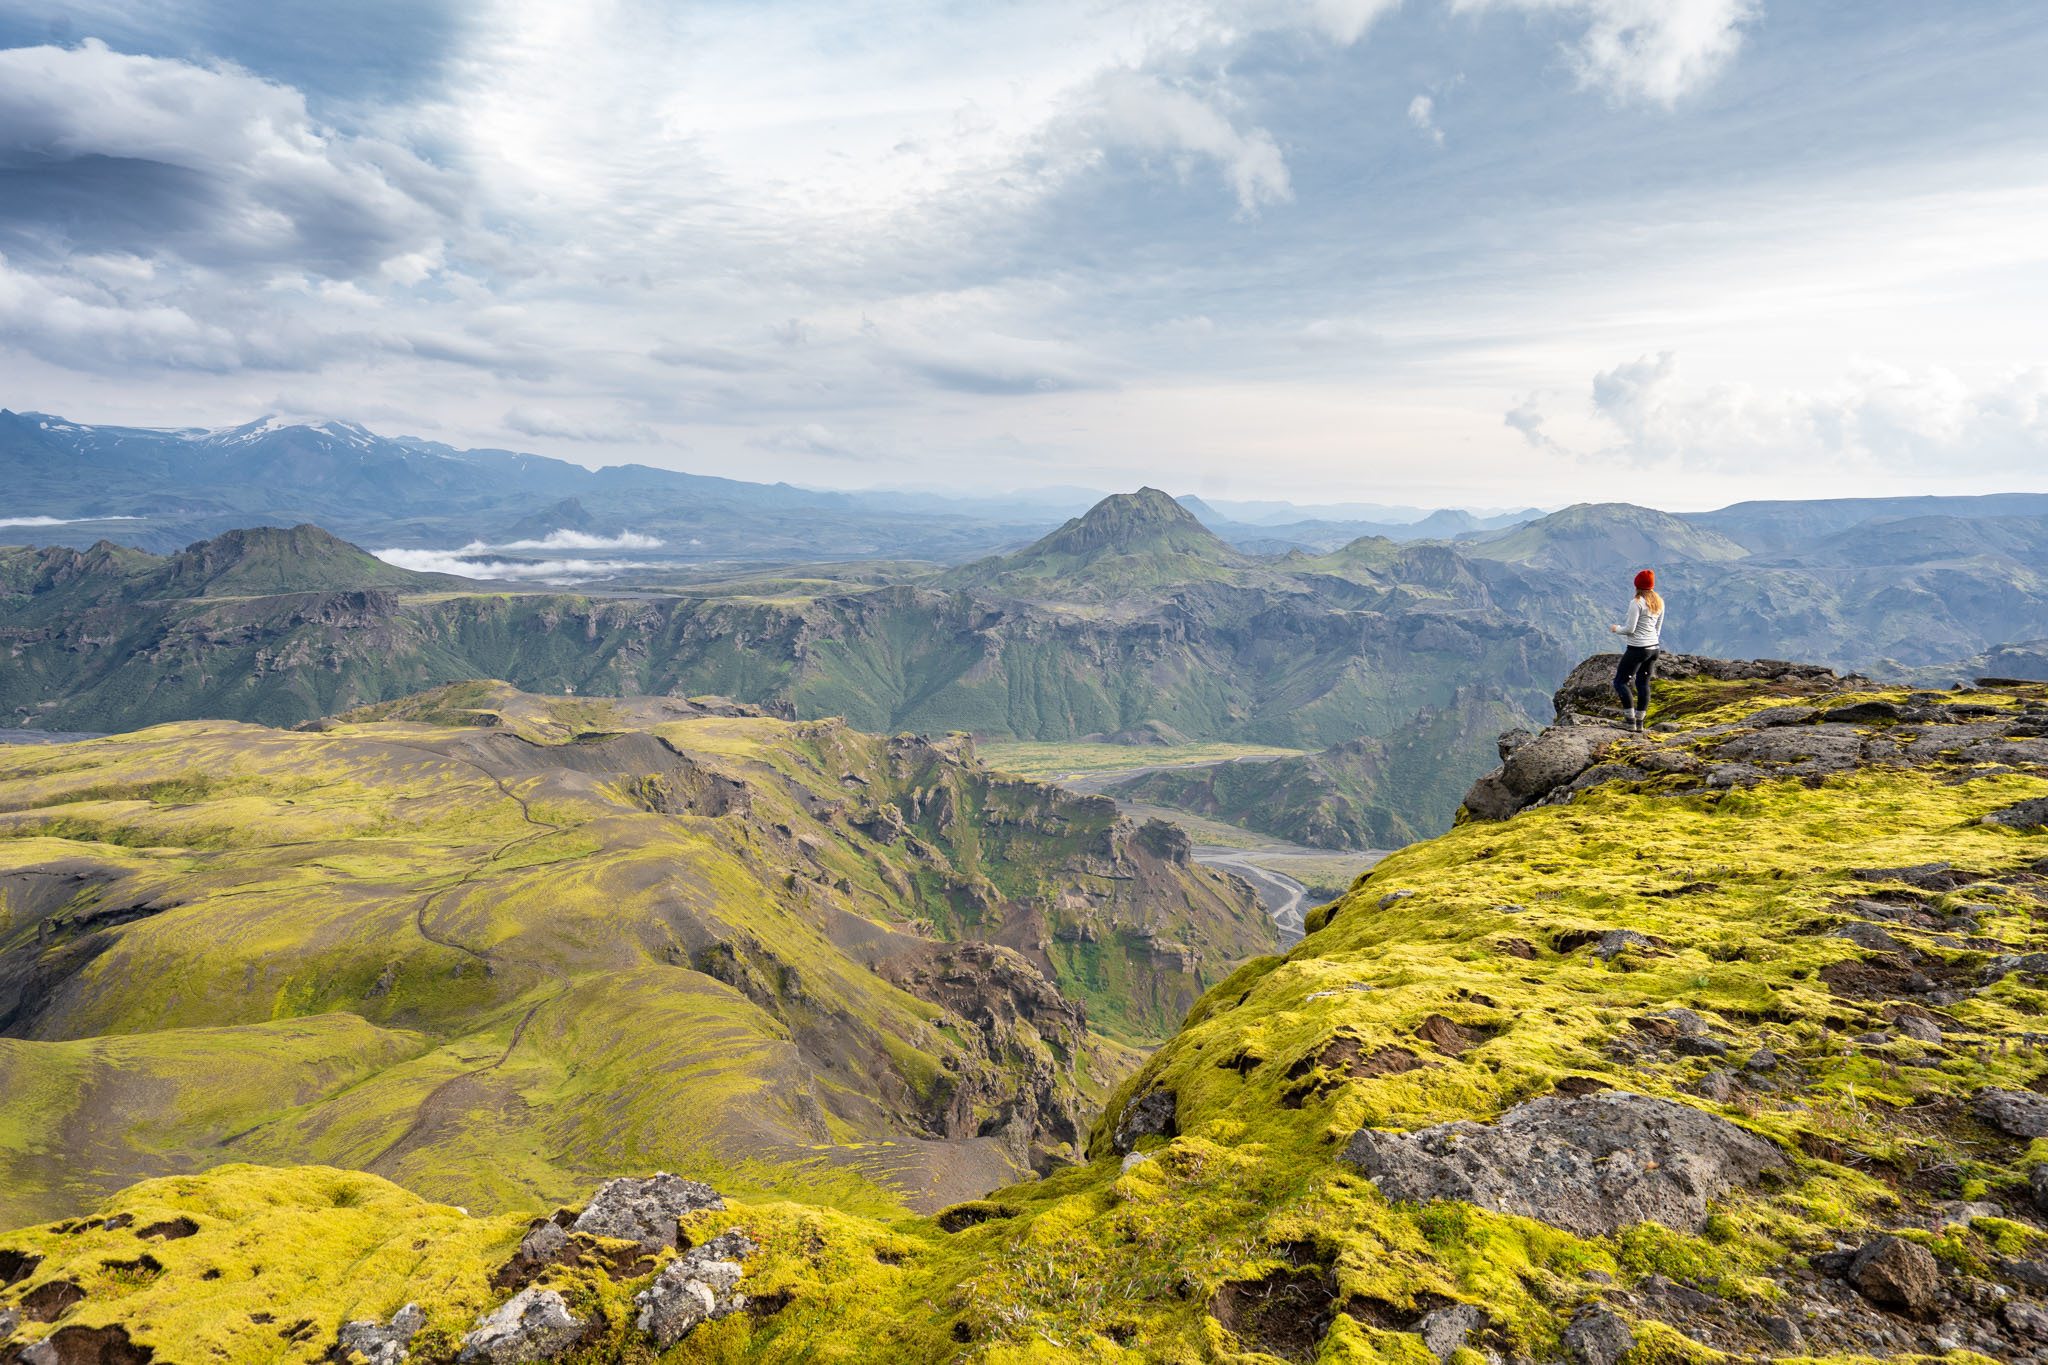
This is a perfect resting spot before another narrow part of the trail, again with chains to hold onto.
Keep in mind that the signs posted on this trail don’t always give an accurate read of how far you’ve come or how far you have to go. I believe this is because the area of Þórsmörk is somewhat large and the huts are each a couple of km away from each other. So don’t depend too much on them to figure out how far you’ve gone or have to go yet. It can get disheartening.
From there it’s quite a steep final 200 m gain to the area of the last big volcanic explosion on Iceland. The landscape changes from green to volcanic rock and sand. You’ll see plenty of snow along the trail as well.
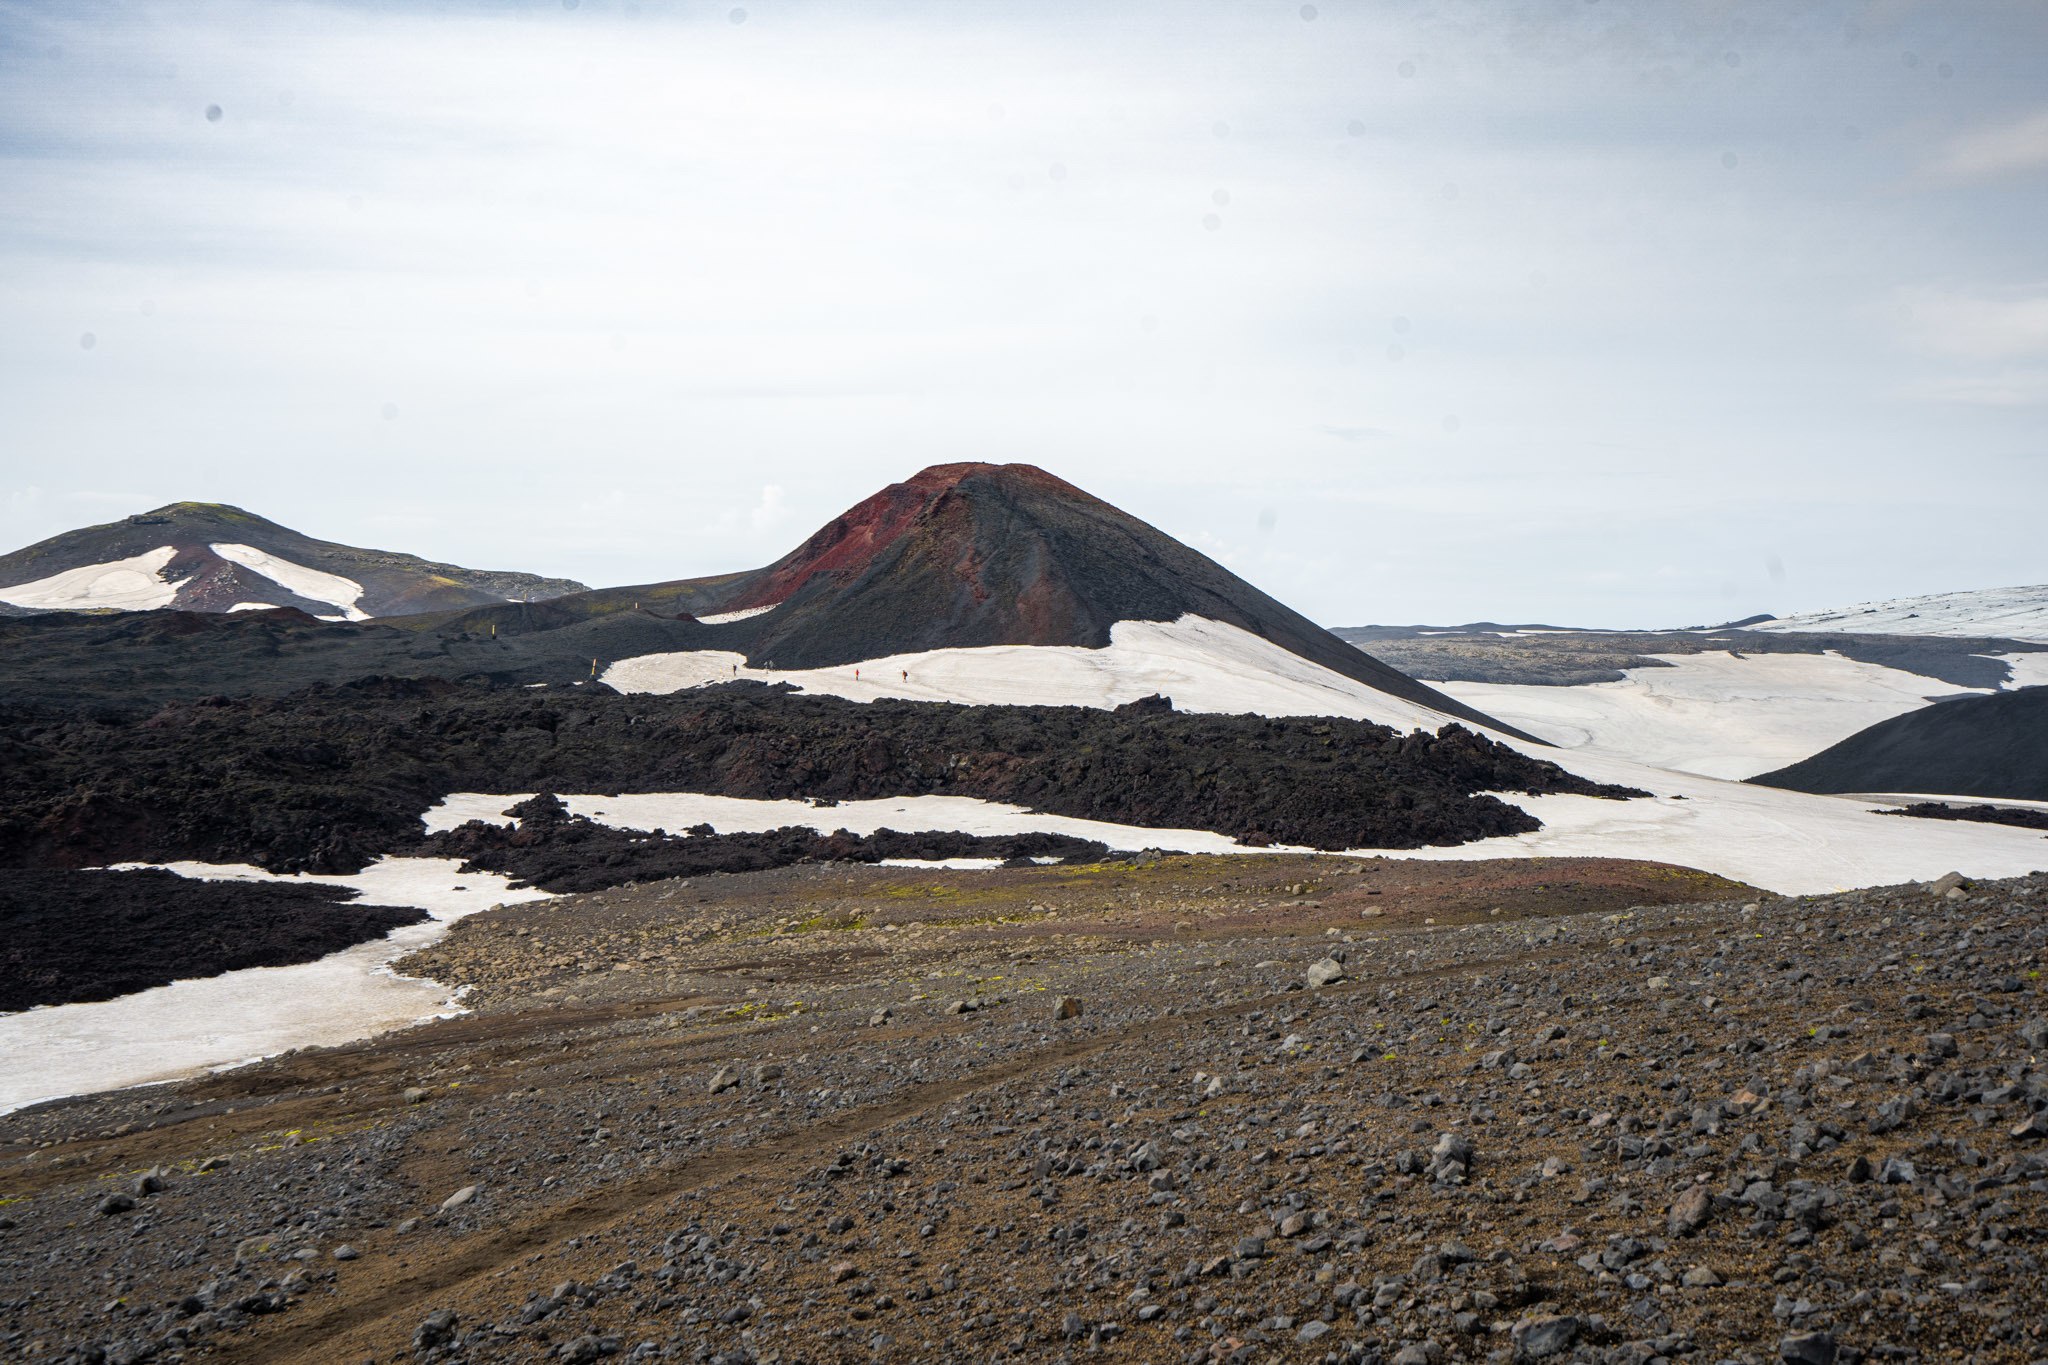
Finally, you’ll hike a few more kilometers along the volcanic landscape before an incredibly sharp descent, at least when I went, on ice, followed by another sharp ascent before arriving at the Baldvinsskáli hut. Make sure you’re heading to the small white Baldvinsskáli hut with the sloped roof rather than the red hut to the right, which is for rangers only. Follow the signs.
Though this hut does not have running water, there is a small jug that they truck in from Skógar. The warden had to be pretty sparing on how much water she gave out when I was there, as their truck was having issues, so don’t count on being able to get as much water as you want at the hut. For hikers coming through, she was selling a maximum of 1 L for 500 ISK.
Since we knew that there would not be much water at the hut for the night, we collected and purified the snowmelt as we went.
The hut has two options for sleeping – one upstairs with about 12 mattresses, and downstairs where the rest of the people sleep. I liked the cozy atmosphere and enjoyed meeting all of the different people who stayed at the hut for the night. Each person has their own mattress on the floor but you’ll need to bring your own sleeping bag. It felt pretty clean to me and it was nice and warm, too.
Day Two – The Baldvinsskáli Hut to Skógafoss
The winds that we had been warned about the day before never really came, instead waiting until about 7 AM the next morning when I looked out the window and saw thick fog and felt the howling wind against the window. I never thought those things could go together before!
After a quick breakfast, finally finishing up all but the last of our rations from our epic hike, we made our way out into about 35 mph wind just as the fog cleared.
This is another reason why I really like hiking poles. They help a lot with balance in conditions like these. I felt like a marionette for the first few kilometers but as we descended the wind got a bit lighter.
There are two main ways to get down to Skógafoss – a road that the big trucks use to bring provisions up to the hut, and a path past all of the waterfalls, the Fimmvörðuháls trail.
You’ll follow the road at first, but after a couple of kilometers you will notice the blue stakes start to veer off to the right. You’ll know pretty quickly if you miss it because there should be a bridge to cross the river (whereas the road would require a river crossing) and a sign as well.
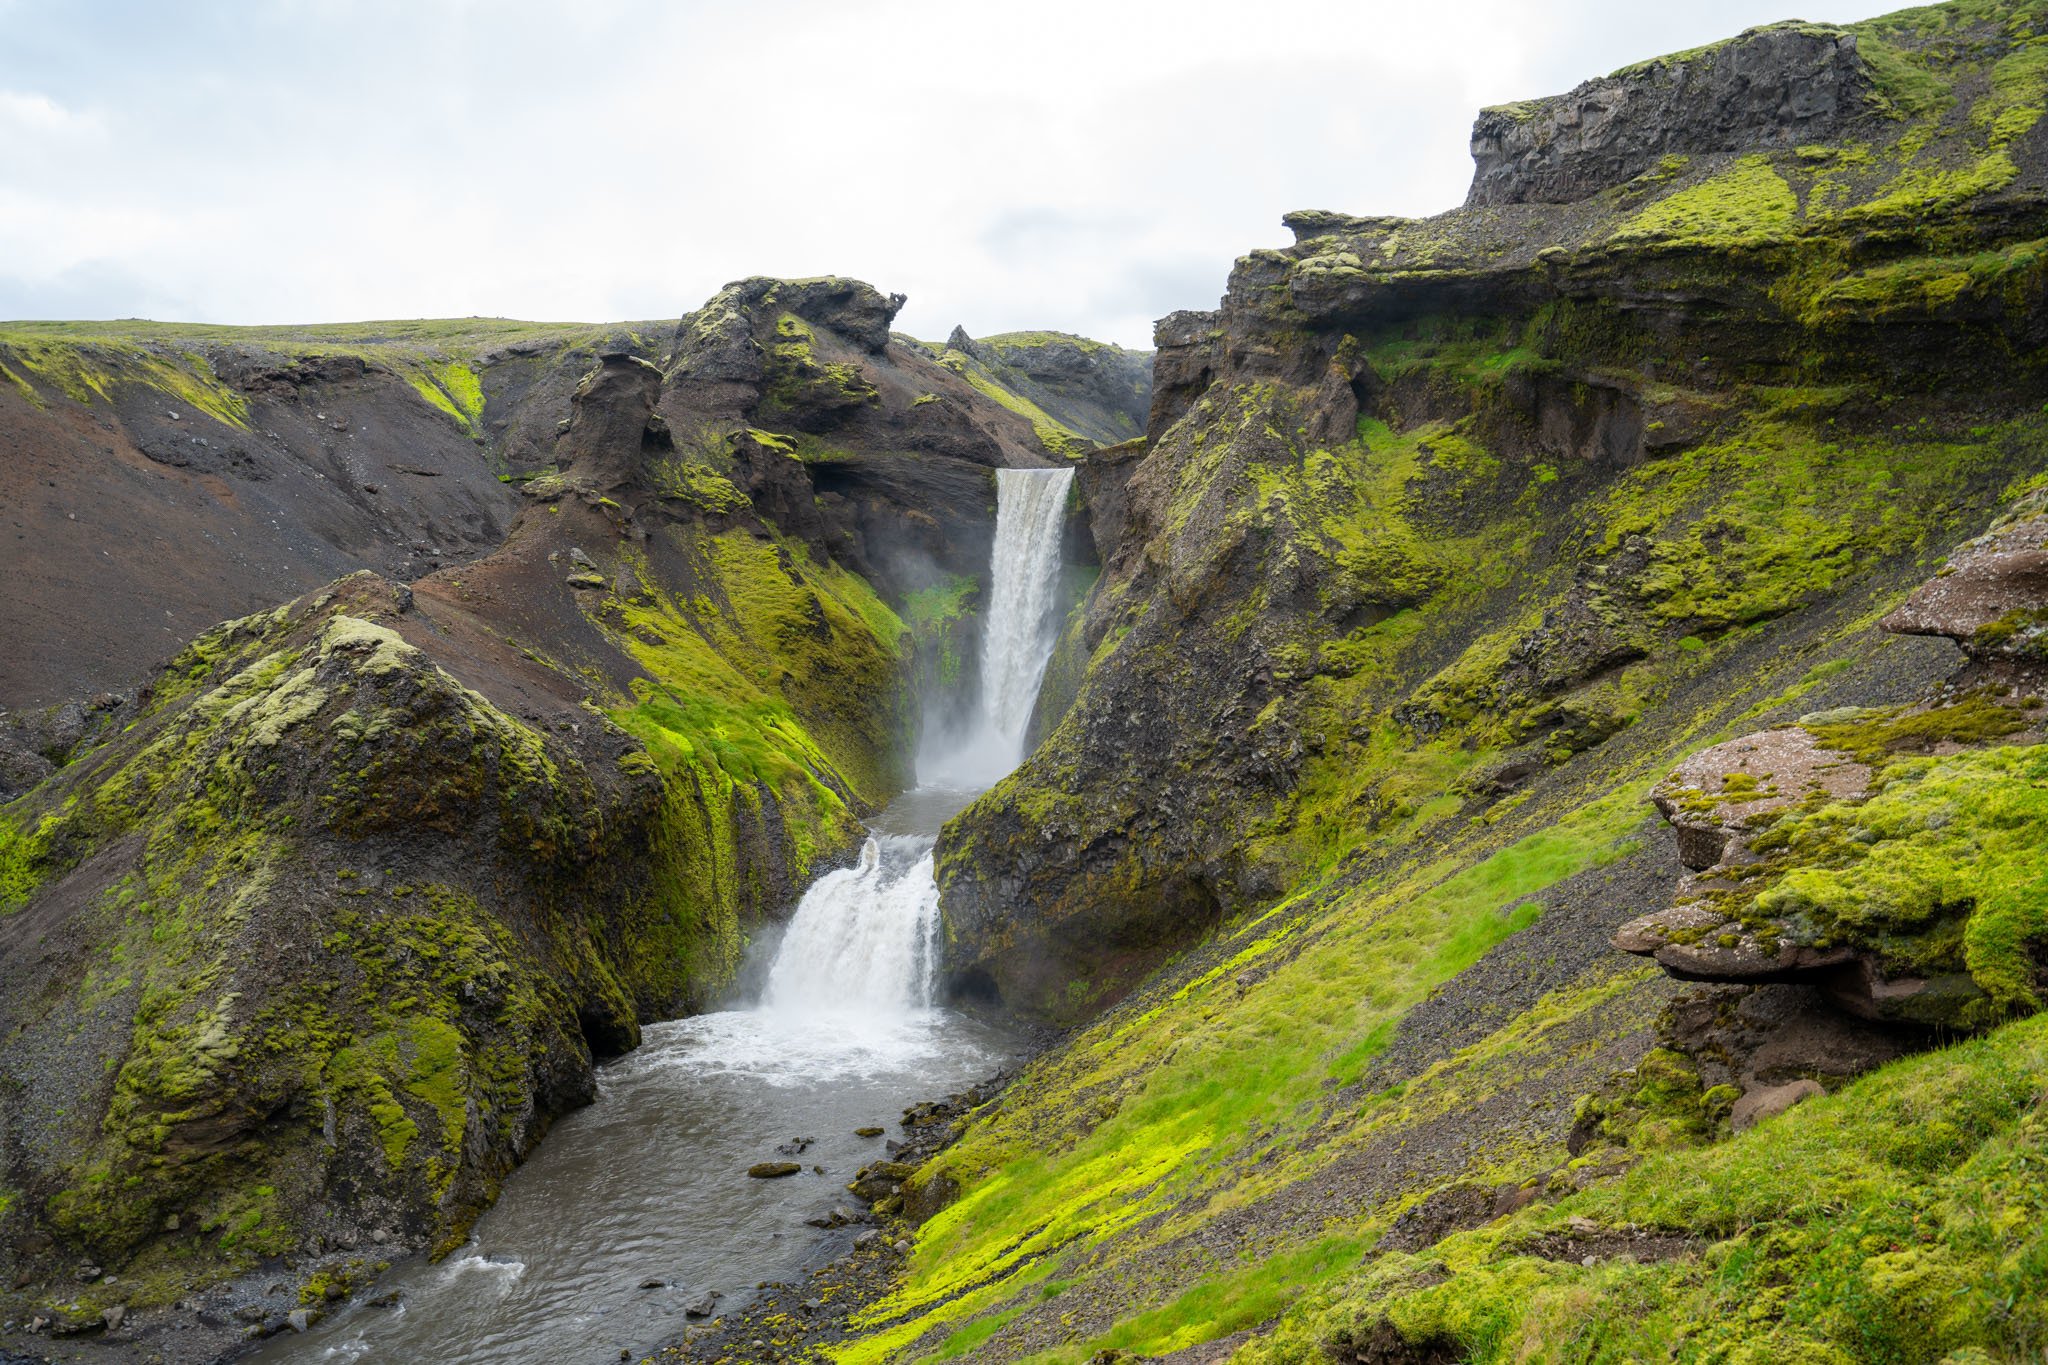
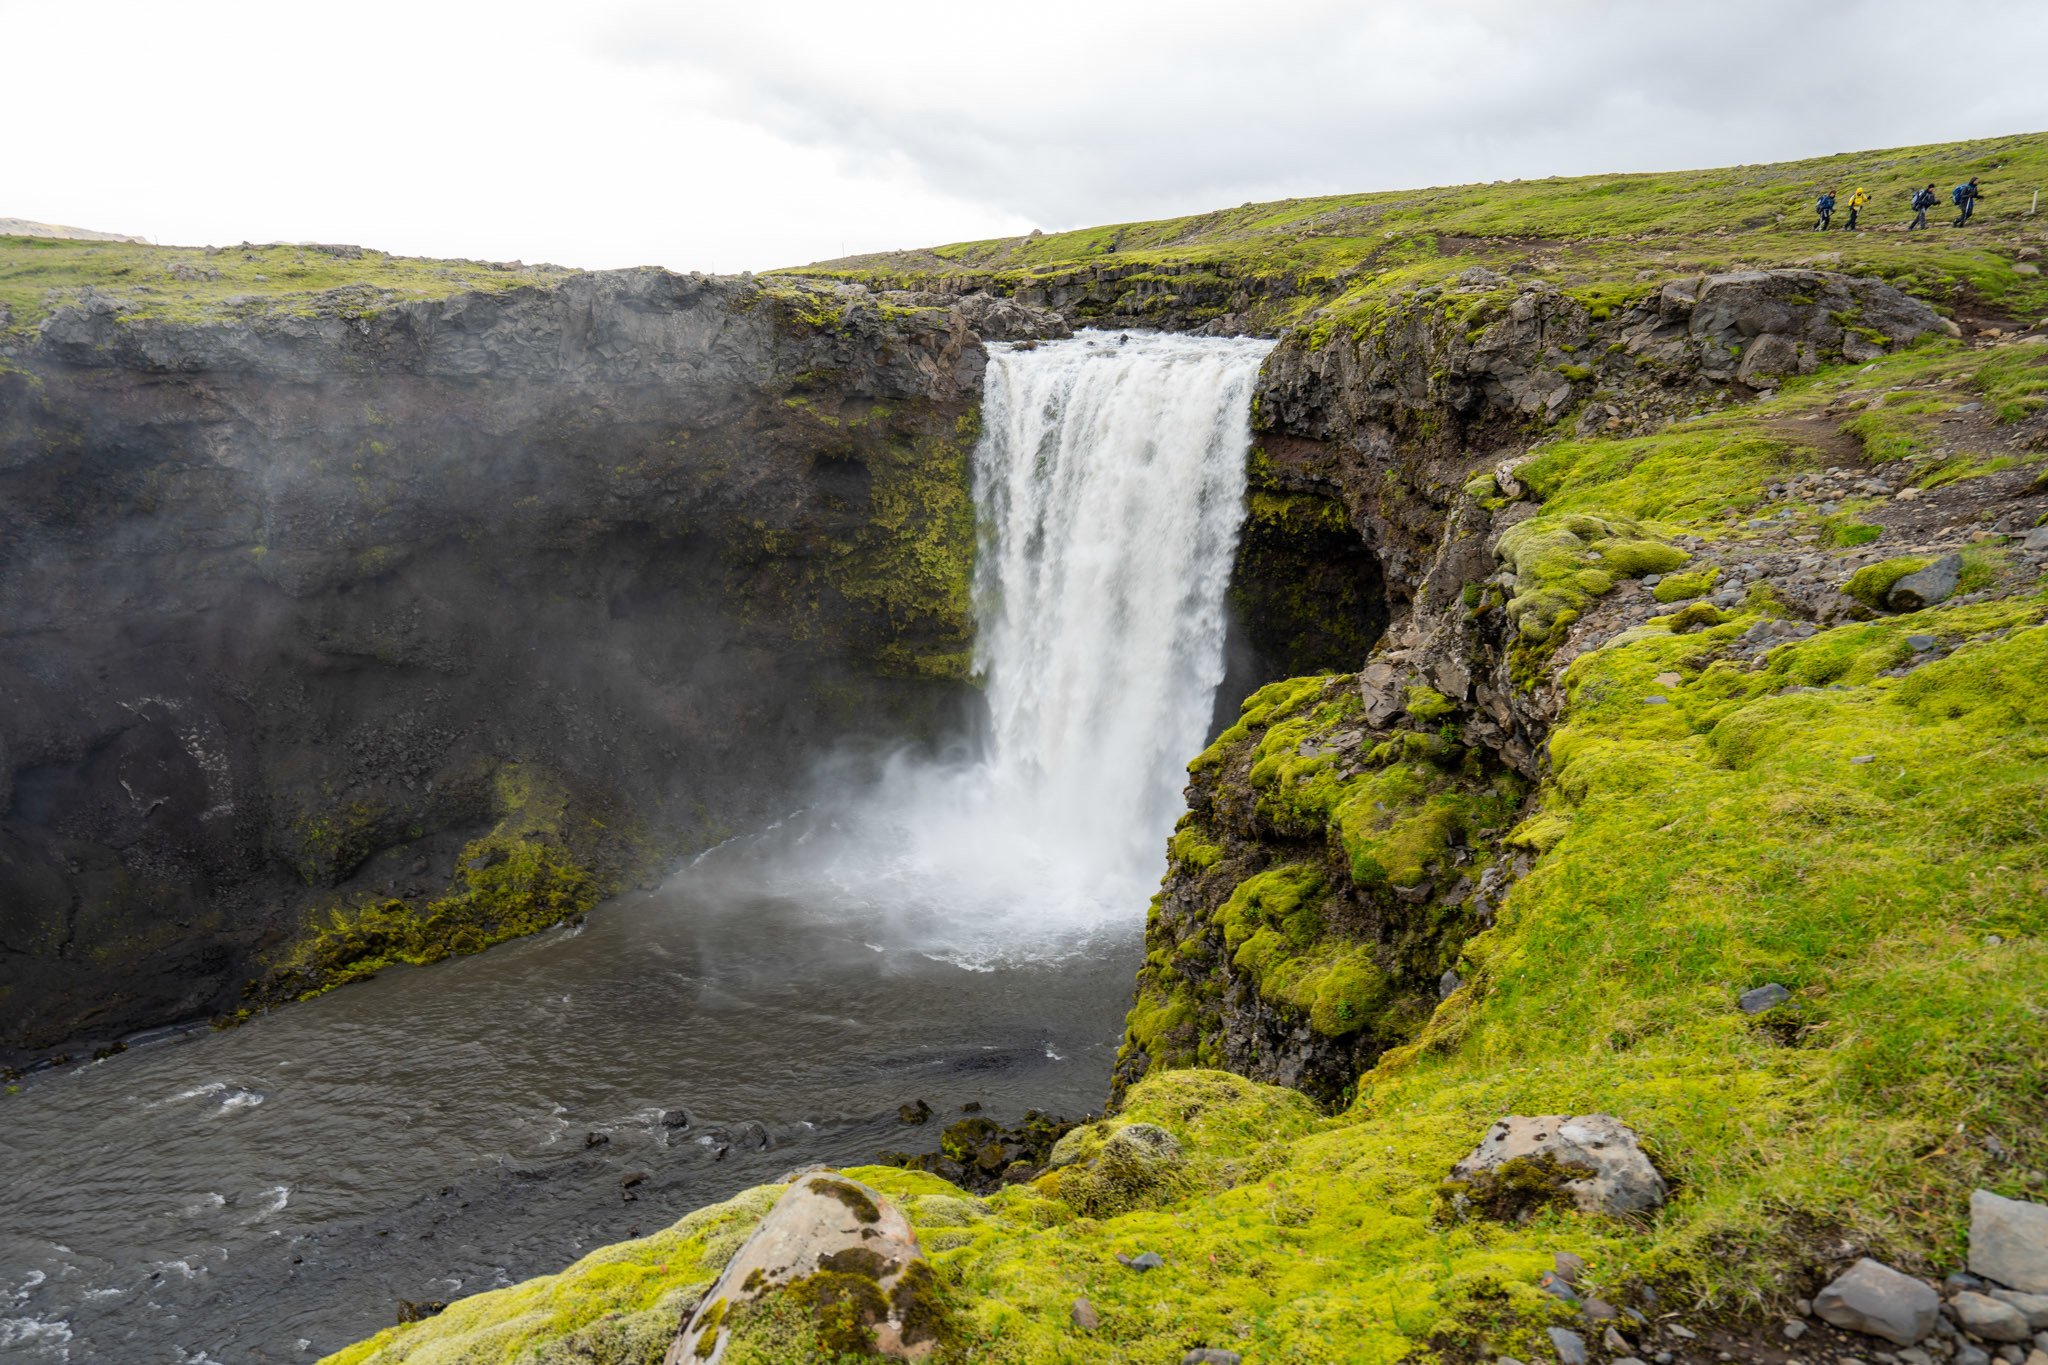
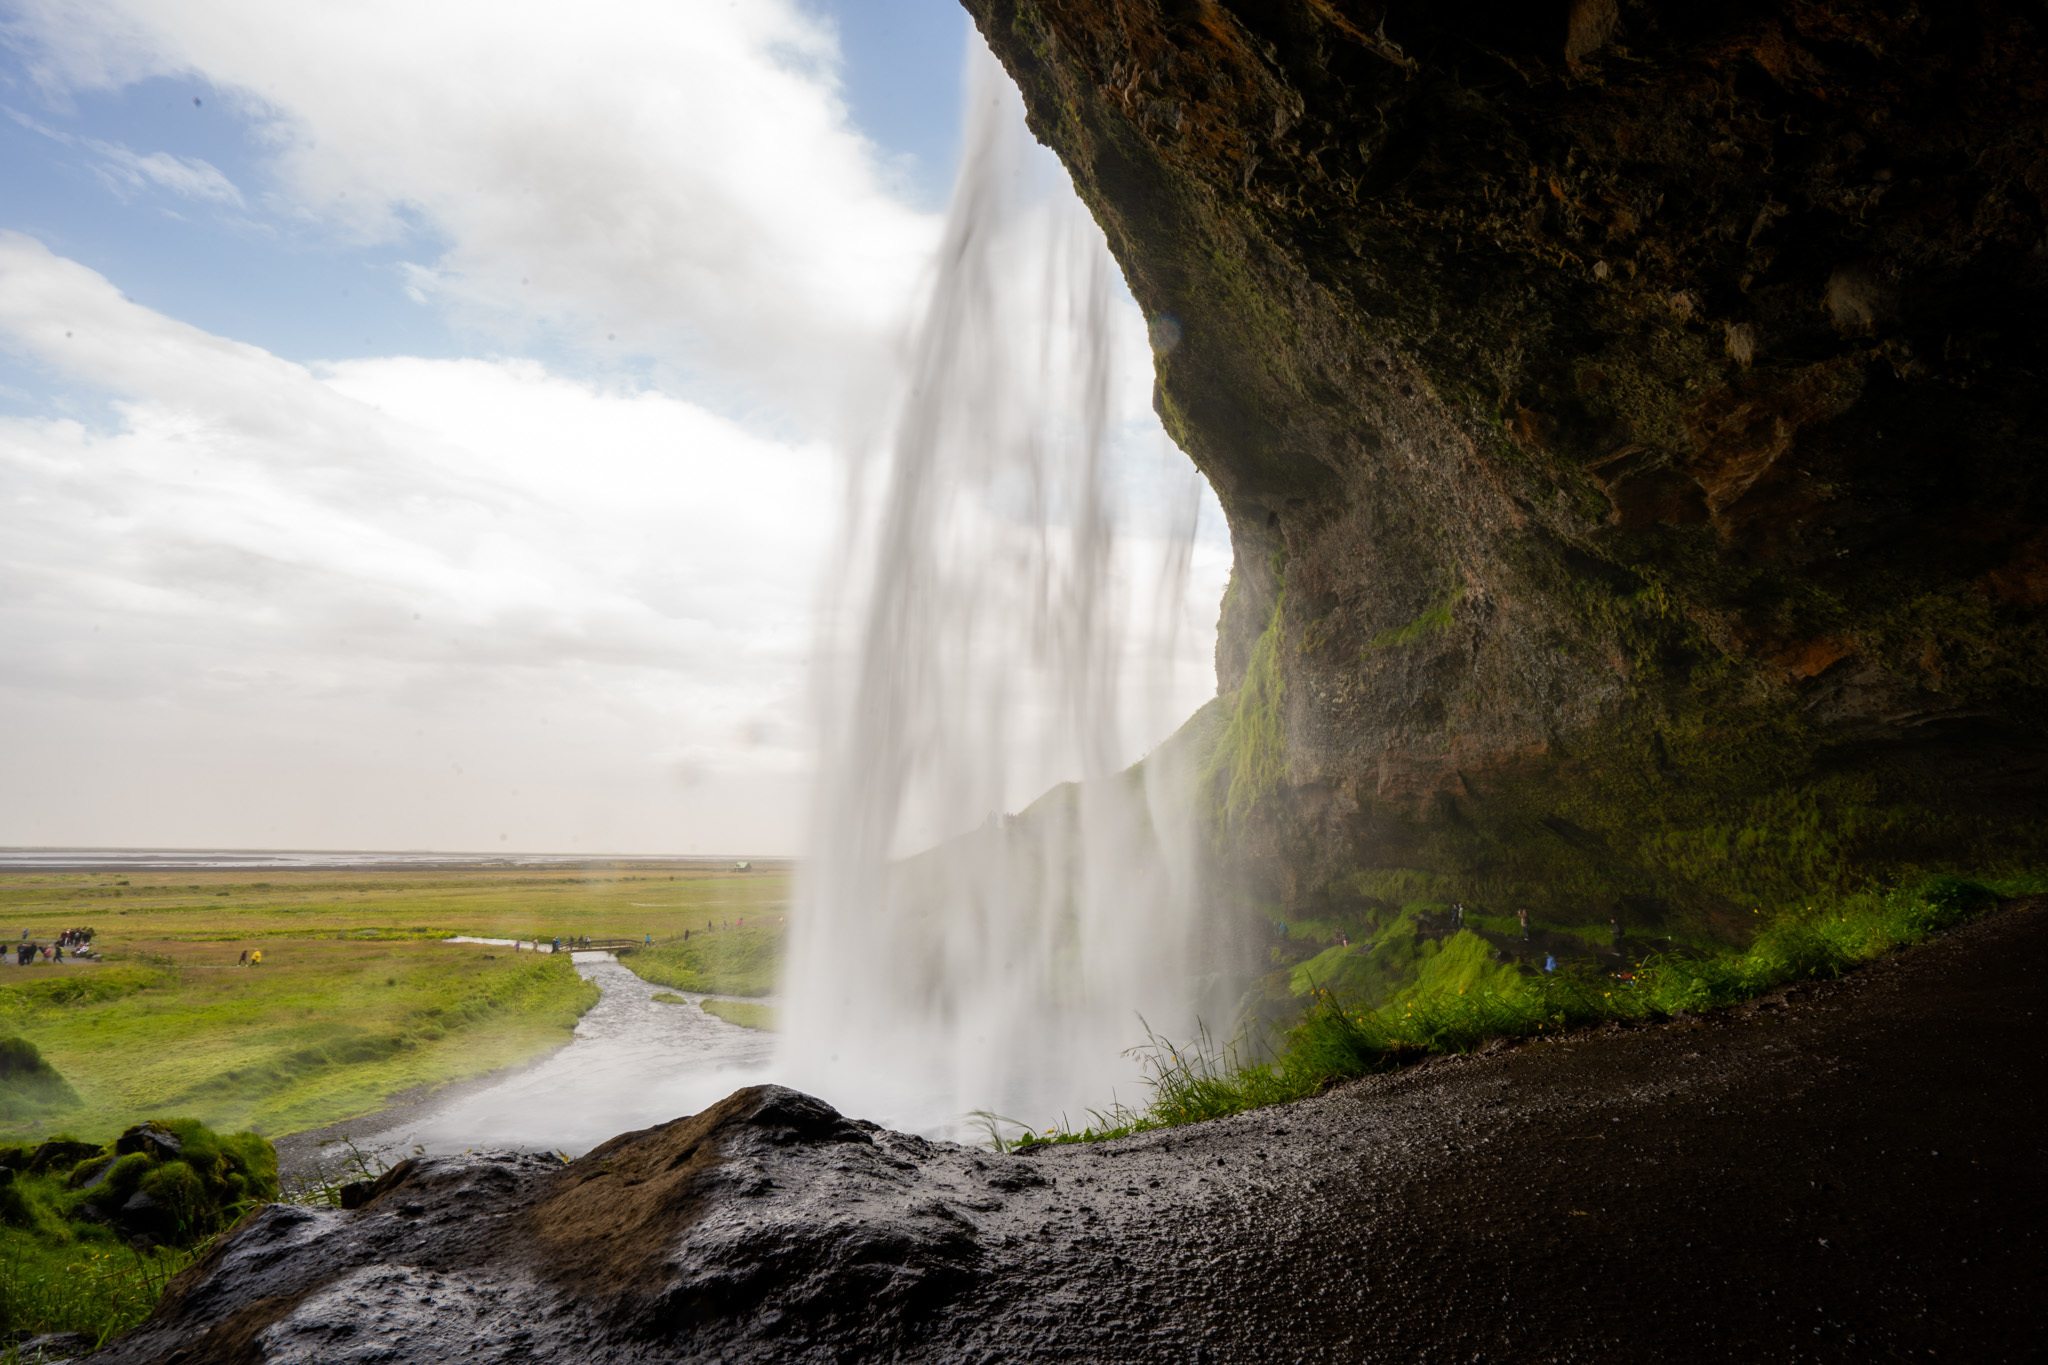
From there you’ll get back down into the greenery, and you’ll start seeing your first waterfalls. There must be at least 20 on the way of varying heights and widths. They’re all beautiful and if you’re like us, you’ll be stopping pretty frequently on the way to take pictures and enjoy the views.
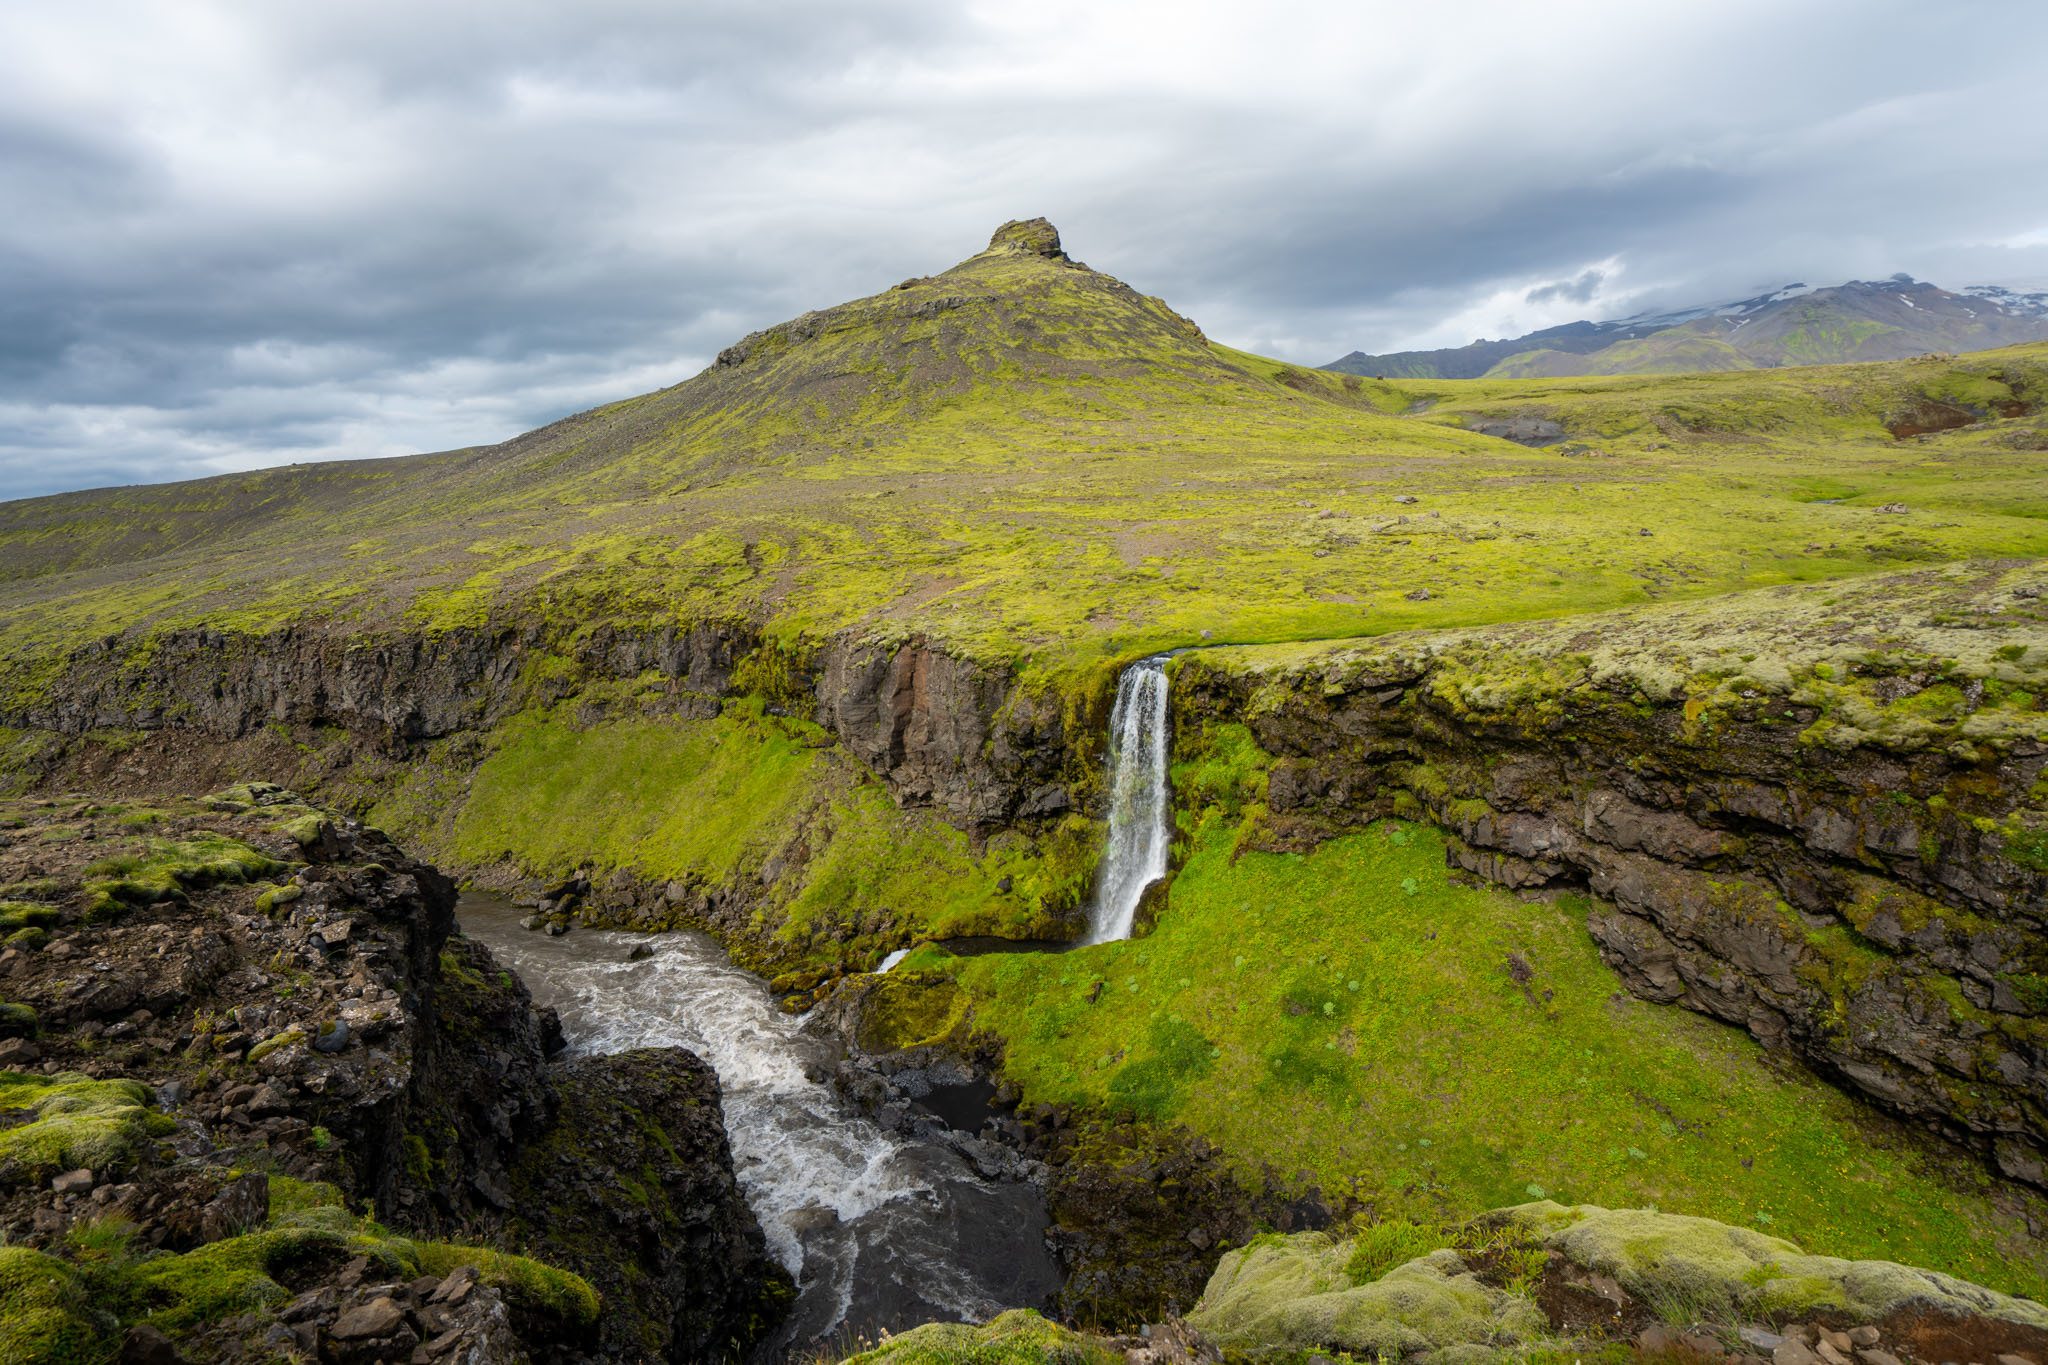
The trail just gets more and more lush as you make your way down.
It’s worth mentioning here that this part of the trail is often very foggy. We had our route mapped out on our phones using maps.me, an offline GPS app, which I highly recommend you download before you leave Wi-Fi. The trail can have sharp drop-offs, so always be looking for where the posts are to mark the trail.
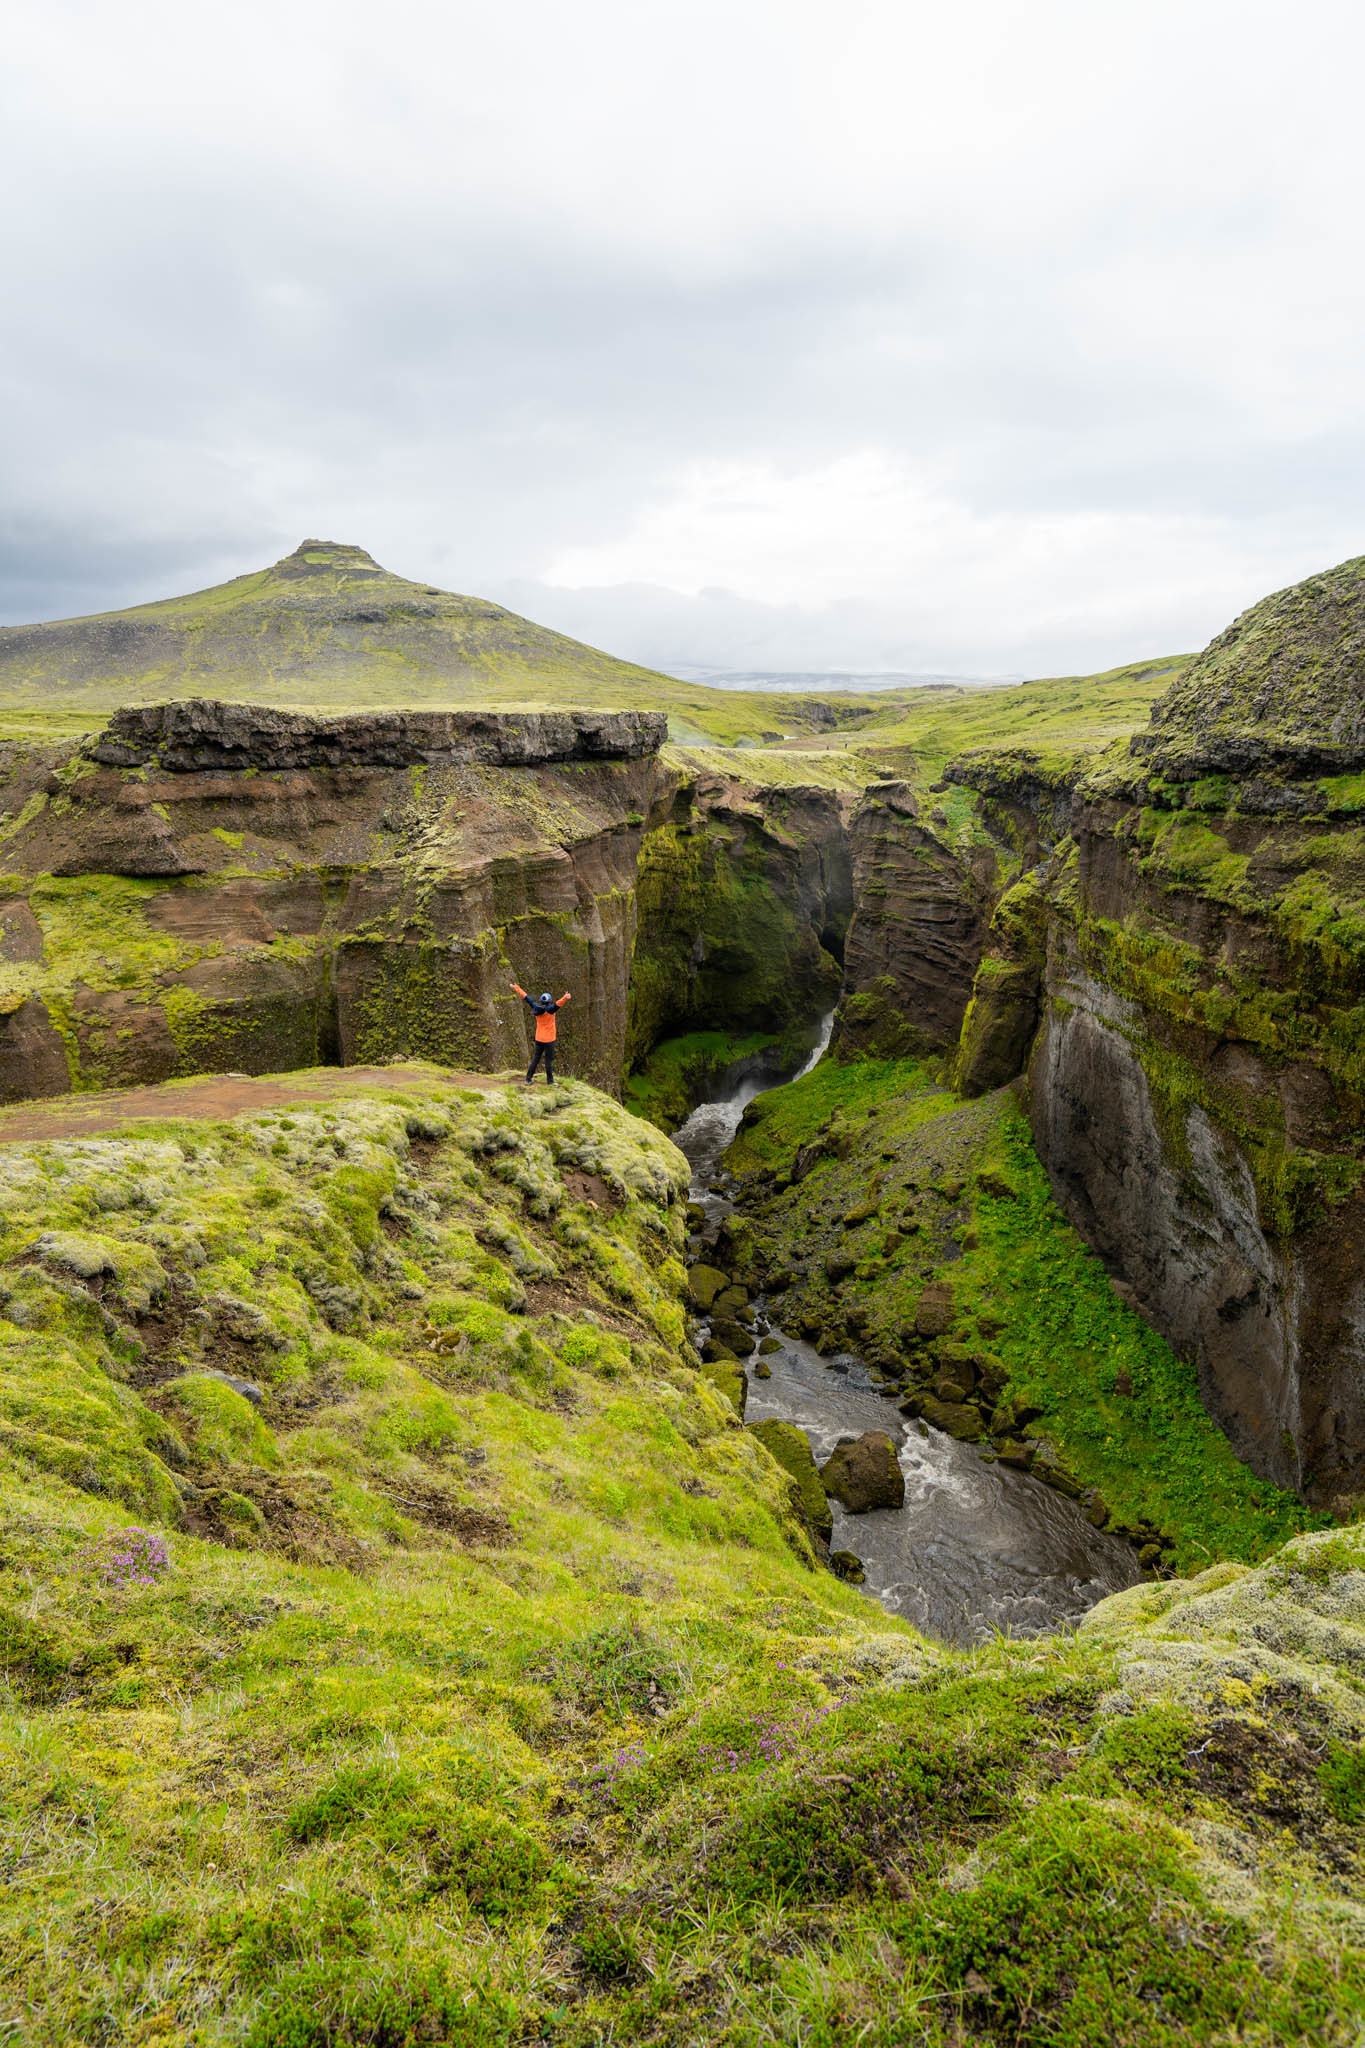
As you continue downward, you’ll keep passing more magical canyons and waterfalls as you start to see more and more people joining the trail from Skógar.
This is always a bittersweet moment for me, because it means the end of a long hike but also re-joining civilization. I look forward to the hot shower while simultaneously wishing I could stay out in the wilderness for a bit longer.
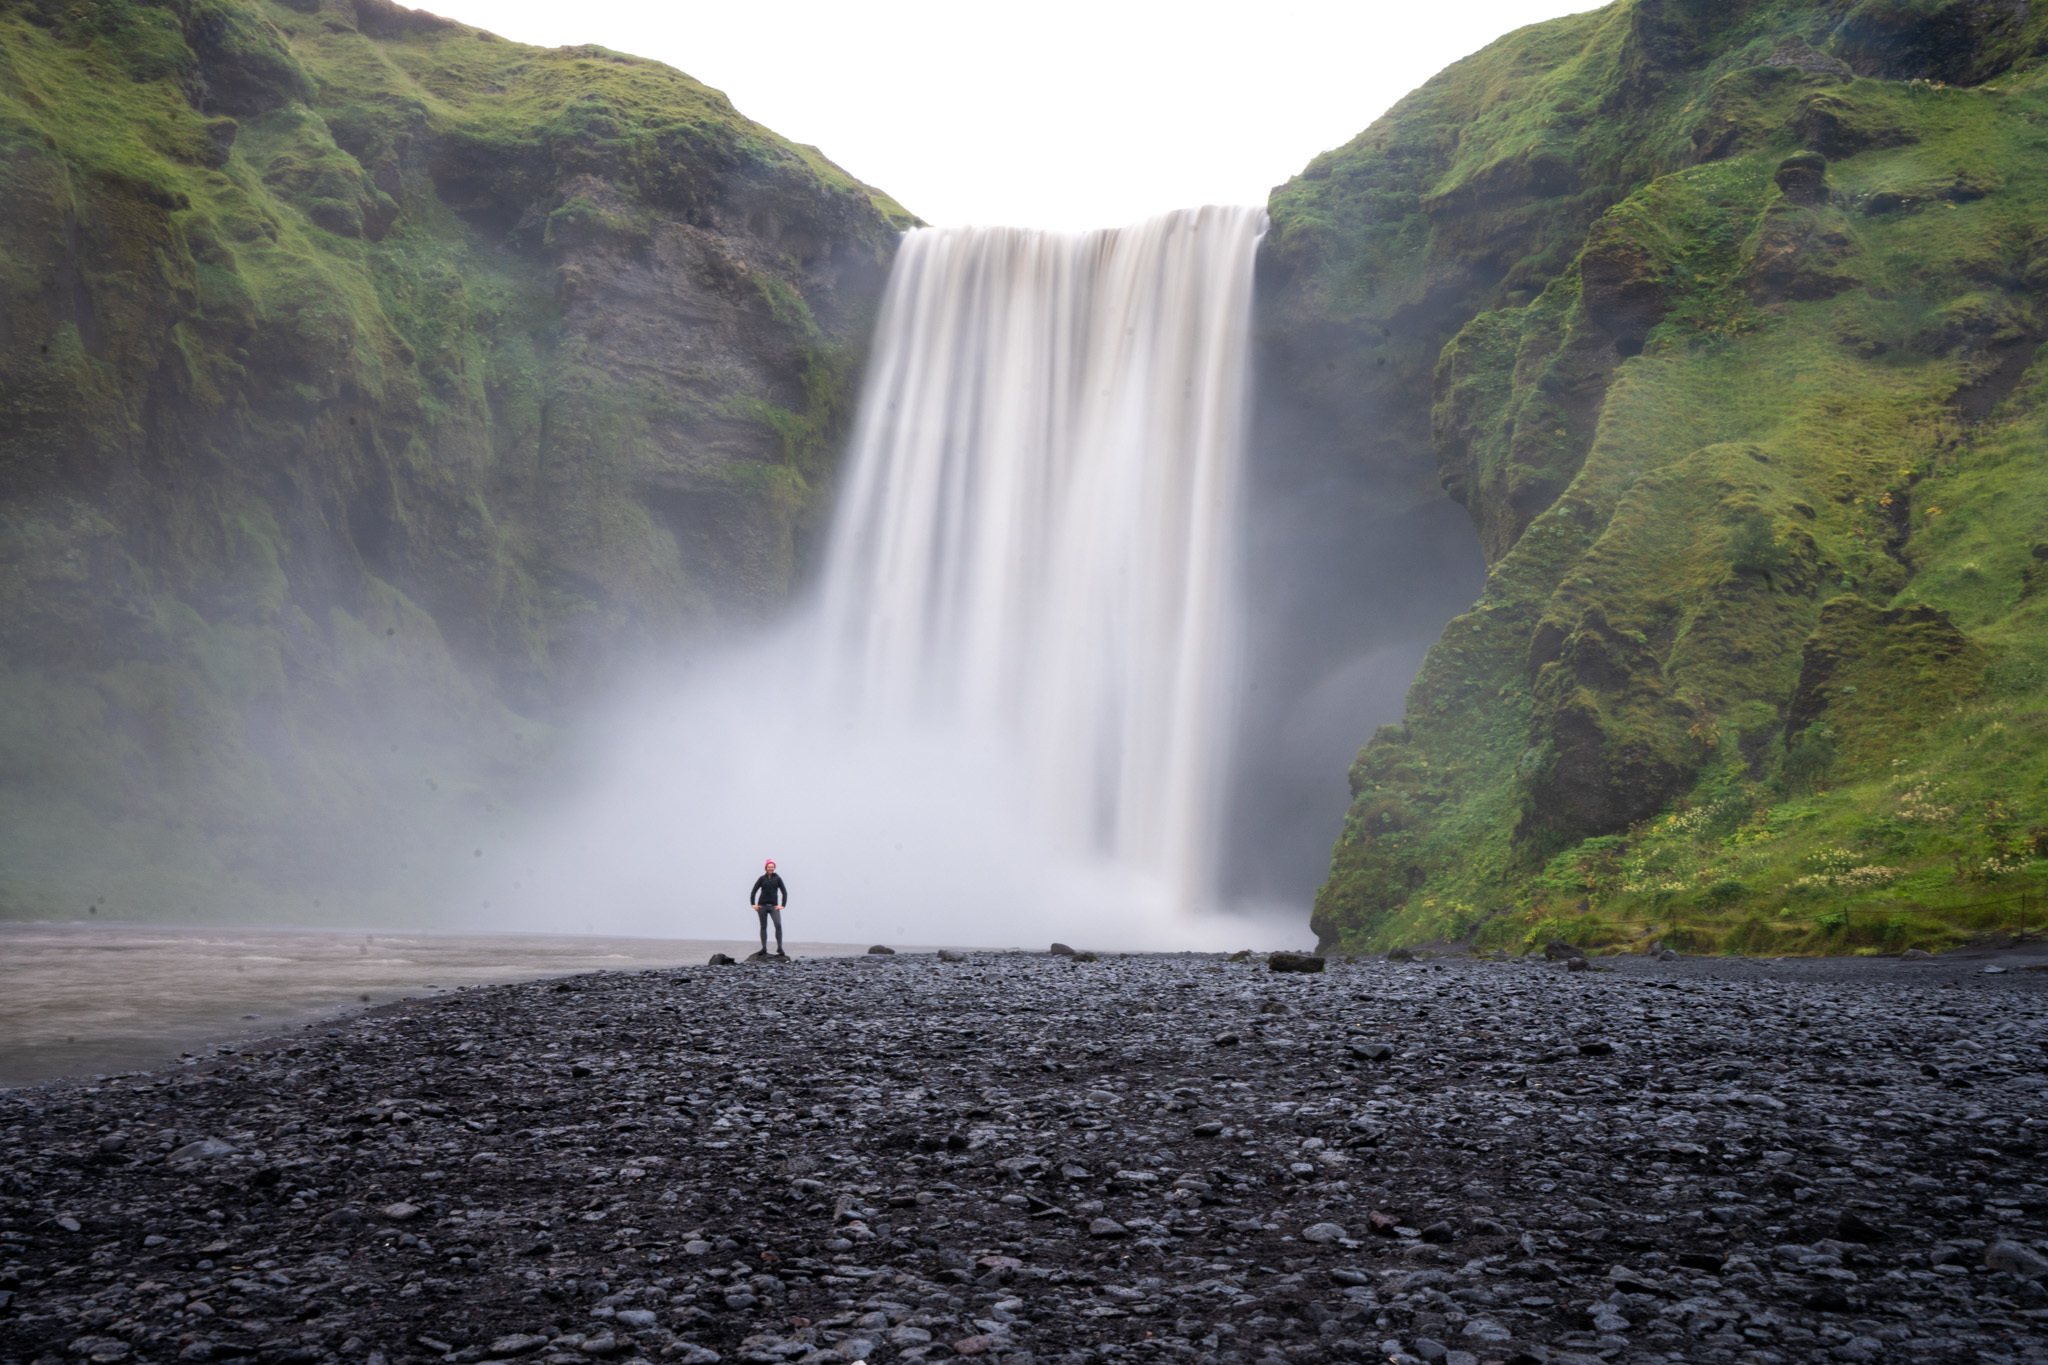
However this day is gradual, and enjoyable, and finishes with the crown jewel waterfall: Skógafoss.
If you have the time, I recommend staying in the town of Skógar (Hotel Skógar has nice rooms, a hot tub, and a great restaurant) for the night so that you can go back to the waterfall around sunset when there aren’t very many people around. That’s how we got photos without anybody in them!
The next day, take your time and make some stops on the way back to Reykjavik if you can. Since there were so many of us, we got our own van and driver. But I’m guessing that there are tours you can look into as well to see the waterfalls and black sand beaches of Vík on your way back.
I can understand why this is Iceland’s most popular hike. Where else on earth can you see this many waterfalls all in one day? Moreover, each of them is spectacular and unique. It’s hard to think of many places on earth where you get that, and sweeping glacier views surrounded by impossibly green canyons. This hike is just one beautiful layer after another and if you get lucky with the weather, you can see it all.
Happy trails, and if you do this hike, I hope you’ll come back and let me know how you enjoyed it!
And if you can be swayed, I absolutely recommend doing the Laugavegur trail from Landmannalaugar as well. You can read more about that here.
Marchus Shane says
Hey, Kristin just wants to thank you for empowering the women in towards these kinds of activities. We always hear about the solo travellers but we only see there the man with these kinds of activities. As reading your guide your steps makes the girl motivate themselves in engaging with Hikes and Trekking.
Kristin says
Thanks Marchus!
Melanie says
Hello, I was just curious what company/website you used to book your huts in the Laugavegur and Fimmvörðuháls trails? I would love to plan an August 2021 trip.
Kristin says
We just booked it directly https://www.fi.is/en/mountain-huts/all-mountain-huts