I love looking through my grandmother’s travel photos, imagining how it was back then. The other day as I flipped through, I wanted so badly to find a photo of her, but she is rarely in any of them. Like I used to, she preferred to stand behind the lens, and I suspect she probably felt vain asking people to take photos of her.
I totally get it. I felt that way too, but then I started getting in my own travel photos, and celebrating my adventure and myself, and you know what? It’s so much fun, and it feels good too.
So how do I manage to be in my photos if I travel solo 99% of the time? Over the years that I’ve traveled alone, I’ve learned to stop caring if people judge me for taking timer selfies and running into place, because the resulting photos finally give me a chance, as a solo traveler, to come back home with lovely photos that actually have me in them. This is everything you need to know about taking the ultimate travel selfie (that doesn’t look like a selfie):
But First: What’s the Best Camera Gear for Travel Photography?
- A user-friendly camera with multiple settings and a WiFi function. Though I now travel with more expensive camera equipment, I used a Sony A6000 for years and think it’s one of the most affordable options that produces an amazing quality of photography, especially since I can see how it looks on my phone screen before I take the shot.
- A tripod – Amazon makes a nice and cheap one, though it’ll break easily and won’t be great in the wind. Over time you may want to pay more for a metal one.
- A remote, or your phone
- A GoPro (optional but helpful)
- A Drone (optional but helpful)
- A telephoto lens and wide-angle lens (also optional but helpful)
How to Take Travel Selfies
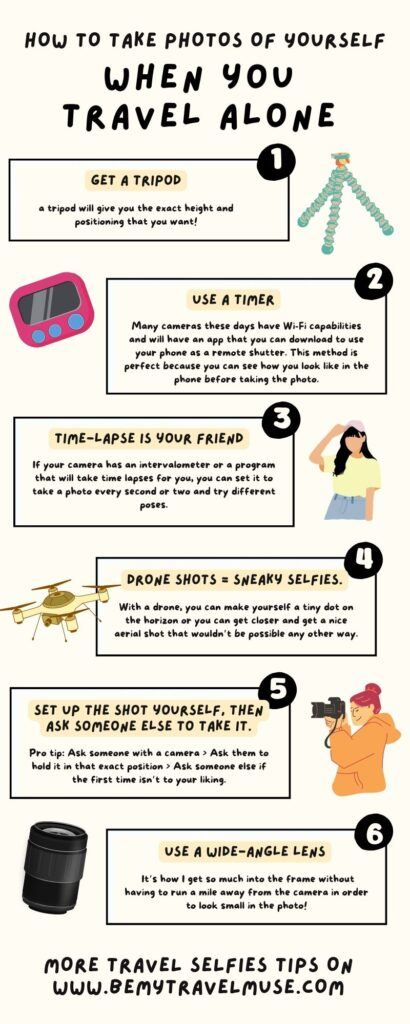
1. Get a tripod.
I resisted a tripod for three years before finally buying one. A quality tripod is usually somewhat heavy and can be very expensive, but you can also get a cheapie while you’re figuring out if you like using one or not. If you plan on doing nighttime photography or any kind of long exposure, a tripod is a must.
In these situations, the camera needs to be still, so hand-holding isn’t possible. I used to balance my camera on anything nearby, and sometimes I still do, but a tripod will give you the exact height and positioning that you want. That can be hard to achieve if you rely on whatever is in your environment instead.
2. Use a timer.
This is the most common method I use, particularly in nature, where I know I don’t have to worry about anyone taking my camera. I just set it up exactly how I want it to look, hit the timer, and run into place.
Many cameras these days have Wi-Fi capabilities and will have an app that you can download to use your phone as a remote shutter. This method is perfect because you can see how you look like in the phone before taking the photo.
Pro tip: If you don’t want your phone in your hand for the photo, set it to a 10-second timer and put the phone down or in your pocket while the seconds are counting down.
If your camera doesn’t have WiFi capabilities, get a cheap remote (they’re easy to set up), and take photos with that. Plus, they’re easy to hide in the photo thanks to their small size.
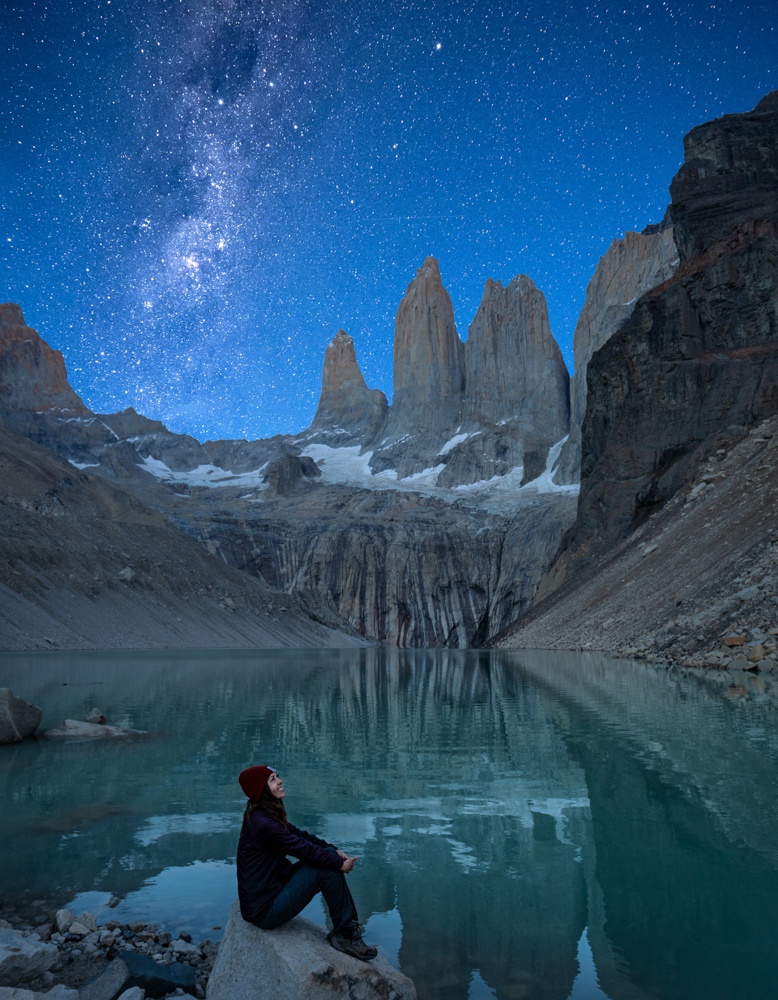
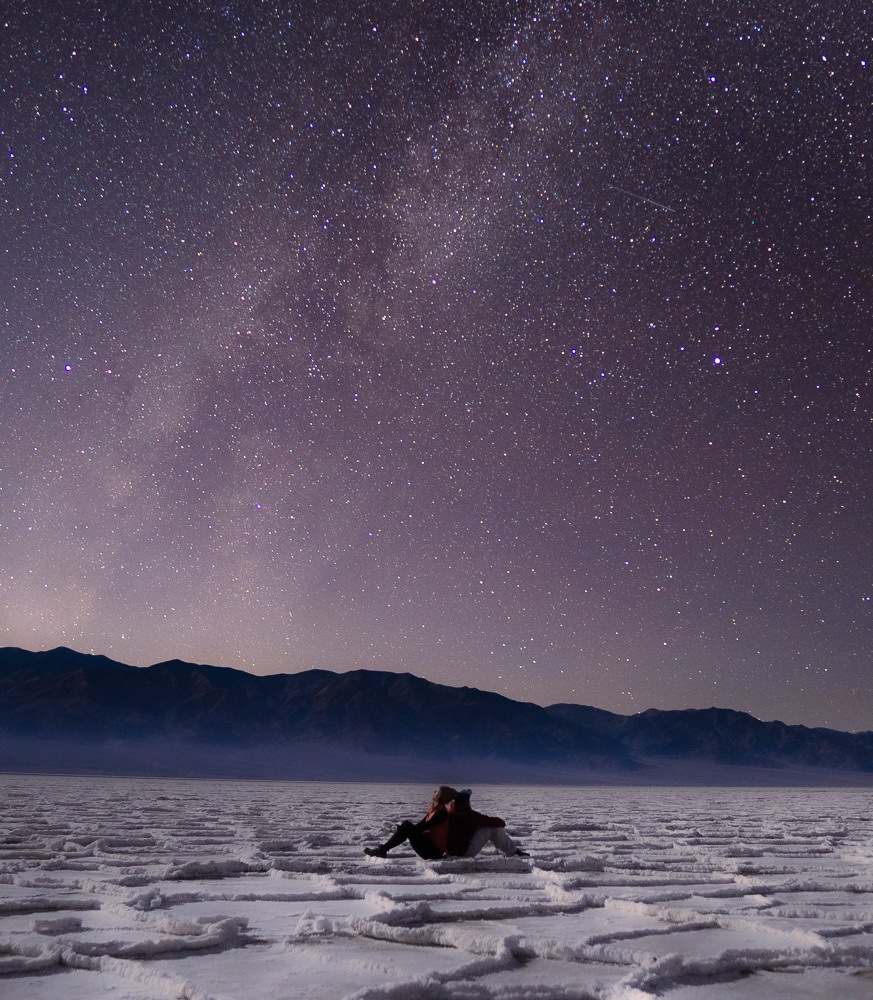
3. Try using long exposure for a nighttime shot.

If you want to take the photo in the evening or especially of the night sky, you’ll need a tripod and a long exposure setting, plus a timer release so that when the shutter releases to take the photo, it hasn’t been moved by your hand. If that doesn’t make much sense, check out my more detailed instructions on how to take photos in low-light situations.
4. Time-lapse is your friend

If your camera has an intervalometer or a program that will take time lapses for you, you can set it to take a photo every second or two and try different poses. Given that the phone and camera will lose signal if you get them too far away from each other, the time-lapse is the perfect alternative if you plan to be smaller in the photo/farther away from the camera.
This is now my favorite way to take travel selfies, although if you plan on having an open aperture, you will need to manually focus and make sure that you don’t move too far from the spot you are focused on.
Many of the smartphone apps will let you tap to focus, which makes this a better option if you plan on shooting anything lower than an F7 and moving around much.
If you have no idea what I’m talking about with the camera-speak and would prefer not to focus manually, stick to the methods mentioned above.
5. Drone shots = sneaky selfies.
No tripod? No problem. A drone is one of my favorite ways to take travel selfies that don’t look like selfies.
You can make yourself a tiny dot on the horizon or you can get closer and get a nice aerial shot that wouldn’t be possible any other way.
Of course, there are more and more regulations every day associated with flying drones, and you’ll need to check the Federal Aviation Administration app before flying in the US to make sure that you’re not flying in a helicopter or airport zone. Drones are also prohibited in all national parks, some state parks, some national forests, and wilderness areas.
But when you’re in an area where they are allowed, and it’s as beautiful as the photo above, it’s a nice toy to have! This was taken with a Mavic 2 Pro. It has a better camera than some of the cheaper models, which makes it much better for photography.
6. Set up the shot yourself, then ask someone else to take it.
Is it too crowded or wet to set up a tripod? Didn’t feel like carting one around? Ask someone around to help you out! There are a few ways to ensure that whoever takes your photo, it’s likely to come out looking good:
- Ask someone with a camera around their neck to take your photo. If they paid for an expensive camera, chances are better that they know how to use it. This person is also unlikely to run off with your camera if they already have one. Best practice is to offer to take a photo for that person before asking. Maybe she’ll even offer back without you needing to ask!
- Ask them to hold it in that exact position and take it for you. Compose the shot before you even ask, and tell them exactly what you plan to do in it so that all of the artistic direction is already dictated by you and not by them.
- Ask someone else if the first time isn’t to your liking. Politely wait for that person to walk away, then try again. It takes an extra five minutes but might result in the perfect photo.
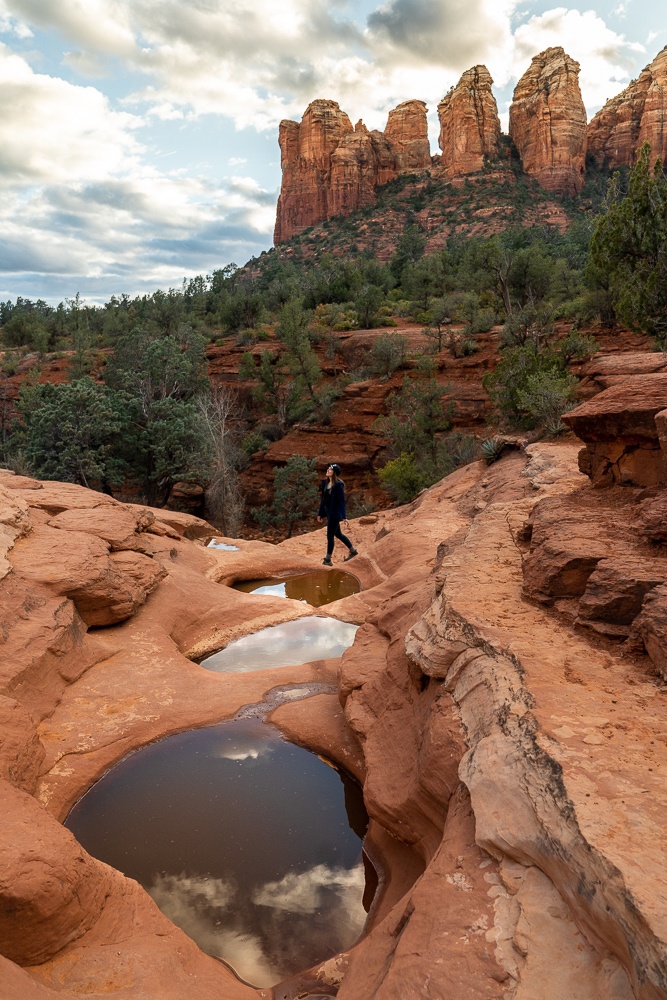
7. Balance it on something, anything, nearby.
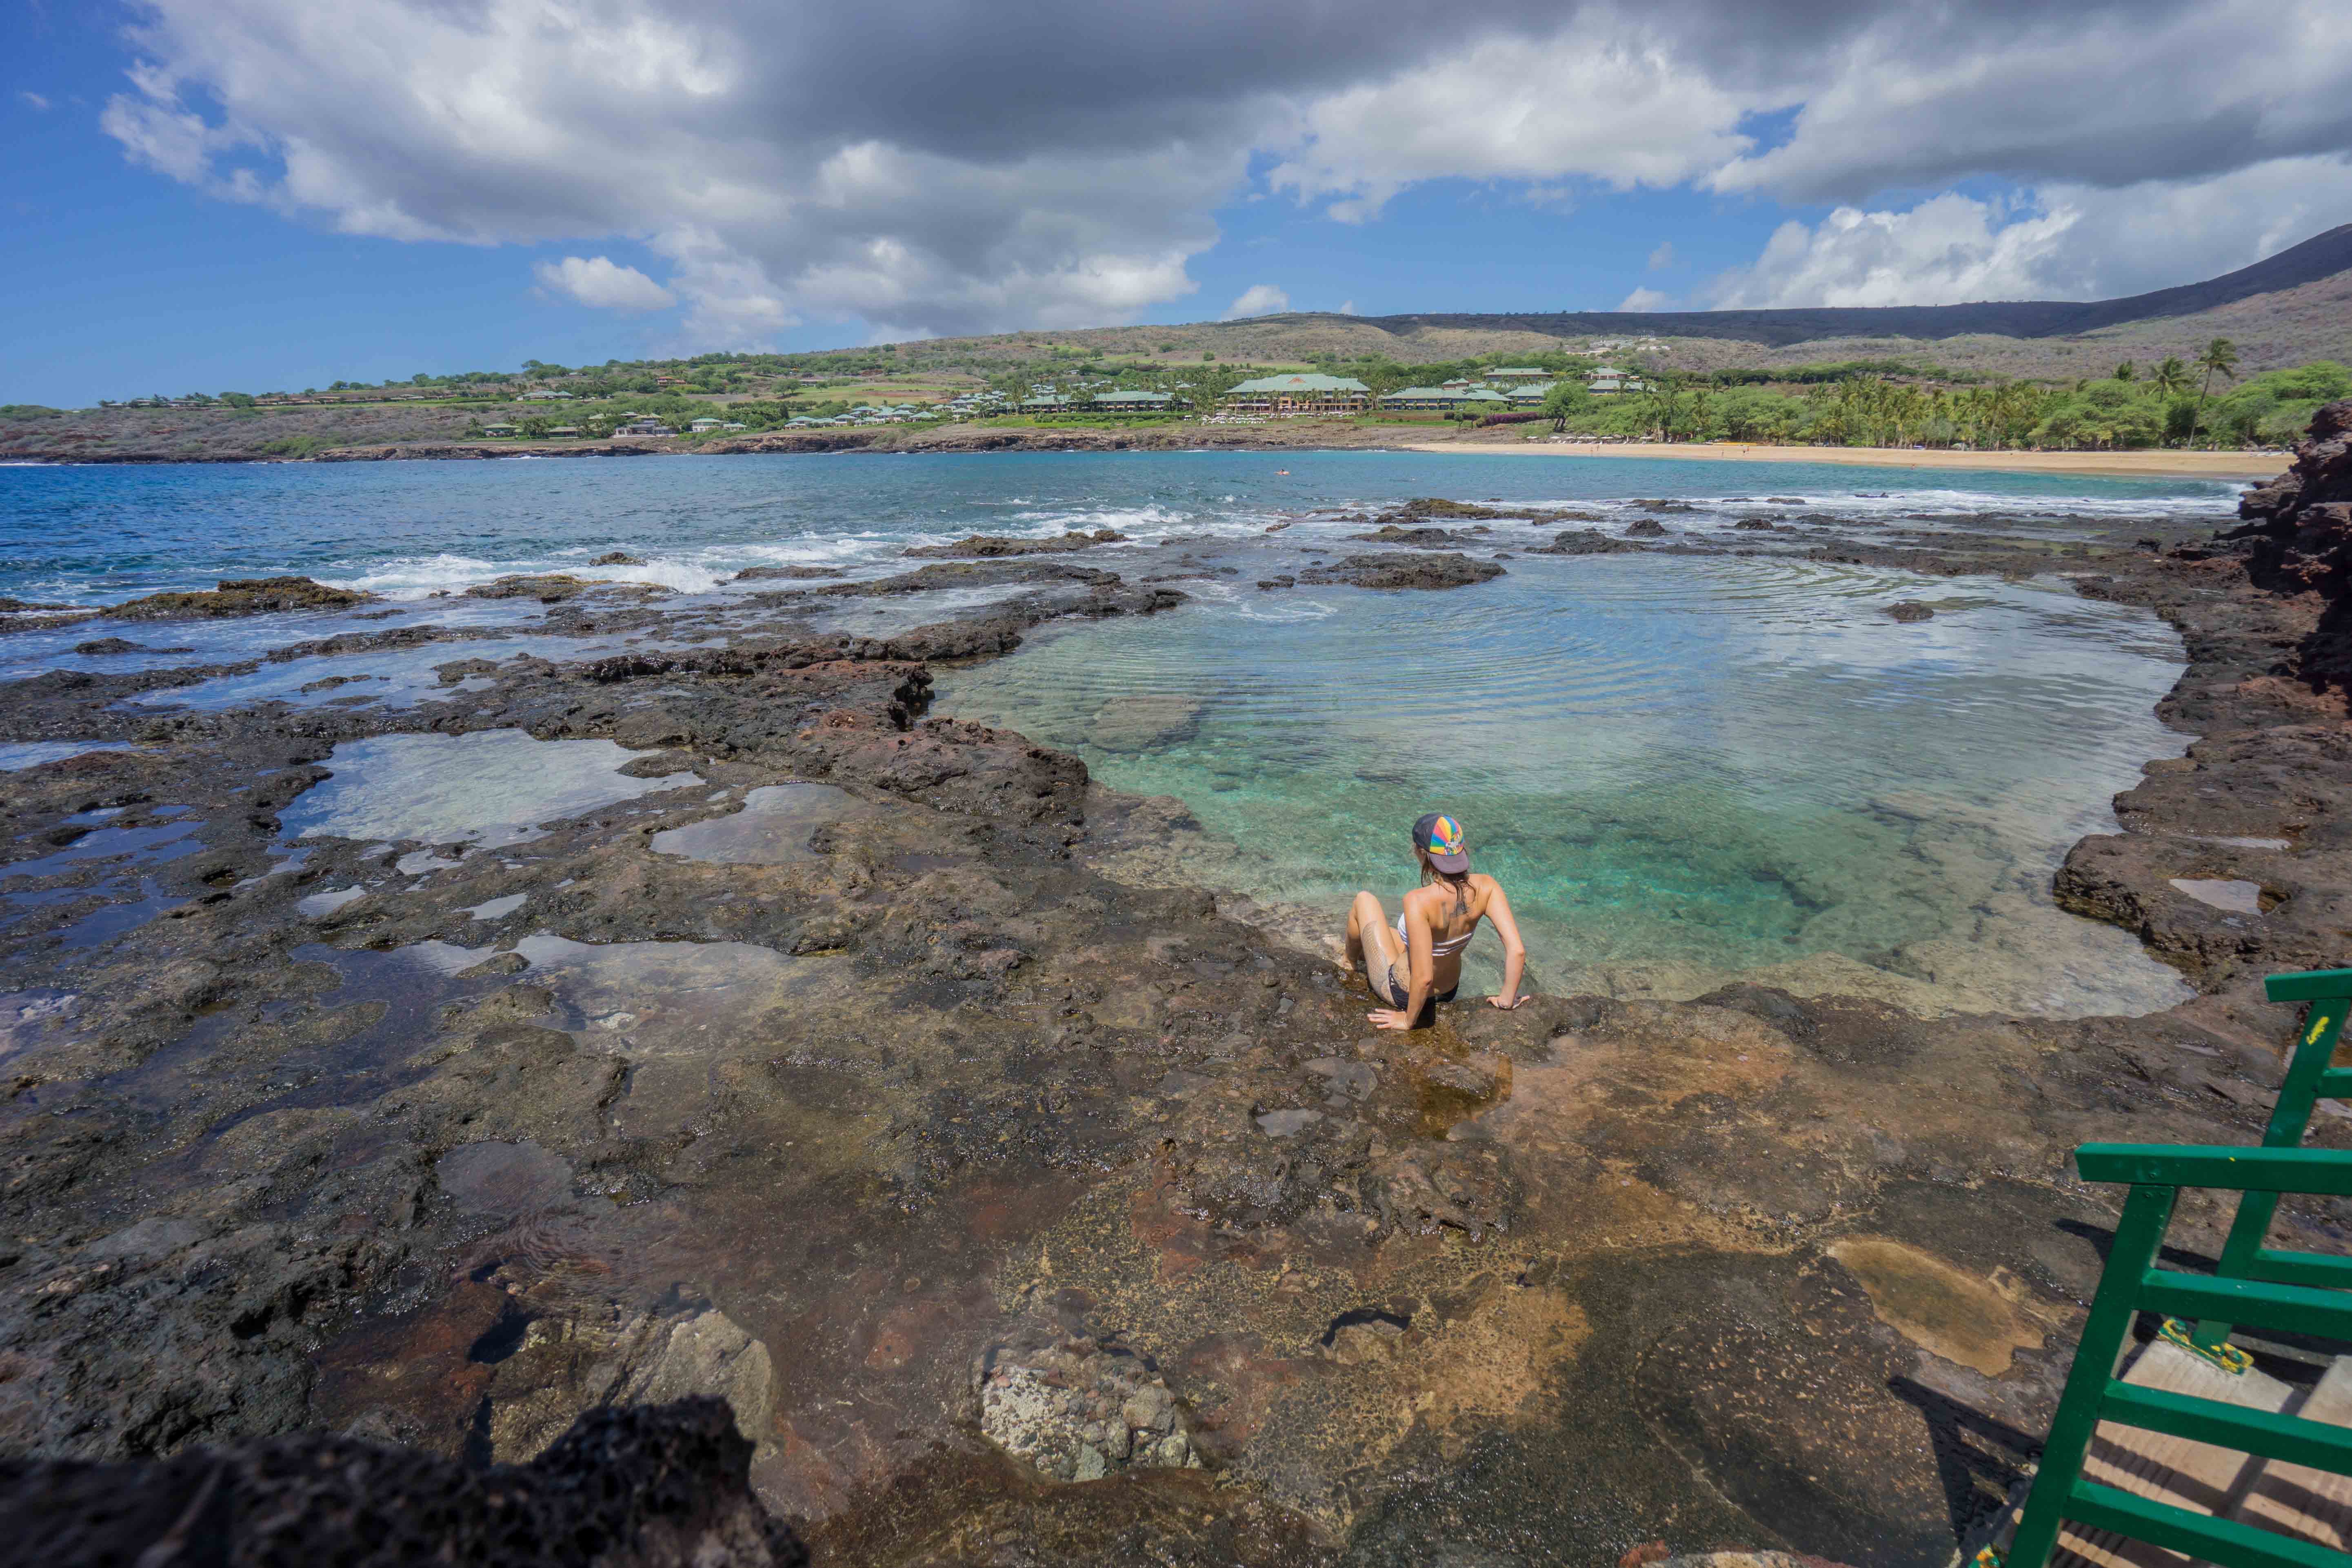
There will be times when you simply don’t want to lug your tripod along. For me, that’s actually pretty often. I’ll often balance the camera on my backpack, a wall, a rock, or just about anything I can find. Just double-check that it won’t fall before you balance it.
In the example above, I found a little nook in the rocks and put it in there. Truth be told, this shot took about 20 tries and certainly would have been easier with someone else around, but that’s the fun of the selfie!
8. Put the camera on the ground for another point of view.
I placed my camera on the ground and put a water bottle under the lens to make it face upwards for this shot. I think the perspective made it look pretty cool! I wouldn’t have had the same kind of look if I’d had my tripod along.
9. Use a wide-angle lens to appear farther away than you are.
My wide-angle lens is my big secret. It’s how I get so much into the frame without having to run a mile away from the camera in order to look small in the photo. Yes, it is expensive, but it’s the lens I use almost every time, and I love it!
10. Use a telephoto lens for a portrait effect or to make certain aspects of the photo larger.
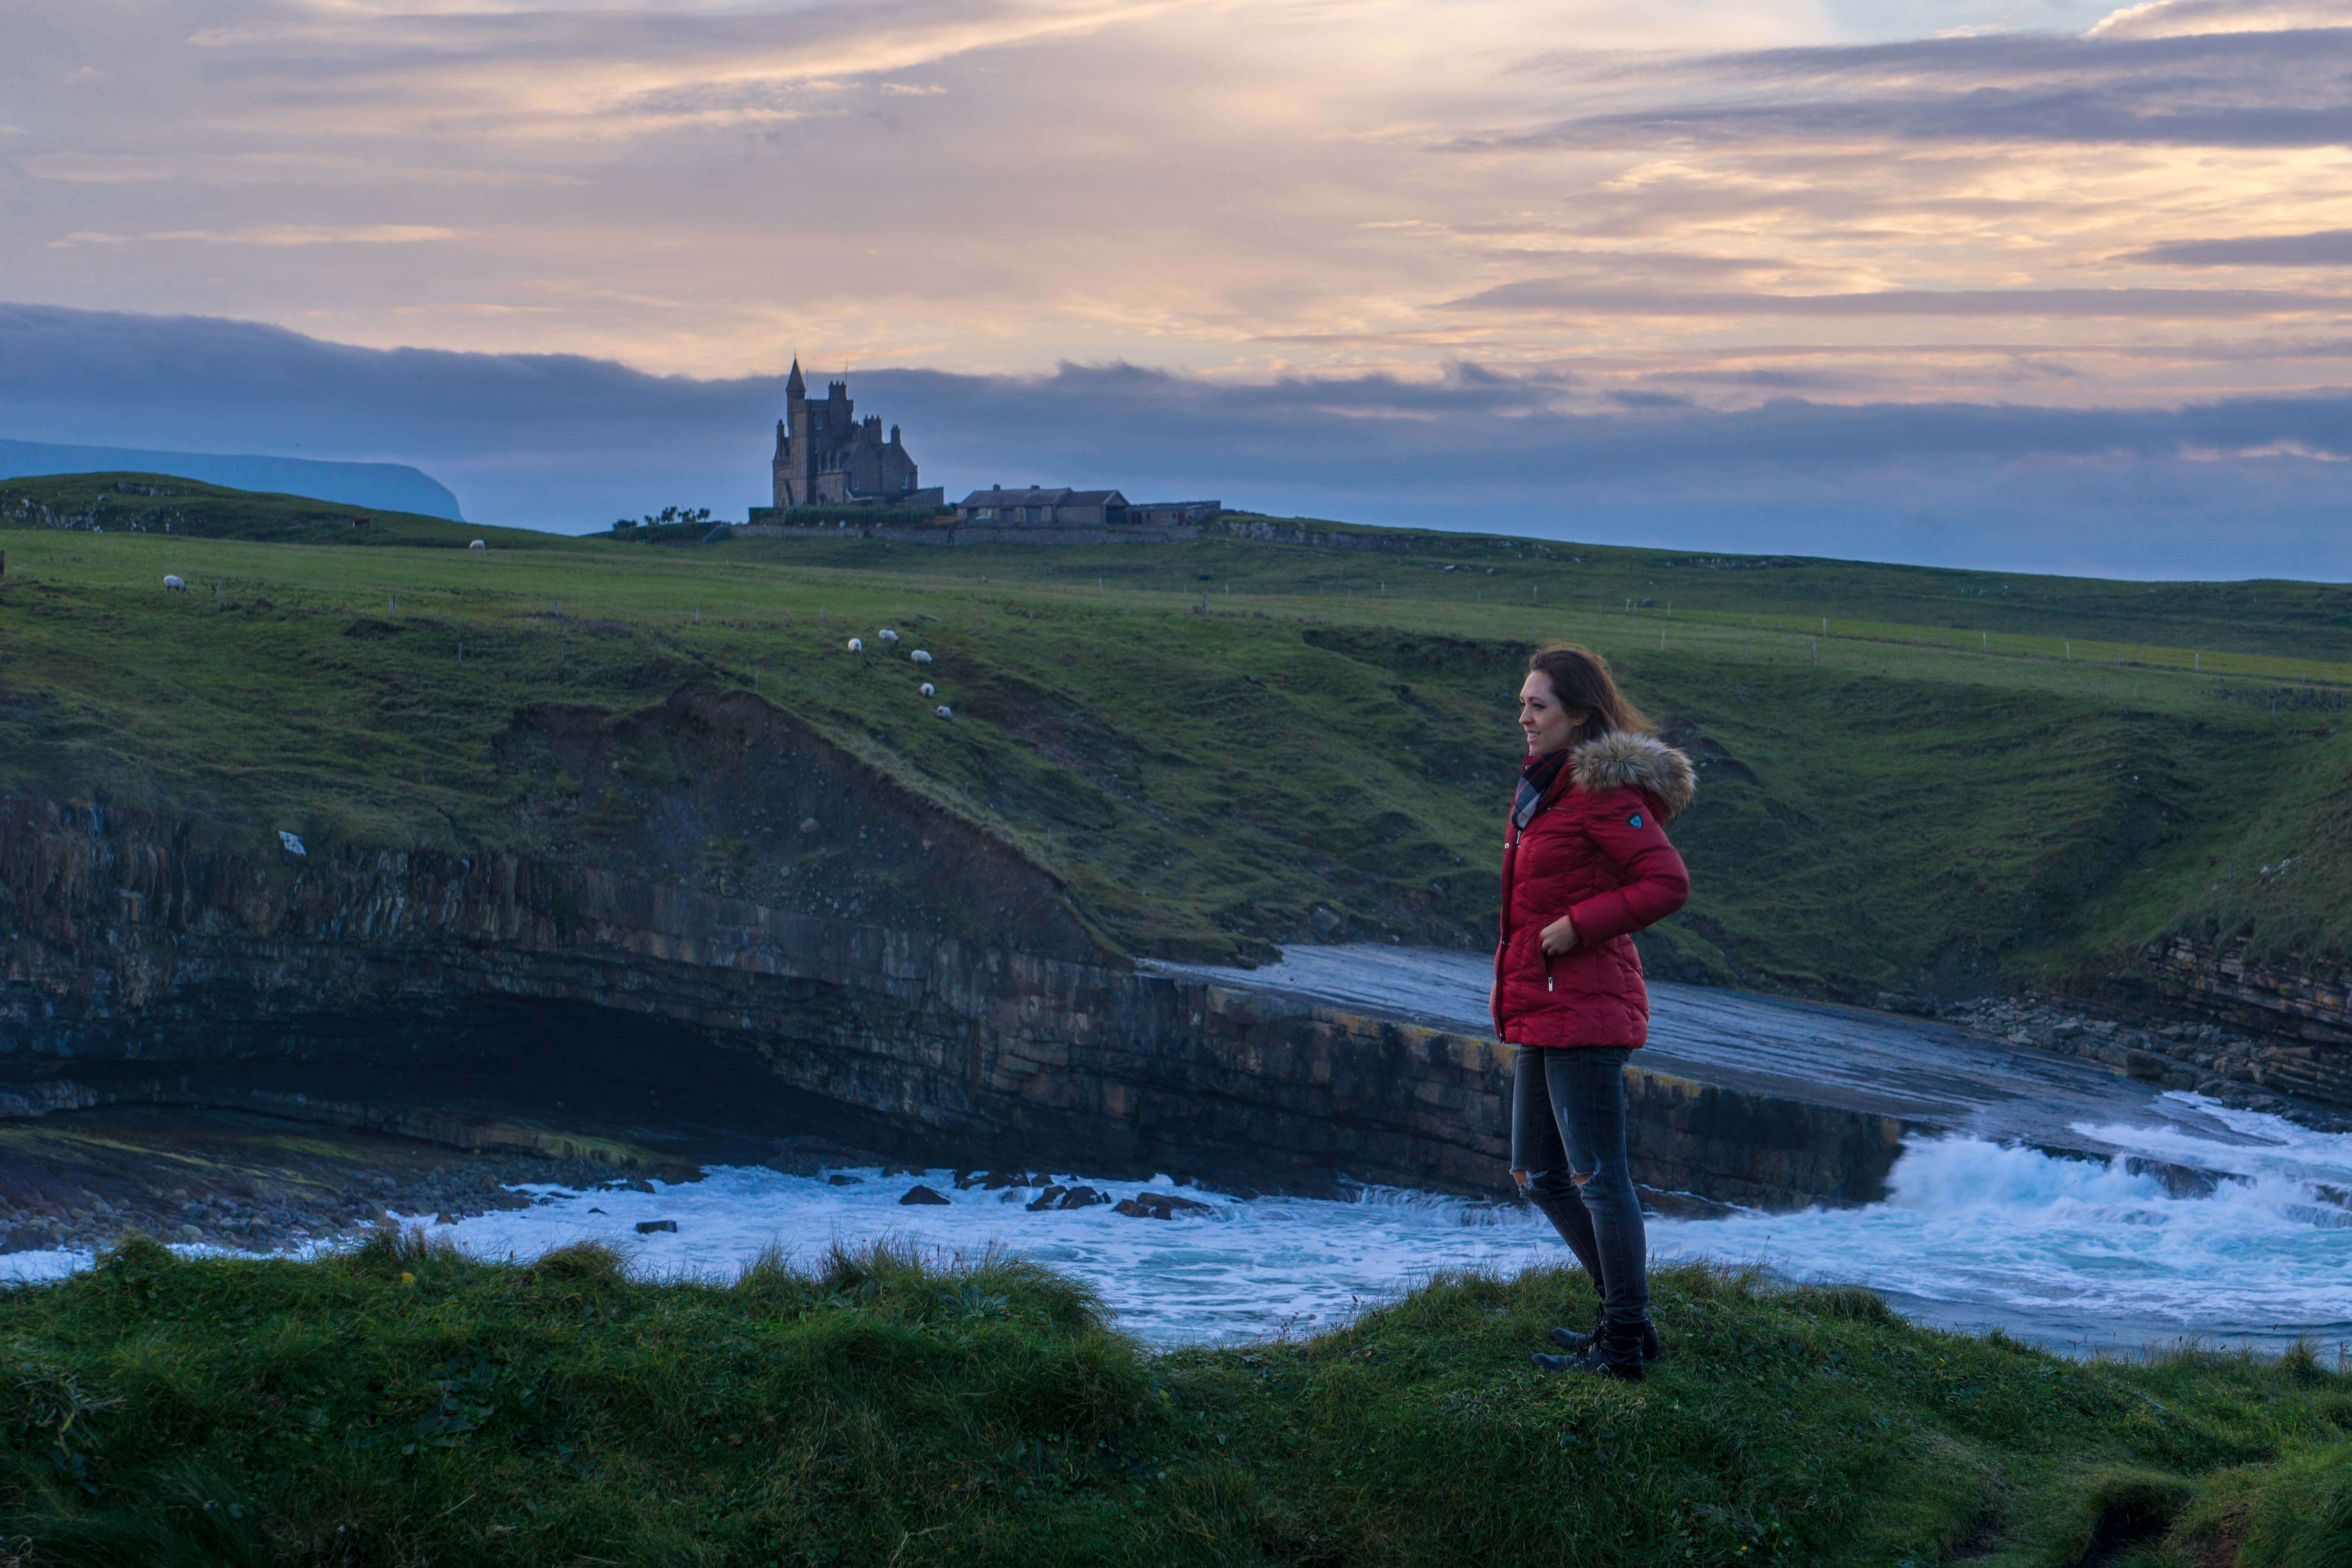
In the example above, the castle behind me looked pretty small on all of my lenses unless I zoomed in with my telephoto lens. The only way to get in the photo and to have the castle look like the proper size was to use a telephoto lens and to have the camera farther away.
It can also double as a fantastic portrait lens and is essential for most wildlife photography.
11. Want to get something overhead? Take a selfie from below
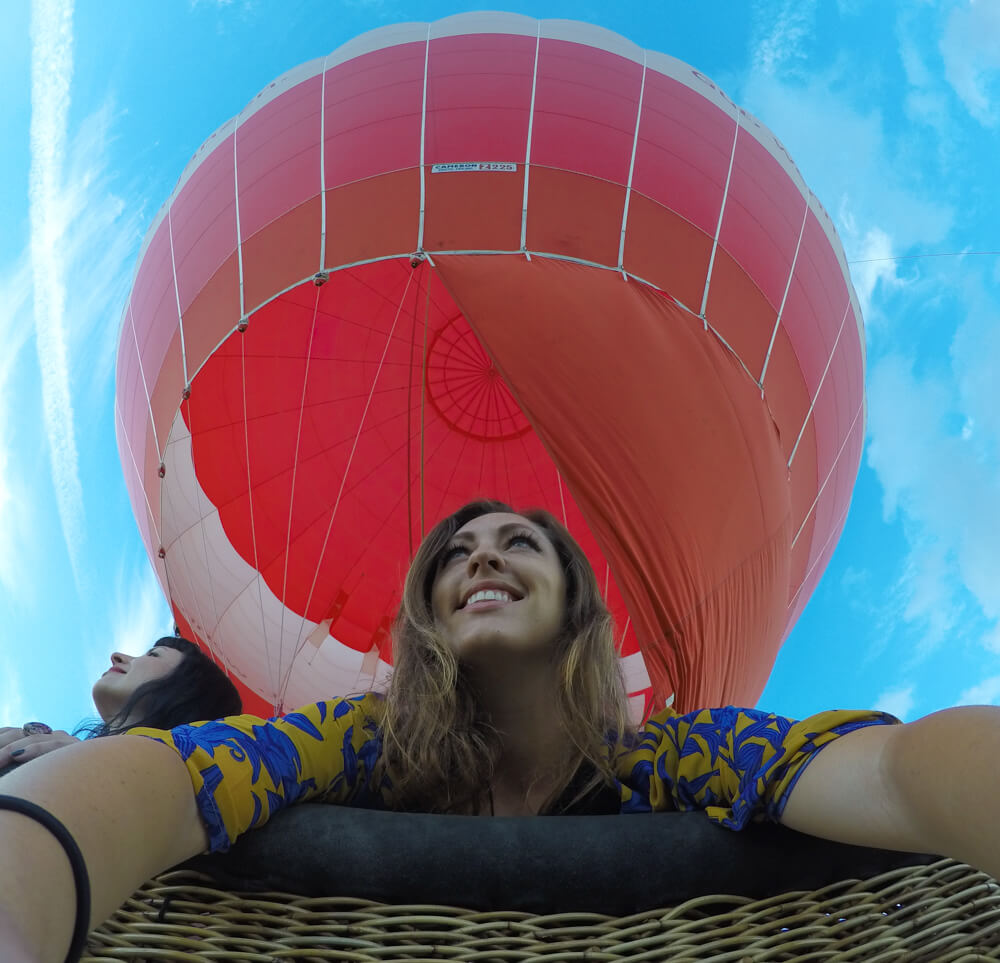
I did this one with my GoPro, which has a fish-eye lens perfect for getting big things all into one shot. How else are you going to get a hot air balloon and yourself into the frame?
GoPros are great for underwater photography as well, and can be great to have along on a tropical trip where a normal camera might get wet.
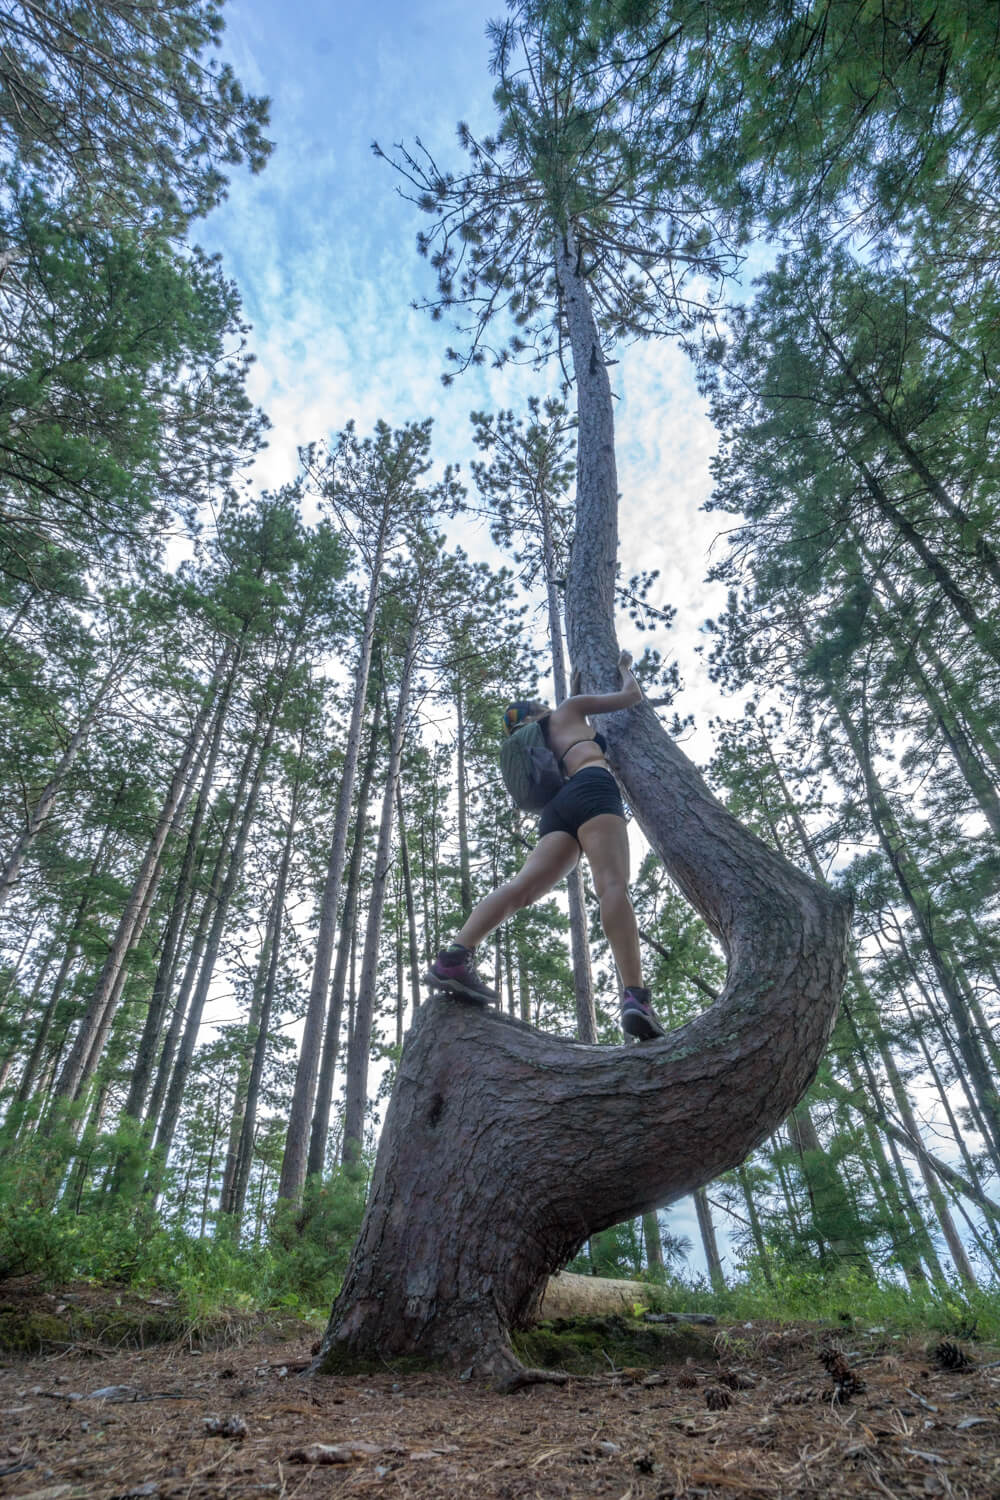
12. Pose like a pro!
When a photo looks candid, it’s easier to fall in love with, to feel enchanted by it, and to picture ourselves there. How can you achieve this when you’re taking your own photos? Practice!
It’s all about posing in a way that works for the shot, whether by using a prop, being a tiny human in the frame, or dancing or laughing in the photo.
I know it seems weird, but it actually helps with relaxing in front of the camera. My friend Kelsey in Namibia said to me, “You know I never liked being in photos before, but when we frolic or dance it’s interesting and I like those photos of myself.”
I admit, it was really hard for me to get comfortable looking natural in front of the camera. I finally understood why so many girls on Instagram face away from the camera or just have photos of the back of their heads on their feeds – modeling ain’t easy! BUT I do also want my face to be in it from time to time. I can just picture 40 years from now when my grandkids ask me why just the back of my head is in photos. We don’t want that, right?
My advice is to just keep taking them until you get one you like, even if it takes 20 tries. I’m not judging you, and who cares if anyone else is?
For some tips on how to pose, I have a 7-day pose challenge you can join here for free:
13. Stop worrying about others judging you for taking selfies.
I used to feel awkward and like everyone was staring at me when I took selfies. But the downside of leaving a place with no photos of myself in it is greater than the temporary shame I might feel from the stares of a few perfect strangers.
I’ve had the opposite happen, too, when people cheered me on as I took my own photos!
I doubt anyone cares. When it comes down to it, humans are very self-focused. And if someone does care that you’re taking photos of yourself, that sounds more like their problem than yours, am I right?
You deserve to come home with awesome travel photos of yourself. Don’t feel ashamed about it!
14. Show up at the right time.
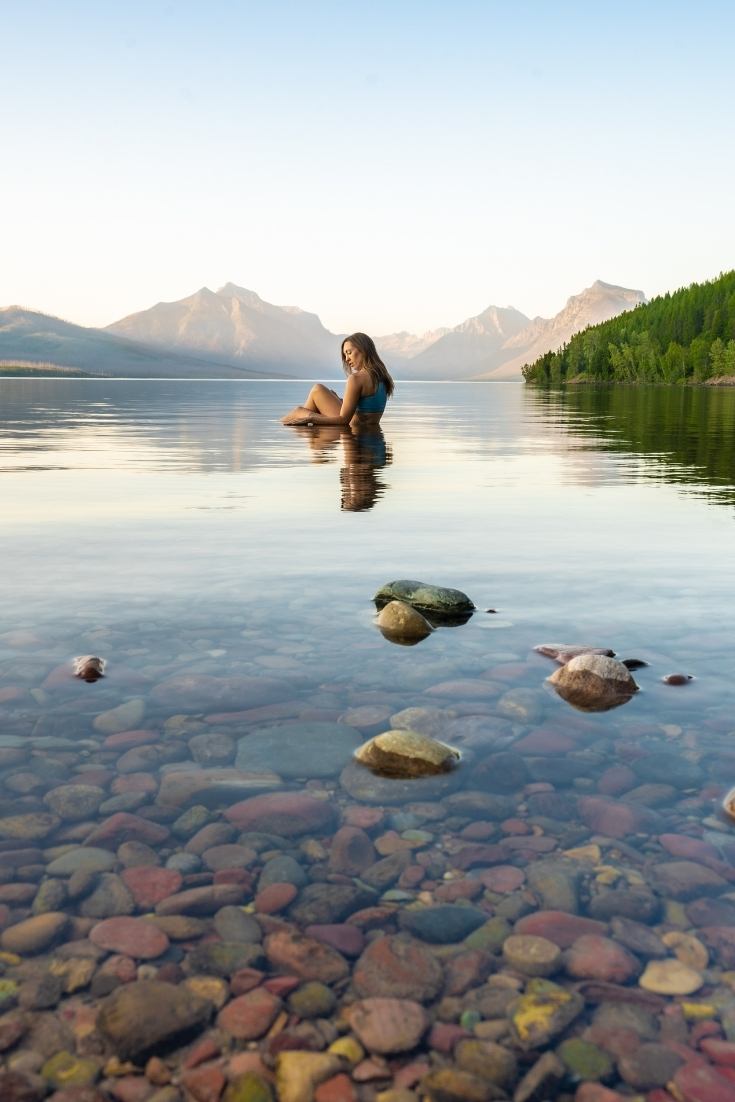
The best way to get photos with nobody in them is to show up early, or late, depending on the place! If nobody is around to make you feel weird or judge you, then you can snap away to your heart’s delight as well. It’s a double win!
Even ultra-popular tourist spots, like this lake in Glacier National Park, can be empty if you show up before people arrive or after they’ve already gone home. Most people like to sleep in and will mobilize around midday. Or if it’s a swimming destination, many people are home before sunset.
15. Lock, then click.

What if you’re in a city or don’t trust that someone won’t run away with your stuff? If you’re not with a fellow traveler or haven’t spotted another tourist (preferably with a camera as well, that means she/he knows how to use one!) sling a lock around the bag and then lock it to something fixed. I like PacSafe products with wires that I can wrap around and through things for that.
I also opt for the very early morning when there’s nobody around. The photo above is a selfie taken with my phone and tripod at around 8am in New Orleans’ French Quarter. Save for the woman who rode by on her bike and cheered me on, there was almost nobody else around!
I can almost always find someone nearby who I can ask for a photo, though, so don’t worry that you’ll frequently find yourself in this situation.

Now you have all my secrets! I hope you’ll embrace the selfie, see that it’s not a vain way to take photos, and maybe give a few of these ideas a try yourself. If you do, please share them with me in the comments or on social media!
If you have any tips to add, please share them in the comments. I’m always open to learning new tricks of the trade.
Kristin says
Exactly! They’re strangers and you probably won’t ever see them again, so who cares?
Melissa says
I still struggle with feeling like a dork when I try to take pictures of myself, whether with a timer or with a selfie stick, but that feeling does fade, while my photo doesn’t so I’ll keep pushing myself. 🙂
Marlies says
Thanks for these tips! I already do a couple of them but not all. I also have to stop overthinking what people might think! haha
Milan Michael says
Great post! Totally useful!
Anda says
Nice Blog. with amazing photograph. appreciate you 🙂
Kristin says
Yeah I usually have to do 4+ times but it’s still my preferred method too!
sam says
HI, I have a question: when using a tripod do you ever get worried that someone might some along and steal your camera if you have walked away from it and have turned around for the photo? And how do you take photos in busy cities by yourself? Also in your photos there are no other people- do you edit people out or wait for an opportunity? I find that a lot of places I visit when travelling there are just so many tourists and I wouldn’t feel comfortable setting up a tripod. Any help appreciated 🙂
Kristin says
I wouldn’t leave it in a place where I feared that would happen. I would ask someone else to take the photo in a busy city, although I don’t take a lot of city shots you’ll probably notice. To get no other people in the photo, I usually go really early in the AM and/or wait for an opportunity.
Scott says
That rainbow unicorn hat is dope! I like all these tips. Inside museums or in the woods I like to set the camera or my phone on the ground looking straight up for cool photos with a different perspective. Also, I use my Apple Watch as a remote with my iPhone. It typically has way better range than a Bluetooth remote for snapping selfies. Great tips, thanks!
Kristin says
I didn’t know about the apple watch! Very cool
Maryanne says
Heading to Ireland and Scotland in the fall, so outdoor counrty pic will be a must. Thanks for the tips and I did get a tripod stand. So many great castles and scenery I want to caputure.
Maryanne
Kristin says
Have an amazing time!
Vercoda says
Just saw this site in a random feed on my phone. The Castle shot is in Mullaghmore, Co Sligo, in northwest Ireland – and I can see that castle as a tiny bump on the horizon from my bedroom window at my parents’ house, in distant Donegal even farther away up the coast. So, interesting that you visited there; the whole coastline around Mullaghmore is pretty nice, and the shots over to nearby Ben Bulben mountain are also pretty great as you head to nearby Sligo town…
Kristin says
How cool! I love Ireland and Northern Ireland so much. I’ve been back 4 times!
Hulya Oyman says
Hello,
Like most people who like to take pictures of nature, I am not in most of them. Thanks to Kristin’s recommendations, I will buy a tripod and another camera. (Each time, I upgraded my camera, I took worse photos since I don’t have technical skills.) My most beautiful photos were taken with my simplest, instant camera since I only relied on my senses. I’ve tried to find the camera Kirstin recommended but got lost since there are so many models? Which one is the most reasonably priced, easy to operate camera?
Thank you for your reply in advance.
Hulya
Kristin says
Sony Alpha 6500 😉
Ed says
There’s a story I think you should read about a man whose name rhymes with sparcissus
Astrid says
Are you kidding? Wanting pictures of yourself traveling…while traveling solo no less! Isn’t narcissistic! XD Go touch some grass hun.
Natalie says
I believe a good light is the key to a good picture. I learned it from my friend-photographer. I love pictures taken during “the golden hour” – the last hour before sunset and the first hour after sunrise. These times provide the perfect light to capture stunning photos.
Kristin says
Agreed!
Mukesh Sharma says
Really appreciate your work, Kristin 🙂 Your article is impressive & applicable IRL.
Kristin says
🙂
Femi says
Reading this article was like a revelation—I can totally relate to your grandmother and her rare appearances in travel photos. But you know what? I’m determined to change that! I’m going to show this post to my wife and make a pact that we’ll both step into the spotlight of our travel adventures.
The struggle is real, though. We’ve attempted the timer method, but let’s just say it resulted in some hilarious “blurry dash” selfies that are better suited for a comedy show.
But now that I’ve read this article, I’ve got some clever tricks to try! The time-lapse idea sounds awesome for capturing natural moments without the awkwardness. And asking a stranger to take our photo? We’ll have to nail the art of getting a good shot so they don’t cut off our heads or capture us in a weird mid-blink moment!
So, wish me luck on my mission to turn my wife into a fearless selfie-taking superstar! And thanks for sharing these fantastic tips.
Cheers,
Femi.
Amanda says
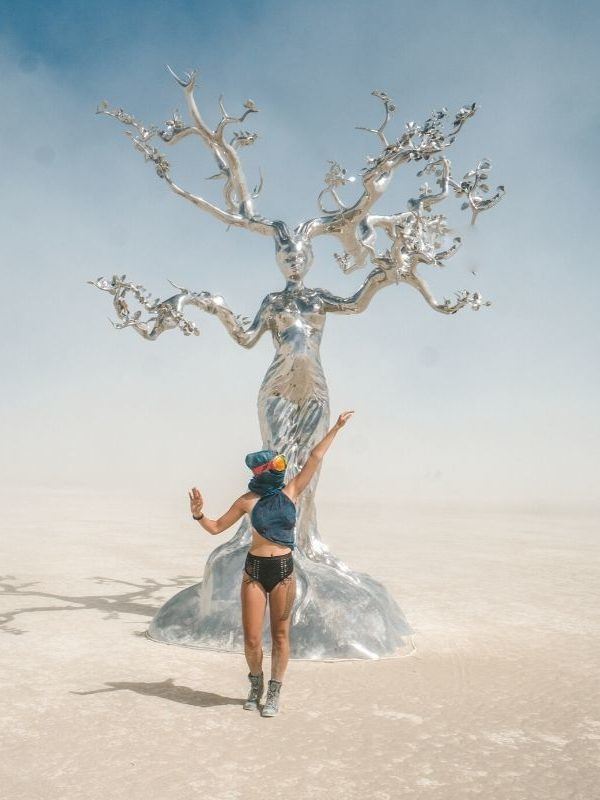
Okay, but tell me more about that adorable suit you’re wearing in the thumbnail…because I need it in my life!
Also, going to South Africa/Botswanna/Zimbabwe next week and it all started based on YOUR recommendations. I’ve been to 10 new countries in 18 months (and I’m not just ticking off boxes here) and your blog has changed my life. I’ve always loved travel, but life got in the way. One day I realized I spent over 10 years waiting for the “right time” to go on my dream trip, and the “right time” was never going to come. The right time is now! I’m actively saving money so that I can go on one international trip a year and see the world I’ve been missing. Your story has been so helpful to me while I make up for lost time.
Kristin says
Wow I’m so honored! Thanks so much for letting me know! Makes all the hard work worth it <3
I got the suit on Revolve a few years ago.
Riley says
How do you lock your camera? I’ve got a 3 foot retractable cable lock for my bags in hostels/airports and didn’t think about using it for my camera, but I’m not sure how I’d lock it on to the camera itself? While I don’t care what others think when they see me taking photos, I’m definitely VERY worried about someone running off with my camera! Thanks!
Kristin Addis says
I haven’t come up against this issue since I don’t often take selfies in big, crowded cities where this could be a problem. Most of the time I’m on a beach or somewhere natural. There was one time I was worried about this, and I asked someone who was also visiting the same place if he could help me get photos of myself, and I offered to take some of him as well and email them to him after. It worked out great!