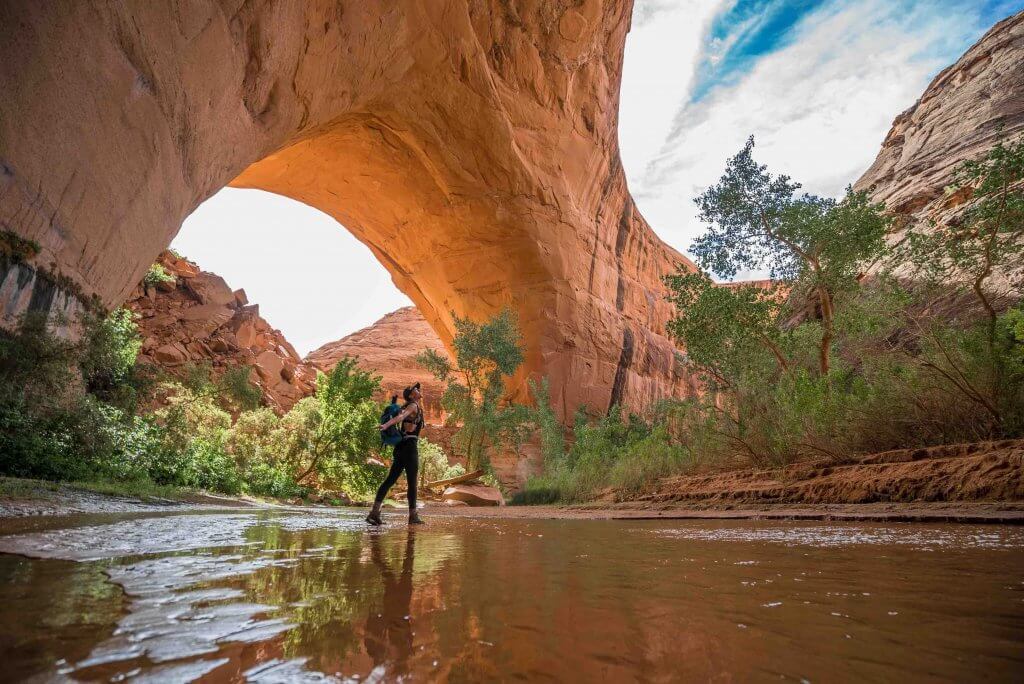
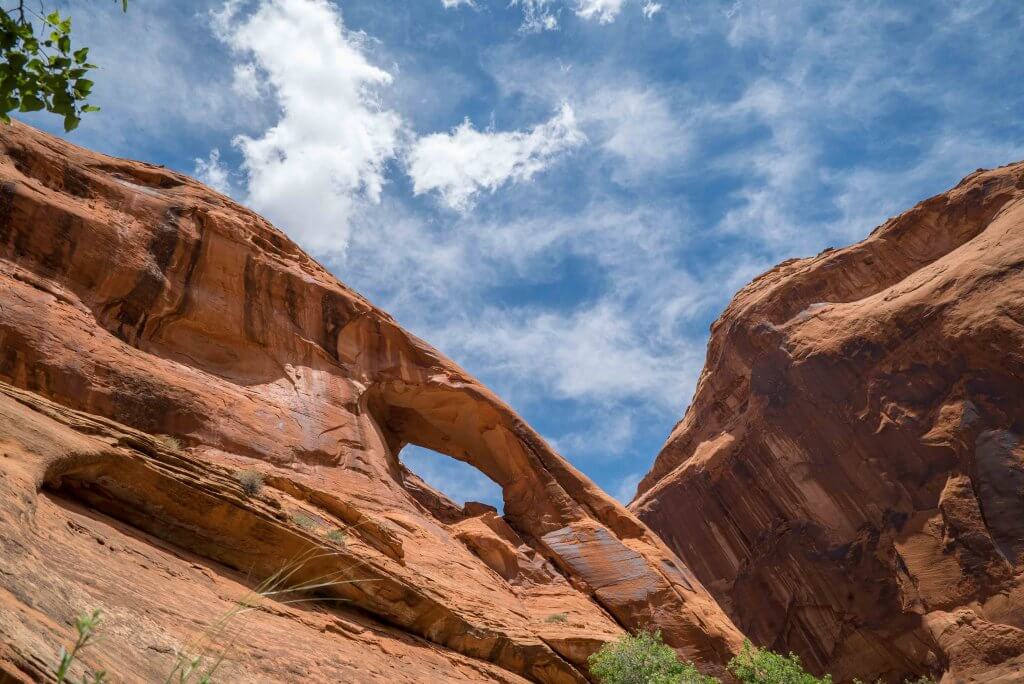
Picture giant orange archways with a lazy, low river running through – the very same river that carved this incredible landscape over millions of years. It seems like it should be raging but instead, it just coasts right through, leading you from adventure to adventure. Now picture it all to yourself, with the occasional other hiker passing by with a friendly wave or a hello, equally blown away by the incredibly talented mother nature.
This is what I found at Grand Staircase Escalante National Monument in Utah. This is a massive sequence of sedimentary rock formations stretching almost 2 million acres from Zion to the Grand Canyon. An outdoor enthusiast’s dream with hiking, rock climbing, bouldering adventures, 4×4 roads, and wide open spaces, you can climb all over and it’s free camp. It’s more rugged as well, without the paved roads, busses, and crowds of the national parks but without the amenities, maintained trails, and services, either.
The beauty is in the remoteness and the freedom to enjoy it, as well as the associated self-reliance.

It was tough to pick which hike out of probably thousands that I could do in the Grand Staircase. However, after seeing a few photos of the giant arches, my heart was set on Coyote Gulch. This one is best accessed via the nearby town of Escalante off scenic byway 12, the same one you’d find yourself on if you’re driving from Zion or Bryce to Arches National Park.
My Coyote Gulch One Day Hike
There are four different entry points for Coyote Gulch. Most of them involve at least one overnight in the canyon and potentially a 4×4 road as well. I didn’t have the gear with me for an overnight hike, or the time. So I decided to just go and try out the ‘sneaker route’ and hope for the best.
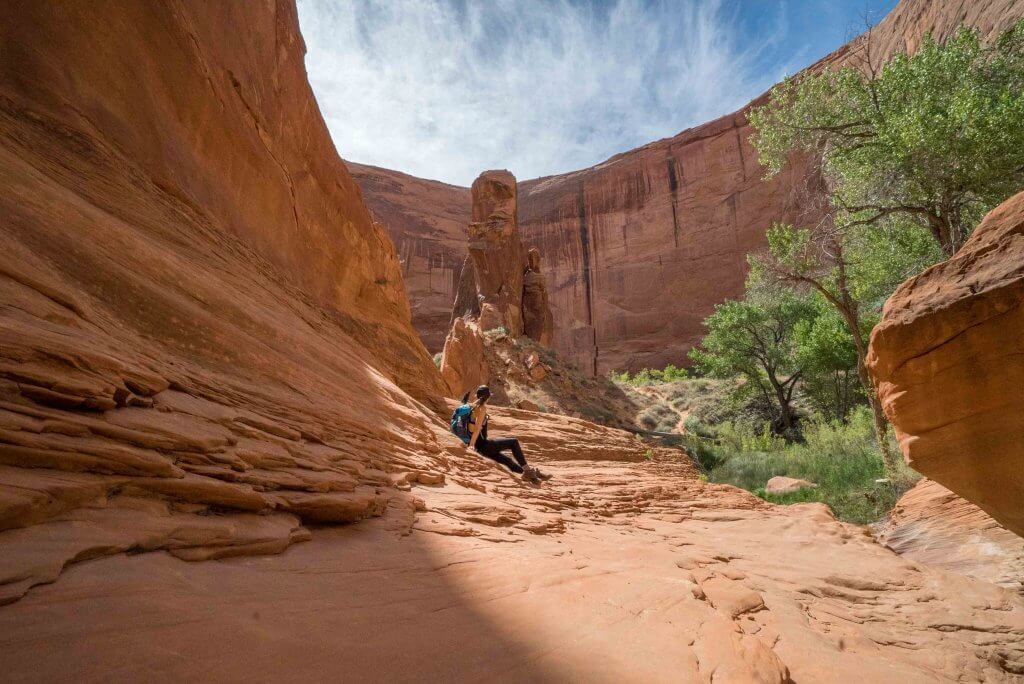
Turns out that it is doable in one day and it’s one of the best hiking experiences I’ve had! You just have to do a bit of trail finding and scale a 250-foot rock face to get down. It sounds tougher than it is, though, so don’t worry!
The Route
Since I wanted to do Coyote Gulch in one day, and I was solo without a friend to drop me off at one end of the gulch and pick me up at the other, I did this as an out-and-back hike to Jacob Hamblin Arch (or the ‘sneaker route’ or the water tank trailhead). It ended up being 12 miles and took up most of the day, particularly since I stop so often to film and take photos.
Before embarking on this trail, I’d read that it’s hard to find in places, but I didn’t have any trouble.
I have a bad sense of direction — I’m talking no internal compass at all people — and I didn’t get lost!
The trail is marked by rock cairns, which are stacks of rocks to help guide your way. Each time I reached one, I could see another in the distance. With those, I found the trail easy to follow. I had also downloaded Utah as an offline map on the free maps.me smartphone app and found that they had all of the major arches in the gulch already plotted in the app. I’d highly recommend downloading this back when you still have service (you won’t in most of the Grand Staircase) and bringing it along on your smart phone.
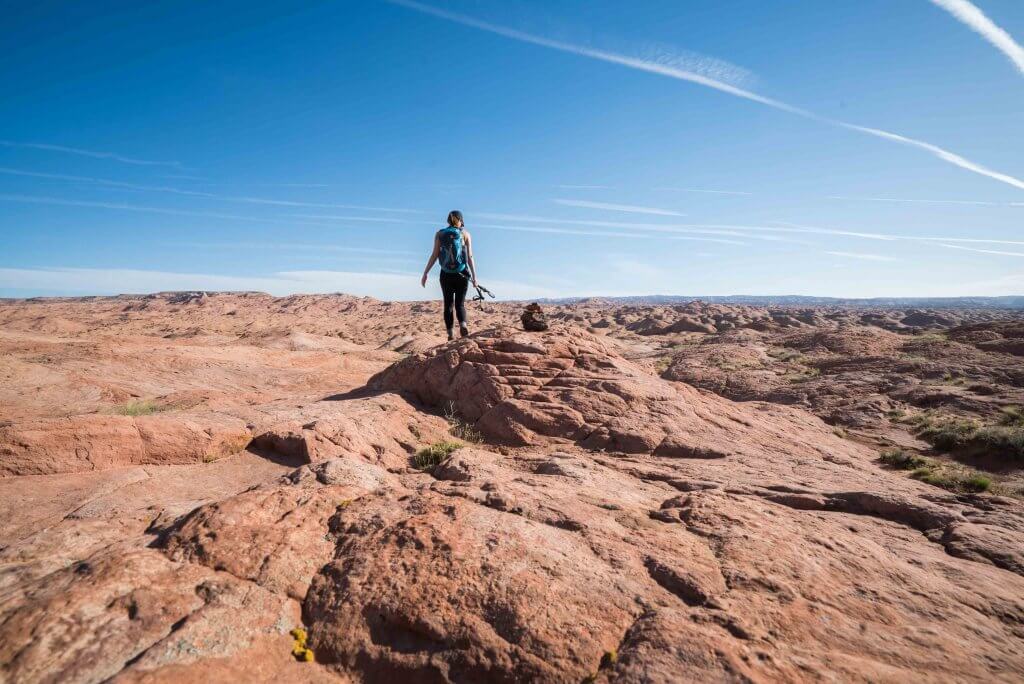
From the water tank it’s a two mile walk over rocks and in sand before reaching the descent point down to Jacob Hamblin arch. You’ll see a rock that is hollow underneath that you can tie your rope around. You might also find that there’s already one there.
I brought a 200-foot rope along which I bought in Escalante at Utah Canyon Outdoors for $100, only to find when I arrived that one was already tied to the rock and had been left there by some kind soul.
It is steep and a little bit nerve wracking, truth be told. Although it wasn’t as terrifying as I thought it would be. It wasn’t climbing down that would have been difficult, though it’s a long way down at about a 45 degree grade. Rather, it’s coming back out that would be tough without a rope. I suggest bringing one along since you can’t count on there being a solid one there waiting for you.
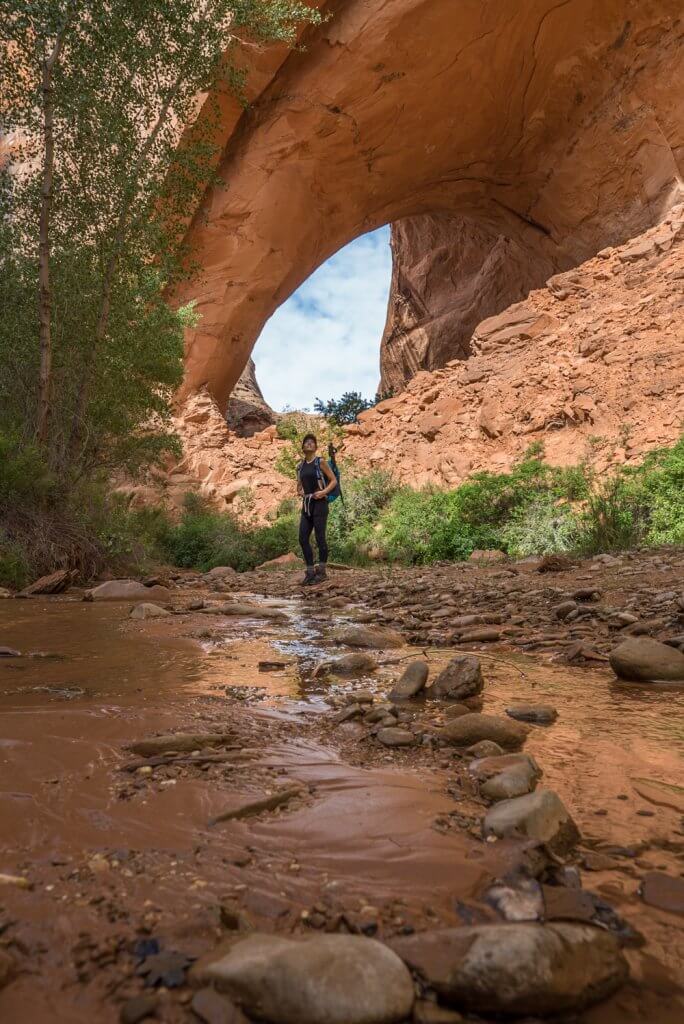
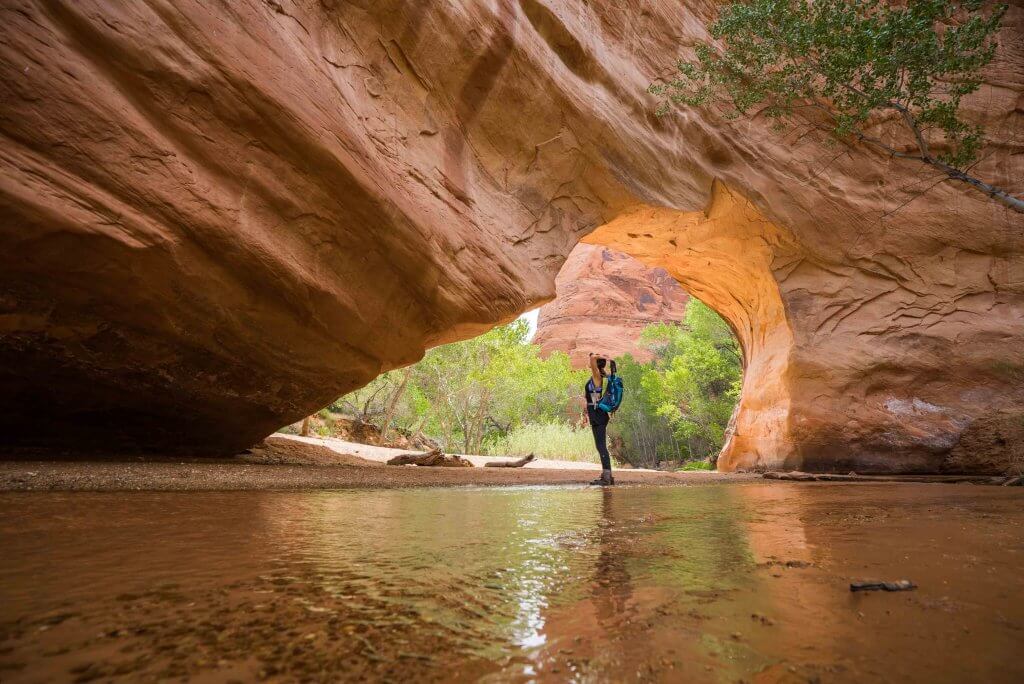
Once you’re down, the first thing you’ll see to the left is the massive Jacob Hamblin arch.
Be sure to wander around it for a little while before turning in the other direction to proceed further down to the other arches and the small waterfall. It’s worth seeing it from several angles.
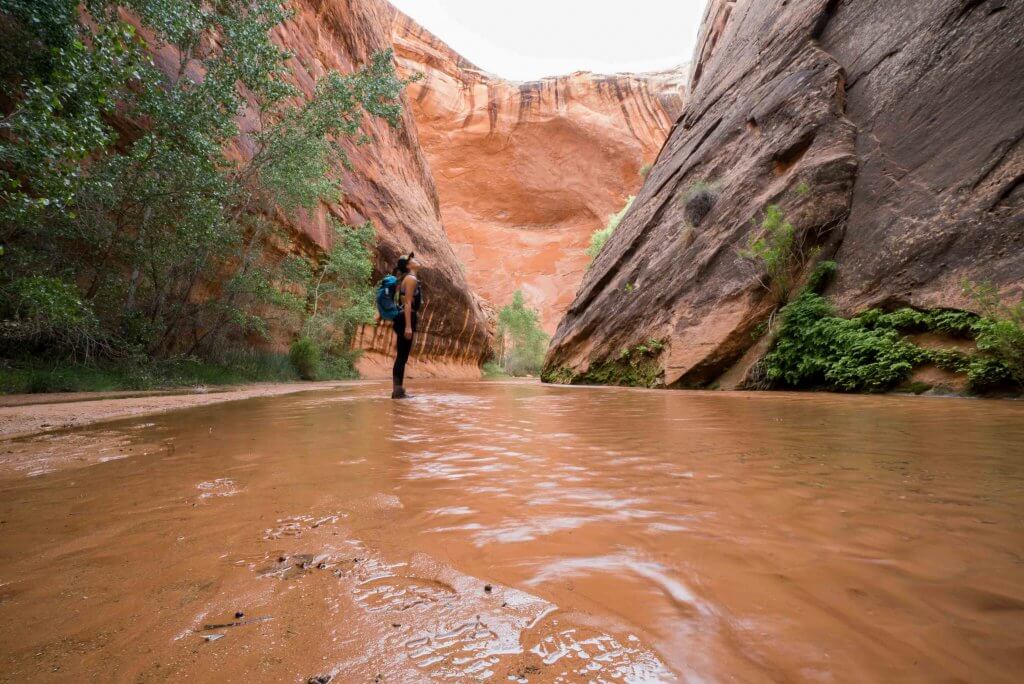
From there, I navigated with my app to the Coyote Natural Bridge and realized that the trail always runs along the water line, and sometimes through it.
For this reason I suggest bringing a way to clean or filter the water so that you don’t have to carry much throughout the day, and waterproof hiking boots lest you end up doing most of the hike barefoot, which is probably fun, too.
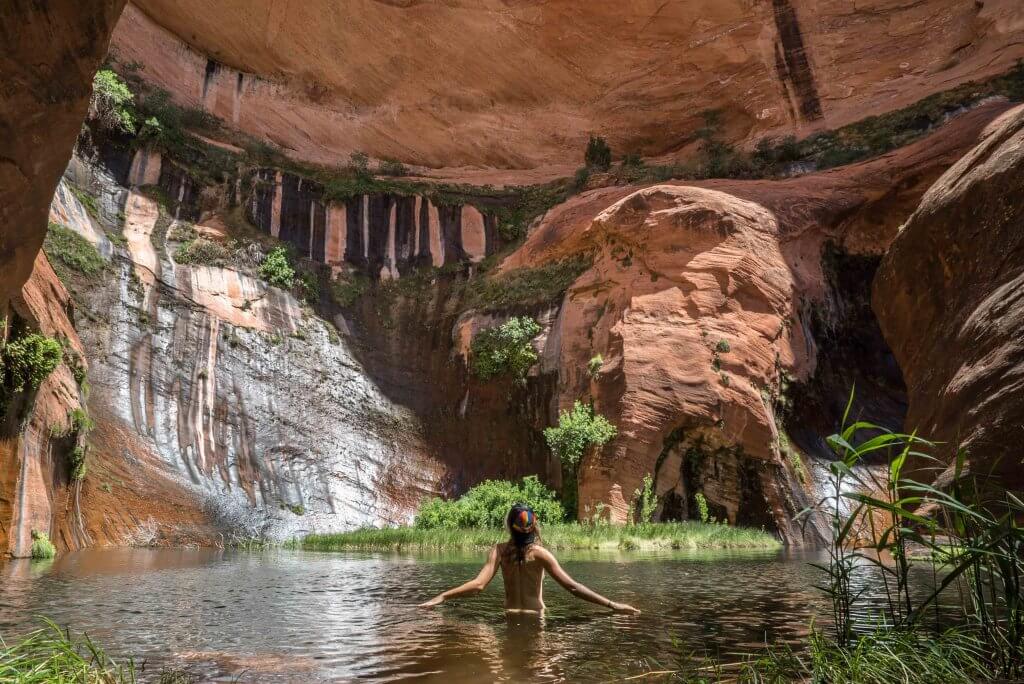
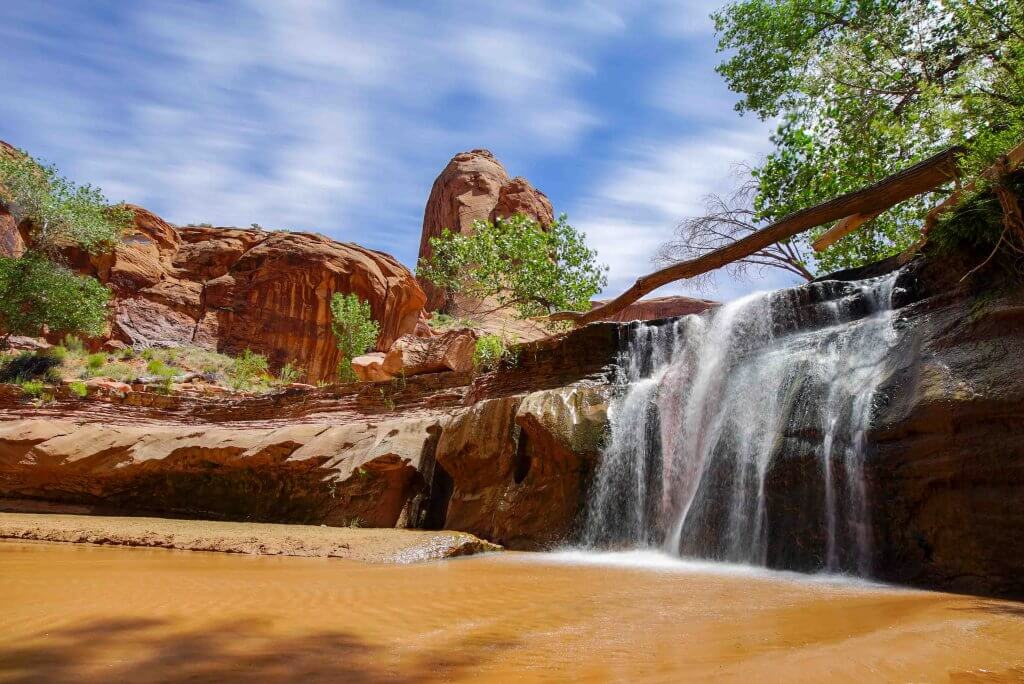
The canyon stays beautiful throughout the entire hike, with little waterfalls and areas where the design of the rock, so artfully carved by the water, looks like it couldn’t be of this world.
There’s also a little hidden lagoon, which you can find here.
Special thanks to the lovely couple who I ran into on the trail for suggesting that I check this out. I didn’t get the chance to tell them that I love them for letting me know it exists.
My terminus for the day was cliff arch and the waterfall. Be careful here as the trail gets a bit confusing with a bunch of social trails branching off and ending in odd places. I lost the trail for a while and had to navigate my way back.
Stevens Arch is meant to be amazing too and would require a few extra miles. Unfortunately I couldn’t make it that far, but with less time spent taking photos and videos, a normal hiker could probably reach it before turning around and heading back if you’re up for a long day.
From there I turned back and made my way back to Jacob Hamblin Arch, back up the rock face, and walked the two miles to the car. I started my hike at 7am and finished before 3pm, walking a total of 12 miles that were mostly flat, but still exhausting since they were almost exclusively through sand.
For reference, there are several different ways to get into Coyote Gulch and each have their advantages and disadvantages. The following would require a multi-day hike for most hikers:
- Hurricane Wash: This one appeared to be the most popular entry point and is a hike mainly down a sandy “wash” (where the water sometimes forms a river in the rain but is otherwise dry) before reaching the canyon. I passed by the parking lot on my drive and saw plenty of hikers getting ready for their trips. I didn’t see the benefit in adding the extra mileage on since the main things to see are in the canyon but if you want to do this route and avoid the rappelling this guide by a fellow Kristen is helpful.
- Red Well: Similar to hurricane wash, you’ll be hiking for about 7 miles before entering the canyon.
- Crack in the wall: Another option to shorten the hike. It’s the same turnout as the water tank where I parked for the Jacob Hamblin arch entry called Forty mile ridge, but you need a 4×4 vehicle to get through the sand for the final two miles of the drive.
Getting to Coyote Gulch
First, get to Escalante off of highway 12 and navigate to Jacob Hamblin Arch using Google maps off of BLM 200.
The drive to the trailhead will take you about an hour and a half to two hours to go the 36 miles on BLM 200 unless you’re driving a 4×4.
Admittedly, I do tend to drive like a grandma on gravel and corrugated dirt roads because I know it’s easy to lose control on roads like that. I was probably averaging 30 mph if I’m being honest. It took me about 2 hours each way.
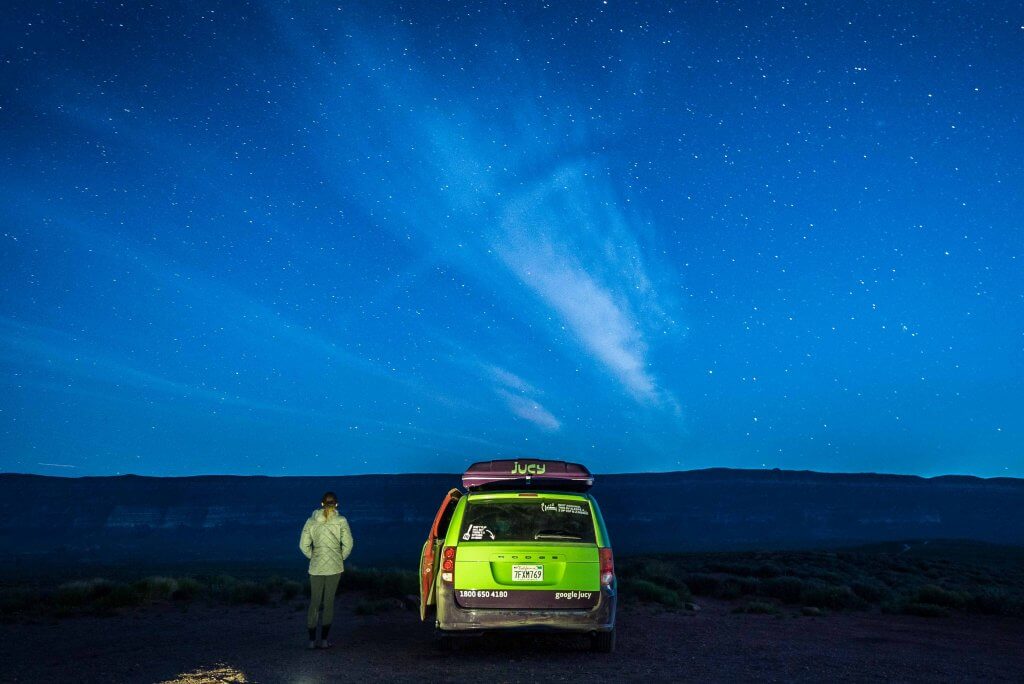
The van that you see in the video is a camper van from Jucy, which I wish I could still recommend. However, they no longer operate in the USA. Indie Campers seems like a great alternative.
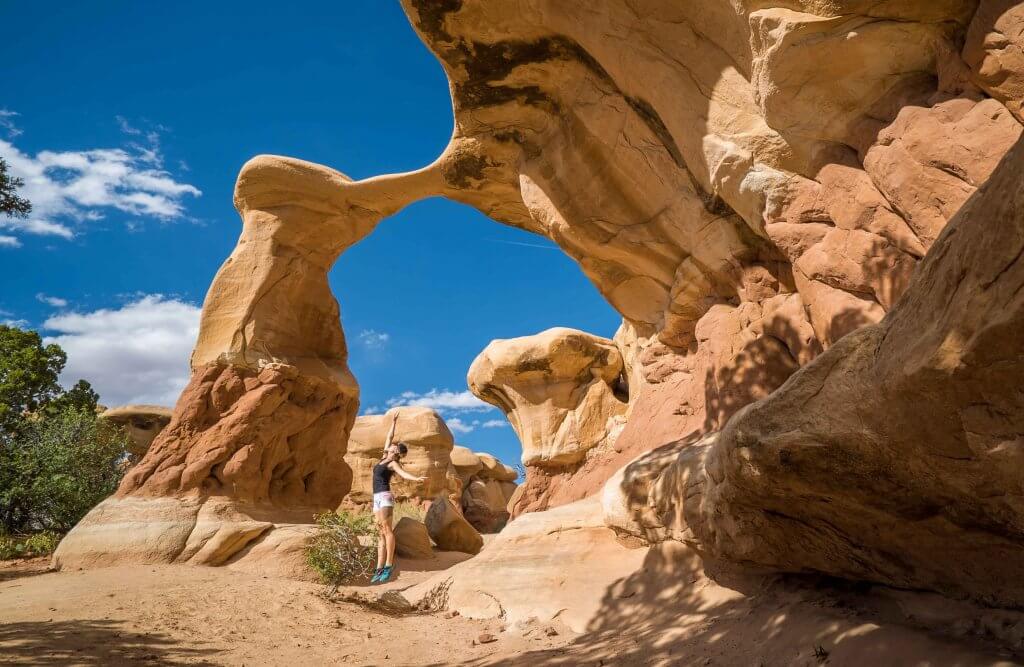
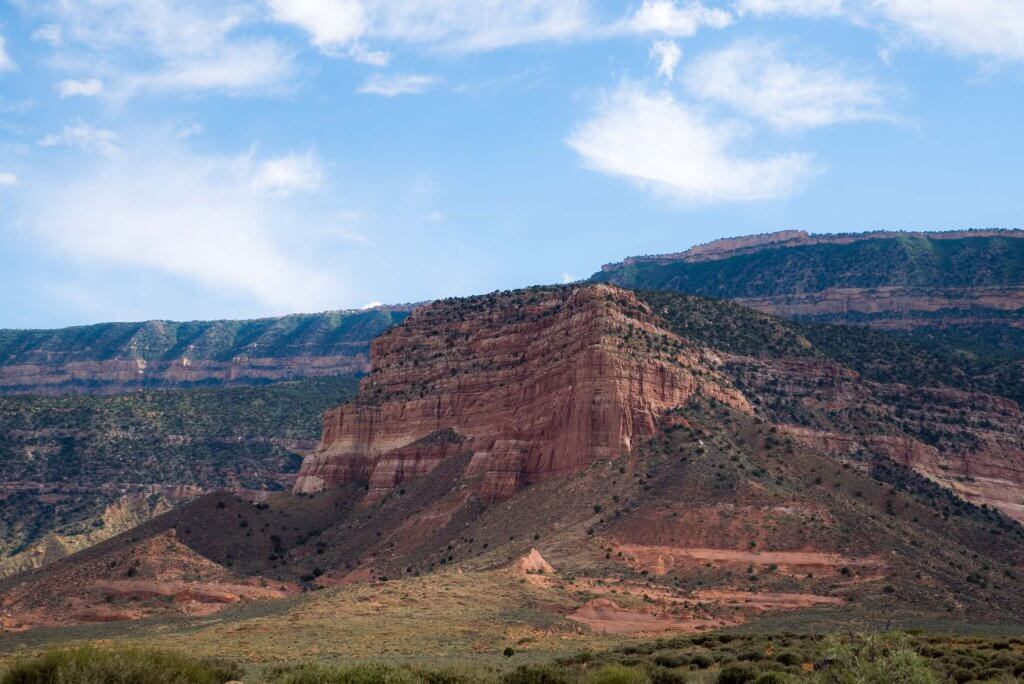
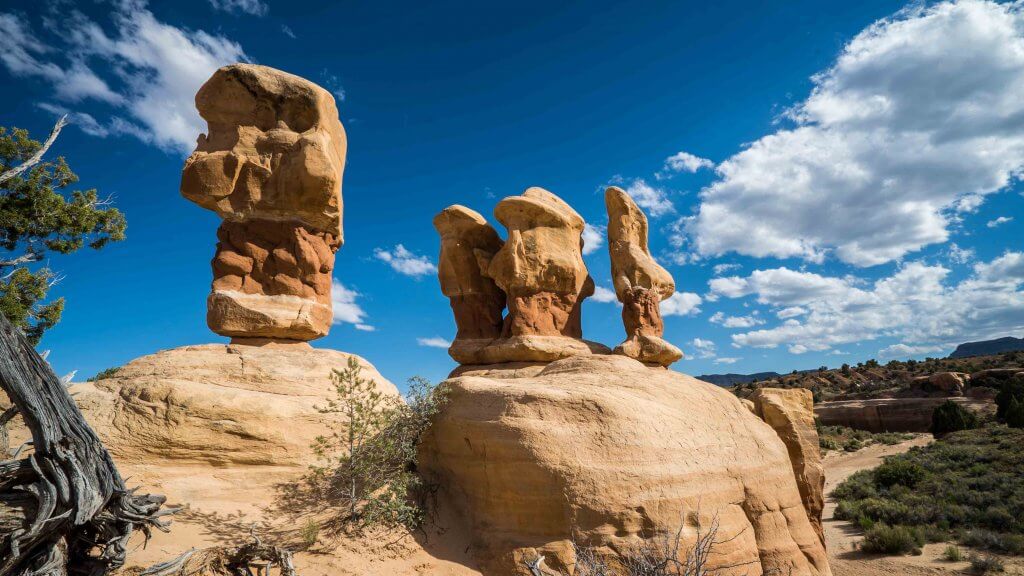
The drive is gorgeous, with plenty of worthy slot canyons to stop at and the hoodoos at the Devil’s Garden on the way. It’s a really short pit stop that I’d highly recommend watching out for as you come down BLM 200. It will be on your right.
Be forewarned that some of the cattle grates will cause you to bottom out. Drive over them carefully and always look to see if there’s an option for going around it, particularly on the turnoff road for the Jacob Hamblin Arch!
Also remember, these roads can get more or less impassable if there are heavy rains and they get muddy.
Camping in Coyote Gulch
When I was researching for this hike I saw a lot of people asking questions about permits. They are available at the trailhead and only required for overnight hikes. They are also free, unless I missed something!
I never realized it before this trip to Utah, but the Grand Staircase Escalante and the surroundings is BLM land, meaning that it’s owned by the public. You can camp, hike, and adventure in there completely for free. I didn’t pay for a campsite for the whole week and a half that I spent exploring southern Utah after that!
It’s easy to find the campsites. Just look for a small dirt road off of the main ones and most of the time there are little areas where you can pull off and camp. You can’t be visible from the main road and are required to leave no trace. In my camper van, this was easy to do.
What I loved about camping out there near the trailhead was the feeling that nobody else was around. To be honest, nobody really was. It was just me and the wilderness for miles. It was humbling and incredibly exciting at the same time to really have everything I was looking at to myself.

In contrast to the national parks, the Grand Staircase-Escalante National Monument is quiet, vast, wild, rugged, and to me, all the better for it.
Overall, Coyote Gulch is now one of my favorite hikes that I’ve done. The minimal crowds, the abundance of arches, and the thrill of the adventure all made this an awesome experience.
If you’re in southern Utah and you want to experience something a little different, a little more adventurous, and a lot less crowded, check out Coyote Gulch.
READ NEXT:
An Awesome American Southwest Road Trip Itinerary
*Some of the companies mentioned here are partners who helped make this article possible, and some links are affiliate links. Anything you purchase through these links helps keep this site running at no extra cost to you!
Ijana Loss says
This sounds awesome! This was a solo trip then? I would love to do a solo hiking trip one day; there’s something about being all by yourself surrounded by the outdoors. I have no internal compass either xD But good to hear you found it simple enough to find the trail, it’s always a bit stressful when you lose it and have to find it again
Kristin says
Yep I did this solo but there were other people on the trail so I would have been ok. It’s perhaps a bit irresponsible to go solo but I agree with you, it makes you feel like a badass too.
Henry says
That’s such a beautiful area! The girlfriend and I were canyoneering near Hanksville this weekend, but we’ll be headed to the escalante sooner rather than later. Great choice of a trail…we’ll add that one to the list for sure. Thanks for sharing!
Kristin says
Have fun! LMK how it goes for you!
Gerard says
Kristen,
If I plan on leaving Escalante by 8am, how long should it take to get to the water tower parking spot at the trailhead for the Jacob Arch?
Do you think I can cram a pit stop at the Devils Graden, take the rope down to the Jacob Arch, hike to the Lagoon and then head back to the car and be back in Escalante by 8pm?
Kristin says
It depends on how quickly you travel down that gravel road. It took me two hours each way. I think that would be really pushing it but it is a flat trail and I stop a lot for photos. I started from the water tank around 7am and was out by 3pm then drove back to town and onwards. Can you leave Escalante earlier? 6am?
Gerard says
Yes that is fine, 6am it is. I was just trying to gauge each leg and this was helpful. Thank you for responding!
Be safe.
Pilot Mark says
What an inspirational post. I love doing hikes like this – solo travel really allows you to connect with yourself and nature in a very unique way. The landscapes look absolutely breathtaking; yet so different to the green and grey colour scale of Yosemite.
Kristin says
Oh quite different! Yosemite was the first national park I can remember visiting and a family favorite but these warm orange hues steal my heart even more!
Kristin says
I know it’s so hard! Burden of choice!
Taylor says
Hi Kristin, I’ve chosen to start at the Jacob Hamblin arch trail head because i do not have a 4×4 but i wanted to do a multi day hike, will this trail head connect to others so i can see more?
Thank you,
Taylor
Kristin says
Yep! You can stay down there and hike for longer.
Alexis says
Awesome solo hike. The rappelling you did to get into the canyon. Did you need other equipment besides the rope? Or used the rope only to help you get in and out?
Alexis
Kristin says
Just the rope!
Gina says
Hi Kristin, do you have any videos or tips on the best way to tie the rope/knot around the rock?
Kristin says
I did a whole bunch of standard knots but YouTube could surely provide a better option.
Carlos says
this is a hike that I want to do and wanted to do it as a day hike, thanks for the info !!!
Beth says
This is a great article! I’m trying to plan my first solo hiking trip now. Did you rent that camper van and just stay in that the entire trip? I’m trying to figure out the best way to do this to be able to see the most.
Thanks,
Beth
Kristin says
Yep! That’s exactly what I did. I loved the freedom.
Dan says
Kristen,
My girlfriend and I are going at the end of March and we are very excited about Coyote Gulch. Is there a way to go in at the Jacob Hamlin Arch and come out of the gulch at another point for a long day hike and make it back to the car?
Thanks,
Dan
Kristin says
You could go through the crack in the wall but you’ll need someone to pick you up and give you a ride back to your car.
Shelci says
My husband and I are hiking here in the coming weeks and staying in the canyon for two nights. I am still debating on routes though. Your route has so many benefits, but I’m reading so many different descriptions of what the sneaker route is like. You are describing a 45 degree descent while others are mentioning extremely steep sections with full exposure. We are very experienced hikers, but not experienced climbers. Would you take this route down and up with a full pack? Was the rope a necessity? It looks like a wonderful adventure!
Kristin says
I would personally do it every time because walking in an exposed sandy wash in and out really doesn’t appeal to me. The descent wasn’t as bad as what I’d read online, though I would not do it, especially with a full pack, without a rope. It’s mainly the way back out that you need a rope for. It wasn’t absolutely essential for the entire way up or down but it’s good to have!
Shelci says
Thank you! And this is a weird question, but you just left your rope there all day while you hiked and then untied it when you hiked back out correct? Since we will be camping for two nights I’m thinking I’ll need to just leave it there for two days.
Liz says
Hi, I was wondering what maps did you look up for this trail and how long is the drive, roughly, from zion nat. park to here?
Kristin says
I downloaded an offline map called maps.me and plotted the points ahead of time. It has the main sites all in there. The drive from Zion will take most of the morning. I think it was 3-4 hours with stops.
Kathleen says
Hi, Kristin. I’d like to do this hike. Is there a way I can contact you to get more info, particularly on the rock scramble part? I only have experience with easier hikes. But I really want to do this. Thank you.
Kristin says
Happy to help. You need a rope. With that I was confident enough getting down.
Anonymous says
Read your post. Copied your hike. Had an awesome time! Thanks!
Kristin says
SWEET Thanks for letting me know! <3
Dani says
Beautiful footage! Just when we are planing on going to Escalante I stumbled upon your video. I’ve seen others get here with children. However, I’m not sure if they went down and up this route. From what you’ve mentioned above it seems it wasn’t so bad.
Kristin says
I found a post about a family who did it, actually. It’s hard for me to say since I’m not a parent, but I’m sure you know your kids best and what they might be up for.
Jenna says
Hi Kristin! I’m heading here next week and I’m so glad I found your blog. Due to time constraints I don’t have enough time for the typical 33 mile route. For the rock scramble part of your hike, how did you secure your rope at the top? I’m new to doing this in areas devoid of trees.
Kristin says
Watch the video embedded and you’ll see how I did it! 🙂
Ramzi says
Jenna I did this yesterday and did the up/down twice (dont ask, thought I missed a photo op..) without a rope. If you’re used to any rock scrambling I think it’s a pretty normal ascent/descent (even if you’re scooting down on your butt). Totally up to your comfort level, but I didn’t feel unsafe at any point. Enjoy!
Ramzi says
Great recommendation about the maps.me app, I had a hard time finding the cairns at the beginning but headed toward the arch and was able to pick them back up toward the descent down. Way back was all good (on the way in I took directions from some people at the parking area, which led to a lot more walking in sand then on rock, which suuuuucked). Great hike! See you at BM!
Delph says
Hi! This is really awesome! I’m planning to hike Coyote gulch this summer and was looking for a way to do it in a day! Your way is absolutely perfect! 😀 I just can’t find the water tank parking lot on google map… do you have the GPS coordinates? Also do you remember where is this amazing lagoon??? I just CAN’T miss that!!! Thanks++++ 😀
Kristin says
Hey! The lagoon was marked on maps.me but people told me they couldn’t load it so I had to remove it 🙁 I wish I’d been able to save it another way. I’d google Earth it and see if you can see it that way. To get to the water tank turn left onto Forty Mile Ridge Road and follow it for 4.3 miles and you’ll see some cars parked on the left. You can get a feel for exactly how it looks from the video 🙂
Sebastian Fournier says
Hello! Amazing post! Thank you very much!
I am planning to do the one-day hike with my dad. What would be less challenging if we have a 4×4? To ho through Crack-In-The-Wall or the Water Tank? Is it possible to do it one-day through Crack-In-The-Wall? We are a bit concerned about the rope drop.
Thanks!
Kristin says
I’ve heard of people getting to crack in the wall then having someone come and pick them up on the other side. It always depends of course on how quickly you hike so I’d evaluate the distance to where you want to get to and see if you think it’s doable for you.
Matt says
Hello Kristin!
(& thank you for your great post and video!)
I’m thinking of possibly doing this hike next month. In doing so, I would make it a day hike such as yourself. And so approaching and exiting the same way as you did seems to make the most sense. My question would be… Did you just leave your rope there while you were down in the canyon? (so it was there for when you ascended?) I’ve always wondered what people do… If they didn’t descend that way, but then they choose that way to exit? How could one possibly attach a rope to ascend from the bottom if it wasn’t there in the first place?
Thanks! – Matt
Kristin says
Hey Matt! You’d have to hope some kind soul left a rope behind. I did just leave mine there. I think it takes a particularly jerky person to steal a rope that a fellow hiker left behind. I like to think anyone down there wouldn’t be the desperado type!
Matt says
cool deal! That’s what I figured. Thanks for getting back so quickly! I’m thinking that a lot of the things I’ve read about it online make it seem a lot scarier than it really is. I was fortunate enough to just do the Subway, top down Route, this past summer in Zion, and it was amazing. I had to do actual technical rappels which were pretty challenging… wearing a harness,
with all the gear, etc. But this looks more like you’re just doing a little bit of a climb down and climb back up utilizing the rope to hold onto for some extra assistance.
Also, lastly, do you need to be in a vehicle with 4 wheel drive to get to where the trailhead is, ideally, that is?
Kristin says
I took a van but I think a 4×4 would have been more pleasant. And yes it’s more of a rock scramble that is much better with a rope than it would be without.
Scott says
Kristin,
I really enjoyed the video and your blog post on this hike. I’m heading there next weekend and will be doing the sneaker route. After reading descriptions before when researching and now seeing your comments I’m feeling pretty positive about doing this route and making this a day hike.
One quick question. Was the 200′ rope necessary or could you have gone with with a shorter rope?
Cheers,
Kristin says
It was a bit longer than needed actually, but I can’t really say by how much because at some point it got tangled and I just grabbed the rope that was already there. However you can’t be sure a rope will just be there. I’d say 150 feet should be OK.
BJ says
Looking to do this hike next month and follow the route you took in your video. I have a 200 ft rope, but I am not sure what type of knot to use to anchor it at the top. What type of knot did you tie on your rope before you made the descent?
Kristin says
I don’t know that much about knots I just tied a regular knot several times! I’m not sure if that’s the best approach. If I were to do it again I’d Youtube it and learn before I go.
Grace says
Hey Kristin!
Thanks for sharing your blog and video. We’re looking to do this soon next month, and was wondering which trails you traveled on for the day hike? We were looking at the Coyote Gulch and Hurricane Wash Loop Trail but wanted to confirm 🙂
Kristin says
Hi Grace, I started at the water tank. You wouldn’t be able to do it as a day trip only if you start at the Hurricane wash.
Ben says
Hi Kristin,
We are doing this hike in two weeks! I’m about to buy a rope, but how do you anchor it there? Are there anchors in rocks to attach it to? Just curious about how that part works. I’ve downloaded the maps already. Thanks!
Kristin says
There’s a rock there that is perfectly shaped to tie the rope around. You’ll see it!
Ben says
Just got back from the trip! Repeated your exact trip flawlessly! There were two ropes there for us, we did bring one just in case. IMO easier getting down. I totally recommend that rope. If you have any fears at all, use the rope to pull yourself up. It is definitely steep, but doable. Trail is well marked for the most part thru the entire area up to the Coyote Arch area, past Swiss Cheese falls. The lagoon was very challenging to find as weeds are grown all of the trail. We also saw a large leech in the water, so we declined swimming let alone skinny dipping! Would’ve loved that. The drive was one of the bumpiest ever! We had AWD and you’ll need it. We left Escalante at 730 and finished the hike around 5 back at water tank. Great job on this, worked out great. Just look for white eagle and that’s where you descend and ascend back. Thanks again!
Kristin says
Yay so glad this worked out for you! Glad I didn’t get any leeches… yikes
Darren says
Just a note to say its not best practice to leave a rope in place. Take the rope down with you, and then on your way back up, just go up with the rope in hand and without the pack to secure the rope, then go back down (on the rope) for the pack. Its not too bad going up without a pack, just to secure the rope. Just take your time and scout your line. There are shallow divots in places to help with footing. I definitely wouldn’t recommend trying to descend the rock with a pack and without a rope. I nearly watched someone die last year trying that. I have seen many a loose water bottle meet its demise rolling off the slope and dropping to the canyon bottom. Also, you can hike from the tank down the sandy road if you want to enter at the bottom of coyote gulch via “crack in the wall.” Its a sandy 2 mile slog from the tank to the 40 mile trailhead for the crack entrance. Someone might pick you up on their way if you’re lucky. Anyway, then its a loop hike back to your car exiting at the Jacob Hamblin exit. I wouldn’t recommend attempting the last 2 miles past the tank trailhead to the 40 mile trailhead in anything without good 4WD and clearance. I buried my dodge neon wanna-be desert rally car trying that and it took a while to dig out. haha Finally, if camping at the TH before setting out in the morning, watch for rattlers. There’s a bunch out there.
Kristin says
Why not leave the rope for a few hours if you’re going to come back? Or leave it for the next person?
Paul says
That seems like a lot of work to climb up twice. I’d probably just leave the rope there if it was for the day. but wondering why it wouldn’t be best practice to leave it there for two nights? Is it just poor etiquette or will it most likely get stolen?
Kristin says
I’m confused too I think it’s fine to leave it.
David M. says
I think the description in the article understates the risk and difficulty of this route for non-climbers and alternative routes to the canyon would be better choices for non-climbers or climbers without equipment (rope and attachment device to rock face).
I tried this 7/14/19 solo without ropes. I was unable to see a way down that appeared safe so turned around at the top of the steep descent. In fact, from the top you can not see the way down the steep descent at all because it curves down away from you. So it is impossible to tell whether it just gets progressively steeper ending in a sheer cliff, or whether it provides a reasonable path. I didn’t want to descend unless I had better visibility on the route.
I suspect it is easier going up than down because you should be able to see the path from the bottom. When driving in I spoke with two women driving out who had just completed a circle loop, exiting via the watertank route, and they said the climb out was ok without ropes.
The ranger in the Escalante visitor center I spoke with was very knowledgeable about the four entry points to the canyon. He. has a detailed topo map with a handwritten marking for the watertank path saying “steep slick rock 150’ class 5”. I chose this because I didn’t want to risk getting stuck in the sand further up Fortynine Road given the extreme remoteness and difficulty in getting assistance if stuck, and wanted to minimize the hiking distance in the 110 degree weather. I knew starting this route that I might need to abandon the goal but this route gave me the most control over my safety as long as I didn’t take unreasonable climbing risks. I saw no other people while hiking.
The policy of the rangers, according to a sign at the watertank trailhead, is to remove unattended ropes. The sign also mention 600’ of friction climbing. This sign is inside a metal box at the trailhead sign, which also has a signin sheet. There was no rope to the canyon when I was there, and it was not clear where one would fasten a rope – you may need equipment to fasten it to a rock face.
I am an experienced solo hiker in excellent shape but am not an experienced climber. To the top of the canyon and back took 3 hours (2 pm – 5 pm) and 1 gallon of water, plus another 1 litre that I drank right before starting. The route was clearly marked to the canyon top as described in the article. Of the three hours about 30 minutes was spent at the top trying to find a way down. Another 15 minutes was looking for the best route for a 30 foot descent. The temp. was 110 degrees and there was about a 10-15 mph wind. Driving to the trailhead from Escalante took almost 2 hours. From the top, the canyon bottom looked absolutely beautiful.
Kristin says
I wouldn’t do it without a rope, as noted in the article. I also brought my own instead of counting on there being one – also in the article. You can also clearly see from the video where to fasten the rope (it was pretty obvious to me) and what the climb down looks like. Thanks for sharing the other routes, though!
Des says
I want to solo hike this trail soon! I have a Volkswagen Jetta. Do you think it would make it if I traveled slowly? Or I could possibly borrow a Ford Explorer. Would either of these cars be ok or should I rent a 4×4?
I’ve never done a big trip solo. Any tips?
Kristin says
I’d go for the explorer between the two!
Cecil Shapland says
Hi,
You really should update this post with just a few trail stewardship items as this is the type of post that attracts individuals who would otherwise never do this hike, to do it.
1. Sure go around the cattle guards, “but be sure to close the gates after youre through”
2. Be sure to stay on the sandy trail. Although it seems attractive to walk on the firmer surface to the sides there is a tiny micro organism living there known as soil crust and if you stomp on it, you’re ending decades of progress.
Steve says
Hi Kristin…. Coyote Gulch isn’t in the Grand Staircase. It is in Glen Canyon NRA. Knowing may make it easier for your site visitors to find the right info for their trip.
https://www.nps.gov/glca/planyourvisit/coyote-gulch.htm
Kristin says
Gotta drive through Grand Staircase to get to it, which is I think why most people think it’s in Grand Staircase, myself included! It does look like you cross into Glen Canyon once there, though. Everything anyone needs to know to go is in the post so if they’ve found it they’ve found the right information 😉
Alondra M says
Hi! Where is the lagoon in coyote gulch? The link was no longer working 🙁 thank you so much for all the detail! This was sooooo helpful, hoping to make it down there this year!
Kristin says
I wish I knew! I don’t have the coordinates anymore 🙁
JODY says
Hello, I enjoyed your youtube video and your write-up! I’m heading here in a few weeks. Would you be able to tell me what area where the lagoon is located? I checked on map.me and am unable to find it. Would love to take a dip in it!
Thank you!
Kristin says
I wish I could remember!
Martin Taxera says
Is it fairly safe to leave a rope on the sneaker route and then traverse the gulch for a few hours. Or, is there some method to secure it? I’m just hoping someone doesn’t take the rope while we’re down in there 😉
Kristin says
I can’t think of another way to do it, because the only way you can remove it is to climb back up and untie it. My hope is that fellow hikers wouldn’t remove and steal it, because that is just such a dick move, but of course there’s no guarantee that people wouldn’t do that.